Author: Alison Hazel – Updated: September 2025
Introduction
This week I’m going to share with you how I started making my Signs and Symbols artspiration card deck. I’ve always had a great interest in signs, symbols and sigils. And the fact that when you are mark making at a very basic level you’ve got lines and circles and shapes. This is what I thought I would base my Signs and Symbols artspiration cards on. Now it did occur to me that I might not be able to find as many signs and symbols as I required for a full deck, but this is one of those projects that you start, and it grows with you.
Decks
A card deck is like a pack of cards. For instance, in a regular playing card deck there are 52 cards plus a joker. In a regular tarot card you have 22 major arcana cards and 56 minor arcana cards totalling 78 cards in all. Now of course I can add more if I want to. There is no hard and fast rule about how many cards you need in your deck. Your deck could have 22 (like the major arcana), 52, 69 or 101 cards. It’s your choice.
52 Weeks
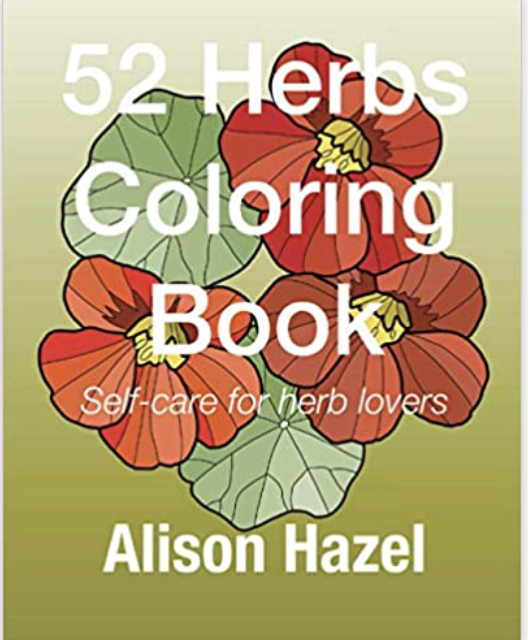
I decided I would start with 52 cards in my deck because I do like to do artworks one-a-week style. Each year has 52 weeks and if I create one card each week, I will end up with a card deck with 52 cards at the end of the year. I’ve previously done 52 Herbs and 52 Meditative art coloring books which are once-a-week art practice coloring books. I also like yearly seasonal art challenges as well. So here I could have done 13 cards for each season as another way to look at it.
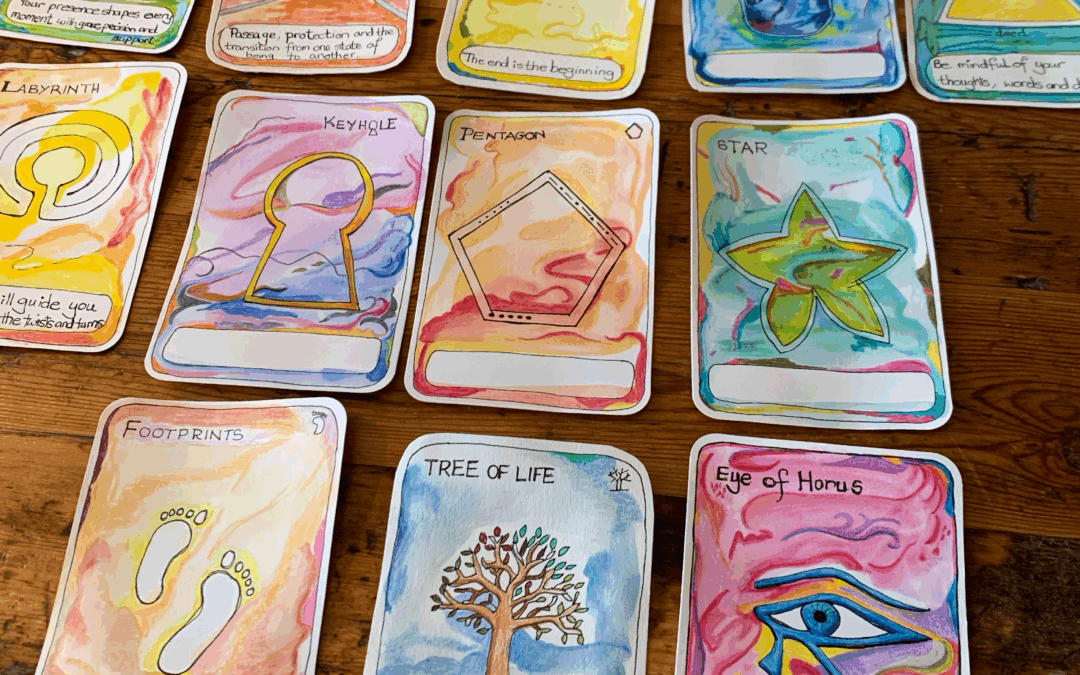
Signs and Symbols Artspiration Card Deck
Shapes
I decided to call my deck the Signs and Symbols Artspiration Card Deck or signs and symbols for short, or actually S&S for even shorter. Many of my symbols are very simple shapes like dots, circles, squares and triangles and from there they develop into other forms as well. For some of these symbols I’m referencing, The Illustrated Signs and Symbols Sourcebook by Adele Nozedar which is a book that I’ve had for over ten years. You can decide on the name for your card deck either now or later.

What Are Artspiration Cards?
Art + Inspiration = Artspiration
Artspiration Cards are a beautiful blend of creativity and encouragement. They are small, hand-crafted cards and with usually around 50 to 70 cards in a set which offer visual and emotional inspiration. These cards can be used for daily art prompts, moments of gratitude, uplifting affirmations or quiet personal reflection. They are not fortune-telling cards. Instead, artspiration cards are open-ended, have a gentle message and for those of us in the slow lane. They help you connect with your own creativity, mood and inner wisdom, whatever that means for you.
You might think of them as:
- Inspiration cards for your art studio
- Gratitude prompts for mindful living
- Creative cues to spark your next innovative piece
- Or simply a personal deck of beauty and meaning
Images and Theme
Cohesive
In my deck, each artspiration card features an image that you create. This could be a symbol, scene, shape, color blend or anything that speaks to your theme.
For a harmonious and professional look, it’s a good idea to keep all your cards within the same:
- Color palette (pastels, brights, blues or black and white etc.)
- Art style (abstract, impressionist or cartoonish etc.)
- Medium (such as watercolor, pen and ink, colored pencil or collage)
This gives your deck a cohesive and intentional feel, even if each card expresses something unique.
Benefits of Making Your Artspiration Deck
Internal
There are a few benefits to making your very own artspiration card deck apart from that you get to have a lovey collection of cards at the end.
Creative Self-expression
This is a chance to play, explore and stretch your creative wings in a format that feels light and doable with just one small card at a time.
Personal Reflection
Your deck becomes a personal tool that you can turn to for journaling, intention-setting or quiet inspiration. Each card holds a message that is just for you.
A Year-Long Art Project
If you create one card per week, you will have a full deck after a year. It is a meaningful project which you can build gently over time, without overwhelm.
Your Art, Your Way
Love bold colors or gentle lines, abstract shapes or nature sketches? Let your style set the tone in your drawing, painting, collage or mixed media.
Set Your Theme
Deck Focus
It is a good idea to choose a focus for your deck. Perhaps you are interested in cats, gardening herbs, summer fruit pies, violins or ethereal topics. Whatever you are most interested in in life and what you know most about, why not choose that as your first theme? You can make other card decks with other themes later. The possibilities are endless.
Deck Focus Examples
Here are some ideas for your card deck theme:
- Emotions: Mood of the day, happy, sad or melancholic.
- Nature: Trees, volcanoes, seeds, rivers or flowers
- Affirmations: Feel good messages
- Goddesses: Nomkhubulwane, Freya or Papatūānuku and yes, I had to check the spelling too.
- Imaginarium: Fairies, elves, goblins or ghosts.
- Crafts: Baking cookies, sewing stitches, weaving, cordage patterns or spinning.
- Animals: Woodland animals, farm animals, tropical fish or water birds.
- Symbols: Signs and symbols (this is the one I’m doing)
Keep your theme either loose or specific and do whatever feels inspiring to you.
Getting It Done
Gentle Weekly Rhythm
Creating one artspiration card per week is a simple, achievable pace that works especially well for hobby artists like us with with full lives. Over the course of a year, this steady rhythm will give you a beautiful 52-card deck, without the stress of rushing or the demand for perfectionism.
Stay Consistent – No Pressure
Let’s face it, life happens. Some weeks flow creatively as the muse arrives, while others feel slower. The idea is to keep showing up, gently. It is really not about making a masterpiece every time, but rather it’s about enjoying the process, staying connected to your creativity and making space for your art in your week. You do not have to finish a whole card in one sitting. You can spread the process out to fit your energy level and time available for art.
Workflow
Sample Week
To help you find time to make these cards, here is a light structure that I’m suggesting which you can follow or adapt to suit your lifestyle.
Monday: Plan Your Card
Choose your theme, sketch some layout ideas and explore composition.
Tuesday: Light Sketching
Create a rough pencil sketch for a card.
Wednesday: Ink or Outline
Refine your sketch with pen, ink, or clean lines in your medium. Erase all pencil marks now.
Thursday: Add Color
Bring your card to life with paint, colored pencils or colored ink.
Friday: Words and Phrases
Add your meaning, message or mantra and add a title to the card.
Saturday: Final Touches
Embellish your card with some highlights. Choose metallics (gold and silver) or white highlights to make it sparkle. Color the edges.
Sunday: Reflect and Rest
Take a moment to appreciate your finished card. Journal about it, share it or simply enjoy how it feels.
Make It Yours
You can follow this rhythm or make your own version. Maybe you could do two steps in one day or just batch create cards at the weekend. What matters the most is that you can find a flow which feels supportive and is not stressful. Remember that artspiration is about creativity and not deadlines.
Materials
Card Stock
You will need thick paper or card stock. I started with watercolor paper, but soon discovered it was too wrinkly to shuffle the cards easily. Then I went onto Bristol board which is a smooth medium weight cardboard.

Measuring the Cards
Each of my artspiration cards is 94mm (3¾ inches) x 140mm (5½ inches). I measured each page out with a pencil and ruler. I can get four cards from one sheet of A4 paper.

Cutting Corners
I began cutting the rounded corners with a pair of scissors but they all looked so squonk. It annoyed me. So I decided to invest in a handy dandy corner cutter. I used a corner cutter.

Pressing Flat
My cards started to bend with the watercolor and the colored inks. To overcome this, when I had finally finished them, I placed some under a stack of heavy books and put a couple into my flower press. I think a book press would be great for this job but I don’t have one, yet… I also didn’t want to overload my flower press either, so the pile of heavy books ended up being the best bet to flatten all of my cards cards.

Words, Meaning and Messages
An image is Worth a Thousand Words
You can have just the art, art and a title, art a title and a meaning or any combination of these. The trick is to do the same thing on every card in a particular deck. If you have a card title, then every card needs a title. If you have a card meaning, then every card needs a meaning. Decide if you want words on the cards, a title, a phrase, or just the art.
Card Companion Notebook
I have a small field notebook which I’m using to record each card. Additionally, this turns out to be a handy guide about the next cards I’m going to make. I have a two-page spread and sketch the image for card on the right-hand page. The title of the card, the meaning and words are on the left-hand page.

Puzzle
Below is the draft for my “puzzle” card in my Signs and Symbols mini notebook.

Document Your Creative Journey
Keep a journal or sketchbook alongside your deck.
Use it to:
- Reflect on the meaning behind each card.
- Track your ideas, color palettes, and materials.
- Note how your technique or style evolves over time.
- Celebrate little wins and breakthroughs.
Looking back at your notes will show just how much growth happens, both in your art and in yourself.
Guidebook
Potentially, you might want to write a small guidebook at the end of the year. If you decide to commercially publish your card deck you ought to provide a guidebook explaining each card. You do not have to do this. Either way, to have a record of each card is a nice thing to have.
Legacy Stash
If your card deck gets into your legacy stash one day, then your family and those who come after you, will know that you were creating and perhaps more importantly why you created your cards in the first place.
If you create a deck aligned with your other interests in life, like pies, trees or angels, then this will reinforce your interest and not be seen as some random thing you did one year.
Something to think about.
Edges
Options
There are two ways to deal with the edges of the cards, either leave them alone or color them. Personally, I like to color my edges to match the back design of the cards. If you leave the edges plain white over time and with use, they will get grubby and look worn, so I believe that to attend to the edges before you start to use your cards is a good idea.
Choose the Edge Color
If your back design is mainly blue then put blue on the edges, if your back design is mainly gold then put gold on the edges. Actually, gold and silver, are great colors for the edges regardless of the card back color.
Color the Edges
I take a marker, I like the Tombow markers, and I hold the pen still and run the card edge lightly over the brush marker tip. You don’t want to press the pen to the card as that can result in too much ink coming out and the color bleeding up onto the front and back design. Rather run the card over the brush tip while you hold the brush still in your other hand.
Photos
Consider scanning or photographing for a digital copy
Card Storage
Box or Bag
In general, there’s two ways to store your cards. You can make a little box for them. Or you could make a little soft bag for them. If you are planning to. Commercially sell your cards. The best way is to make a box. A new card manufacturer can help with this.
Pouch
Personally, I like to make. A small bag or a soft pouch to keep my cards in. You can actually get little net bags from the dollar store, which may be ideal for your purpose. But here’s a quick design on how to make a pouch for your cards.
Pouch Design
You will need some cloth. Light material works well, like a chiffon and net or a very thin cotton.
Materials
To make your card deck pouch like I did you will need:
- One fat quarter or a piece of material about 30cm (one foot) square. You could use a dinner napkin.
- Matching sewing thread.
- Sewing needle, (I like a size 8).
- About 50cm (20 inches) of, 3mm to 5mm wide, co-ordinating ribbon or cord.
Instructions
Cut two pieces of cloth 15cm (6 inches) wide by 22cm (8½ inches) tall. Fold the top over 1cm and press, now fold the top over again 2cm and press. This will form the channel that the drawstring goes through. Sew the top edge right just above the second fold see diagram.

Staying Inspired
Keep Up
While art challenges are great fun to start, I sometimes find that I can’t keep up in the end, and perhaps you are like me. I’m pretty good at being gung ho and making the first seven to ten things for any project. Like in my artspiration deck or my AHAtober prompts or my Artist Trading Cards, but by the time we get to day 27, 28 and 29, I am struggling to keep up with the project. Here are a few ideas to make staying the course easier for you and me.
Build Community and Let Your Deck Evolve
Creating your artspiration deck can be a very personal journey, but it doesn’t have to be a solitary one. If you share the process with other people ,it can bring new energy, accountability and inspiration to your practice.
Join (or Start) a Creative Card Circle
Look for other artists who are also working on weekly card projects, inspiration decks or creative challenges.
You could perhaps:
- Join an online group or forum.
- Start a small circle with friends (in person or virtually).
- Share your weekly card on social media using a custom hashtag that you choose.
To create alongside others keeps your momentum going and makes the experience more fun and you feel more connected.
Seasonal Inspiration
I am a huge fan of working within the natural tempo of the yearly solar cycle. It is a great idea to let the rhythm of the year guide your creativity because each season brings its own energy, colors and feelings.
For example:
- Winter: Stillness, reflection and inner wisdom.
- Spring: Growth, fresh ideas, color and playfulness.
- Summer: Joy, bold expression, sunlight and movement.
- Autumn: Cards with warm tones, themes of letting go or the harvest.
You can even align your deck to natural festivals like spring or harvest festivals or maybe even lunar phases like the New Moon or Full Moon.
Let Your Deck Evolve Naturally
Do not worry if your early cards feel different from your later ones. That is the beauty of a year-long project. Your skills, style and themes will grow and develop with you. In fact, this is a good sign that you are evolving as an artist. Trust the process and let your deck reflect who you are at each stage. It doesn’t need to be perfect, but rather it just needs to be yours.
Designing the Back
Obverse
The obverse is the front side of your cards where the main image or symbol and the artwork is on a card. The obverse would be where your unique artwork, title and message go.
Reverse
The reverse is the back side of the card where the design that repeats on the back of your cards. The reverse may have a consistent pattern for the whole deck.
Card Back Design
While the front of each card in your deck is unique and expressive, the back of the card is where consistency comes in. It’s the one side your audience will see before they flip a card over, so it sets the tone for your whole deck. Think of the back as your calling card and as a gentle introduction to your art style, mood, and creative voice.
Reflect Your Artistic Style
The back design should feel like you.
It can reflect your overall art aesthetic, whether that’s:
- Soft watercolor washes.
- Bold graphic shapes.
- Delicate linework.
- Nature-inspired motifs.
- Abstract patterns.
- Digital textures or collage.
This is your chance to showcase a specific repeating element that ties the whole deck together, visually and energetically. The back design of your cards can also be repeated on a box to keep them in, a keepsake box, if you choose to make one. If the design is simple enough, it can be embroidered onto a soft cloth pouch that you specially make for the cards.
Include Your Branding (Gently)
If you’re creating a deck to share, gift or possibly sell, consider adding some subtle branding:
- Your name or art studio name.
- A small logo or monogram.
- A signature motif or sigil that you are known for.
Keep it gentle and artistic as it doesn’t need to feel corporate. Think of it as a personal stamp of your own that says, “this is made with care.”
Make It Repeatable
To keep your deck feeling cohesive, the card back design should be:
- Consistent: Use the same artwork across all cards. You can use your logo.
- Centered and symmetrical: Especially if the cards will be shuffled and used face-down.
- Simple enough: That it does not distract but still feels special.
If you’re working digitally, create a single high-resolution card back and apply it to each card file. If you’re working traditionally, you might use a stamp, stencil, or printed backing paper.
A Few Creative Ideas
- A single flower or symbol which represents the theme of the deck that is repeated on each card.
- Your favorite color palette in a soft gradient or pattern.
- Hand-lettered initials, so for me that would be AHA for Alison Hazel Art.
- Words that uplift like artspiration, calm, or create.
- A moon phase or mandala motif if that’s your style.
- Repeating textures much like handmade paper, brushstrokes or fabric patterns.
Card Backs Overview
The card back is the quiet part of your deck, but it carries your essence built in. It holds your deck together like a book cover or the delicate stitching of a handmade quilt. Design your card backs with love and let them whisper your artistic spirit every time someone picks up a card.
How to Use Your Artspiration Deck
Daily Pulls
One of the simplest ways to enjoy your artspiration deck is to do a daily card pull. Each morning you can shuffle the deck and then draw a card and allow the meaning of that card to guide your creative flow for the day. You could use the card meaning as an art journaling prompt, or as a little nudge to try a new color palette or even a reminder to pause for a mindful moment with your sketchbook. These gentle daily sparks can bring both focus and freshness to your own creative practice.
Private Practice
Your artspiration cards can be something deeply personal. You may choose to keep them just for yourself, as a quiet personal art practice so you can connect with your inner artist. Or you could share them with close friends and creative companions and invite them to pull a card and see what inspiration unfolds for them. Try to let the cards become a safe space for creativity to blossom.
Create Prints
If you fall in love with your deck, why not take it further? You could print a small run of cards to give as thoughtful gifts, as each one is infused with your creative energy. Or, if you feel like it, you might create a set of cards to sell and share your unique artspiration creativity with a wider audience. If you print your cards, you will elevate your practice from a personal project into something fun and tangible that others can enjoy.

Bookshelf: Card Decks
Ready Made Card Decks
Here are a few inspirational ready-made card decks which you may enjoy.
- Gratitude: Inspirational Card Deck and Guidebook by Caitlin Scholl
Overarch
It’s Your Deck
I encourage you ta make a card deck that truly reflect who you are, what interests you and how you do art. There is no right or wrong way to make a personal deck. You do you. My role is to inspire you to just start and then you can see where it goes.
Artistic Journey
I also urge you to revel in the quest or crusade which you are on. Although to have a final deck is the main goal, please do not ignore the things that you discover along the way. It’s a great idea to celebrate the journey as much as the final product. What you discover about yourself, what interest you and your art style or favorite color palette will help you as you move forward in your own hobby art practice.
When To Start
They say that the best day to plant a tree was 20 years ago, but the second best day to plant a tree is today. This stands for your aspiration card deck as well. The best day to have started your card deck was last year, but the second best day is today. If creating some beautiful cards interests you, then start with one card and see how you go.

Author Bio: Alison Hazel
Alison Hazel is a hobby artist and she shares her ongoing journey about becoming an artist later in life. She creates simple art that anyone can make. She hopes to inspire you to reach your creative potential in the area that suits you. Read more about Alison’s story. Get her newsletter.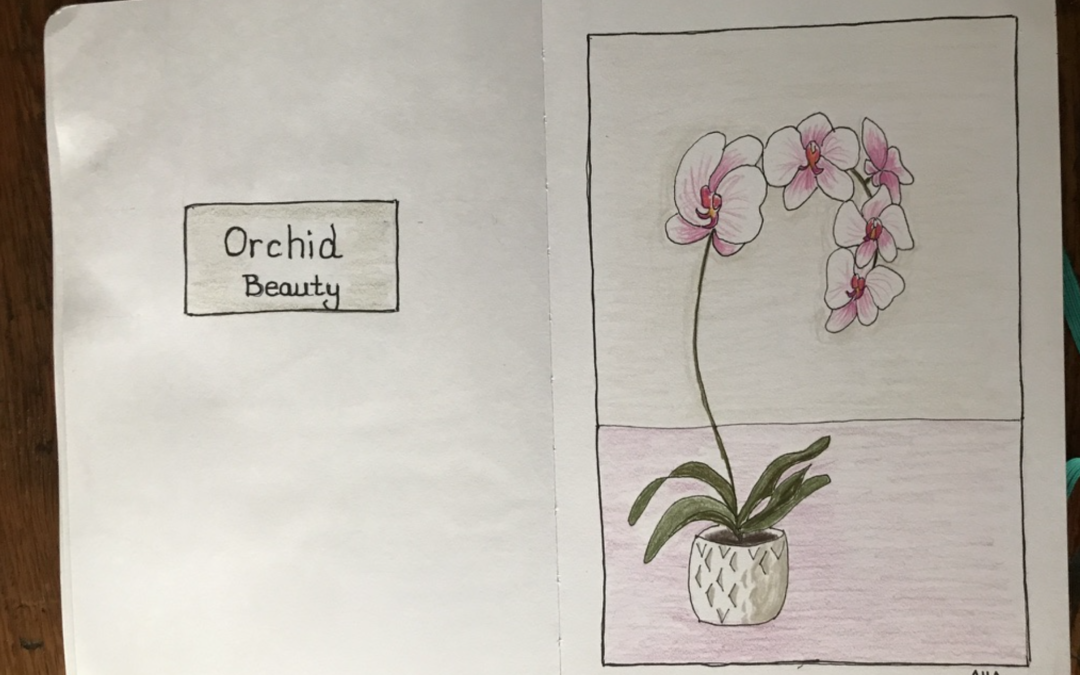
Sketchbook – Orchid with Colored Pencils
See how to draw step-by-step an orchid with colored pencils in your sketchbook. Learn the meaning of the orchid flower.
How One Artist Won Inktober for the First Time
Read the interview with artist Sandra Sabota who won Inktober/AHAtober for the first time this year. Inspiration for Aspiring Artists.
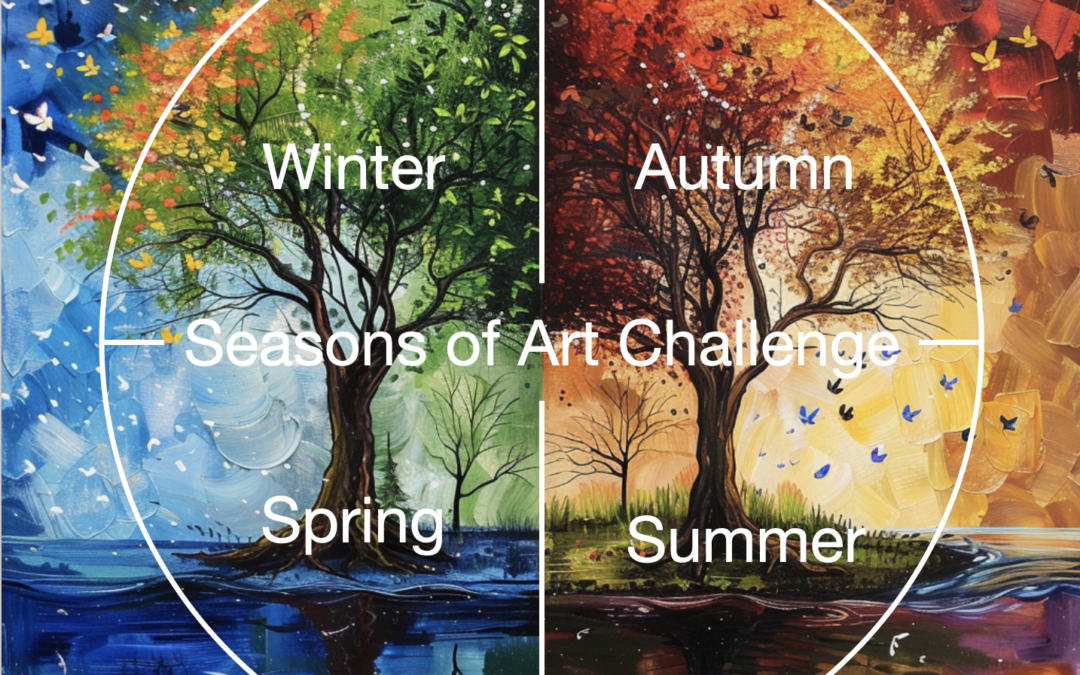
Seasons of Art Challenge
Join us for the Seasons of Art weekly art/drawing challenge. See what you can do in your art life.