AHAtober – Inktober for Self-care

AHAtober – Inktober for Self-care

Author: Alison Hazel   –   Published: December 2021   –   Revised: January 2024

Introduction

Inktober is an art movement devised by Jake Parker way back in 2009. To do Inktober you draw one ink artwork for every day of October.  At the end you have thirty-one artworks.

Inktober Prompts

Each year the official Inktober prompts are published which you can follow. Many artists and creators devise their own prompts depending on the type of art or interests they have.

For instance, there is the Starztober challenge for astrologers.

The Inktober artworks are drawn in ink thus it is called Inktober and not Paintober. Many artists take up the challenge, post their work and process drawings on their social channels.

The Inktober Challenge

Inktober is a challenge you take with yourself. The task to create one ink drawing every day for the month of October. To win Inktober is to complete thirty-one drawings in the tenth month.

Many people start Inktober, but not everybody completes it, and I can attest to this. Inktober is not a competition against other people, but rather it is a contest with yourself.

The question is, “Are you able to create one new ink drawing every day for thirty-one days?” That is the challenge of Inktober.

When you complete all thirty-one drawings before the month has ended you win Inktober.

Inktober Winner

See how one artists won Inktober. I was fortunate to interview an artist who did AHAtober for the first time and completed all the artworks. Check out her story here.


Previous Inktober Years

I’ve started Inktober before, but I’ve never completed. I believe that this year I will get there. I’m more of an artist than ever before so I am up for the challenge.

AHAtober Prompts

If you want to be traditional you can find this year’s official Inktober prompts here.

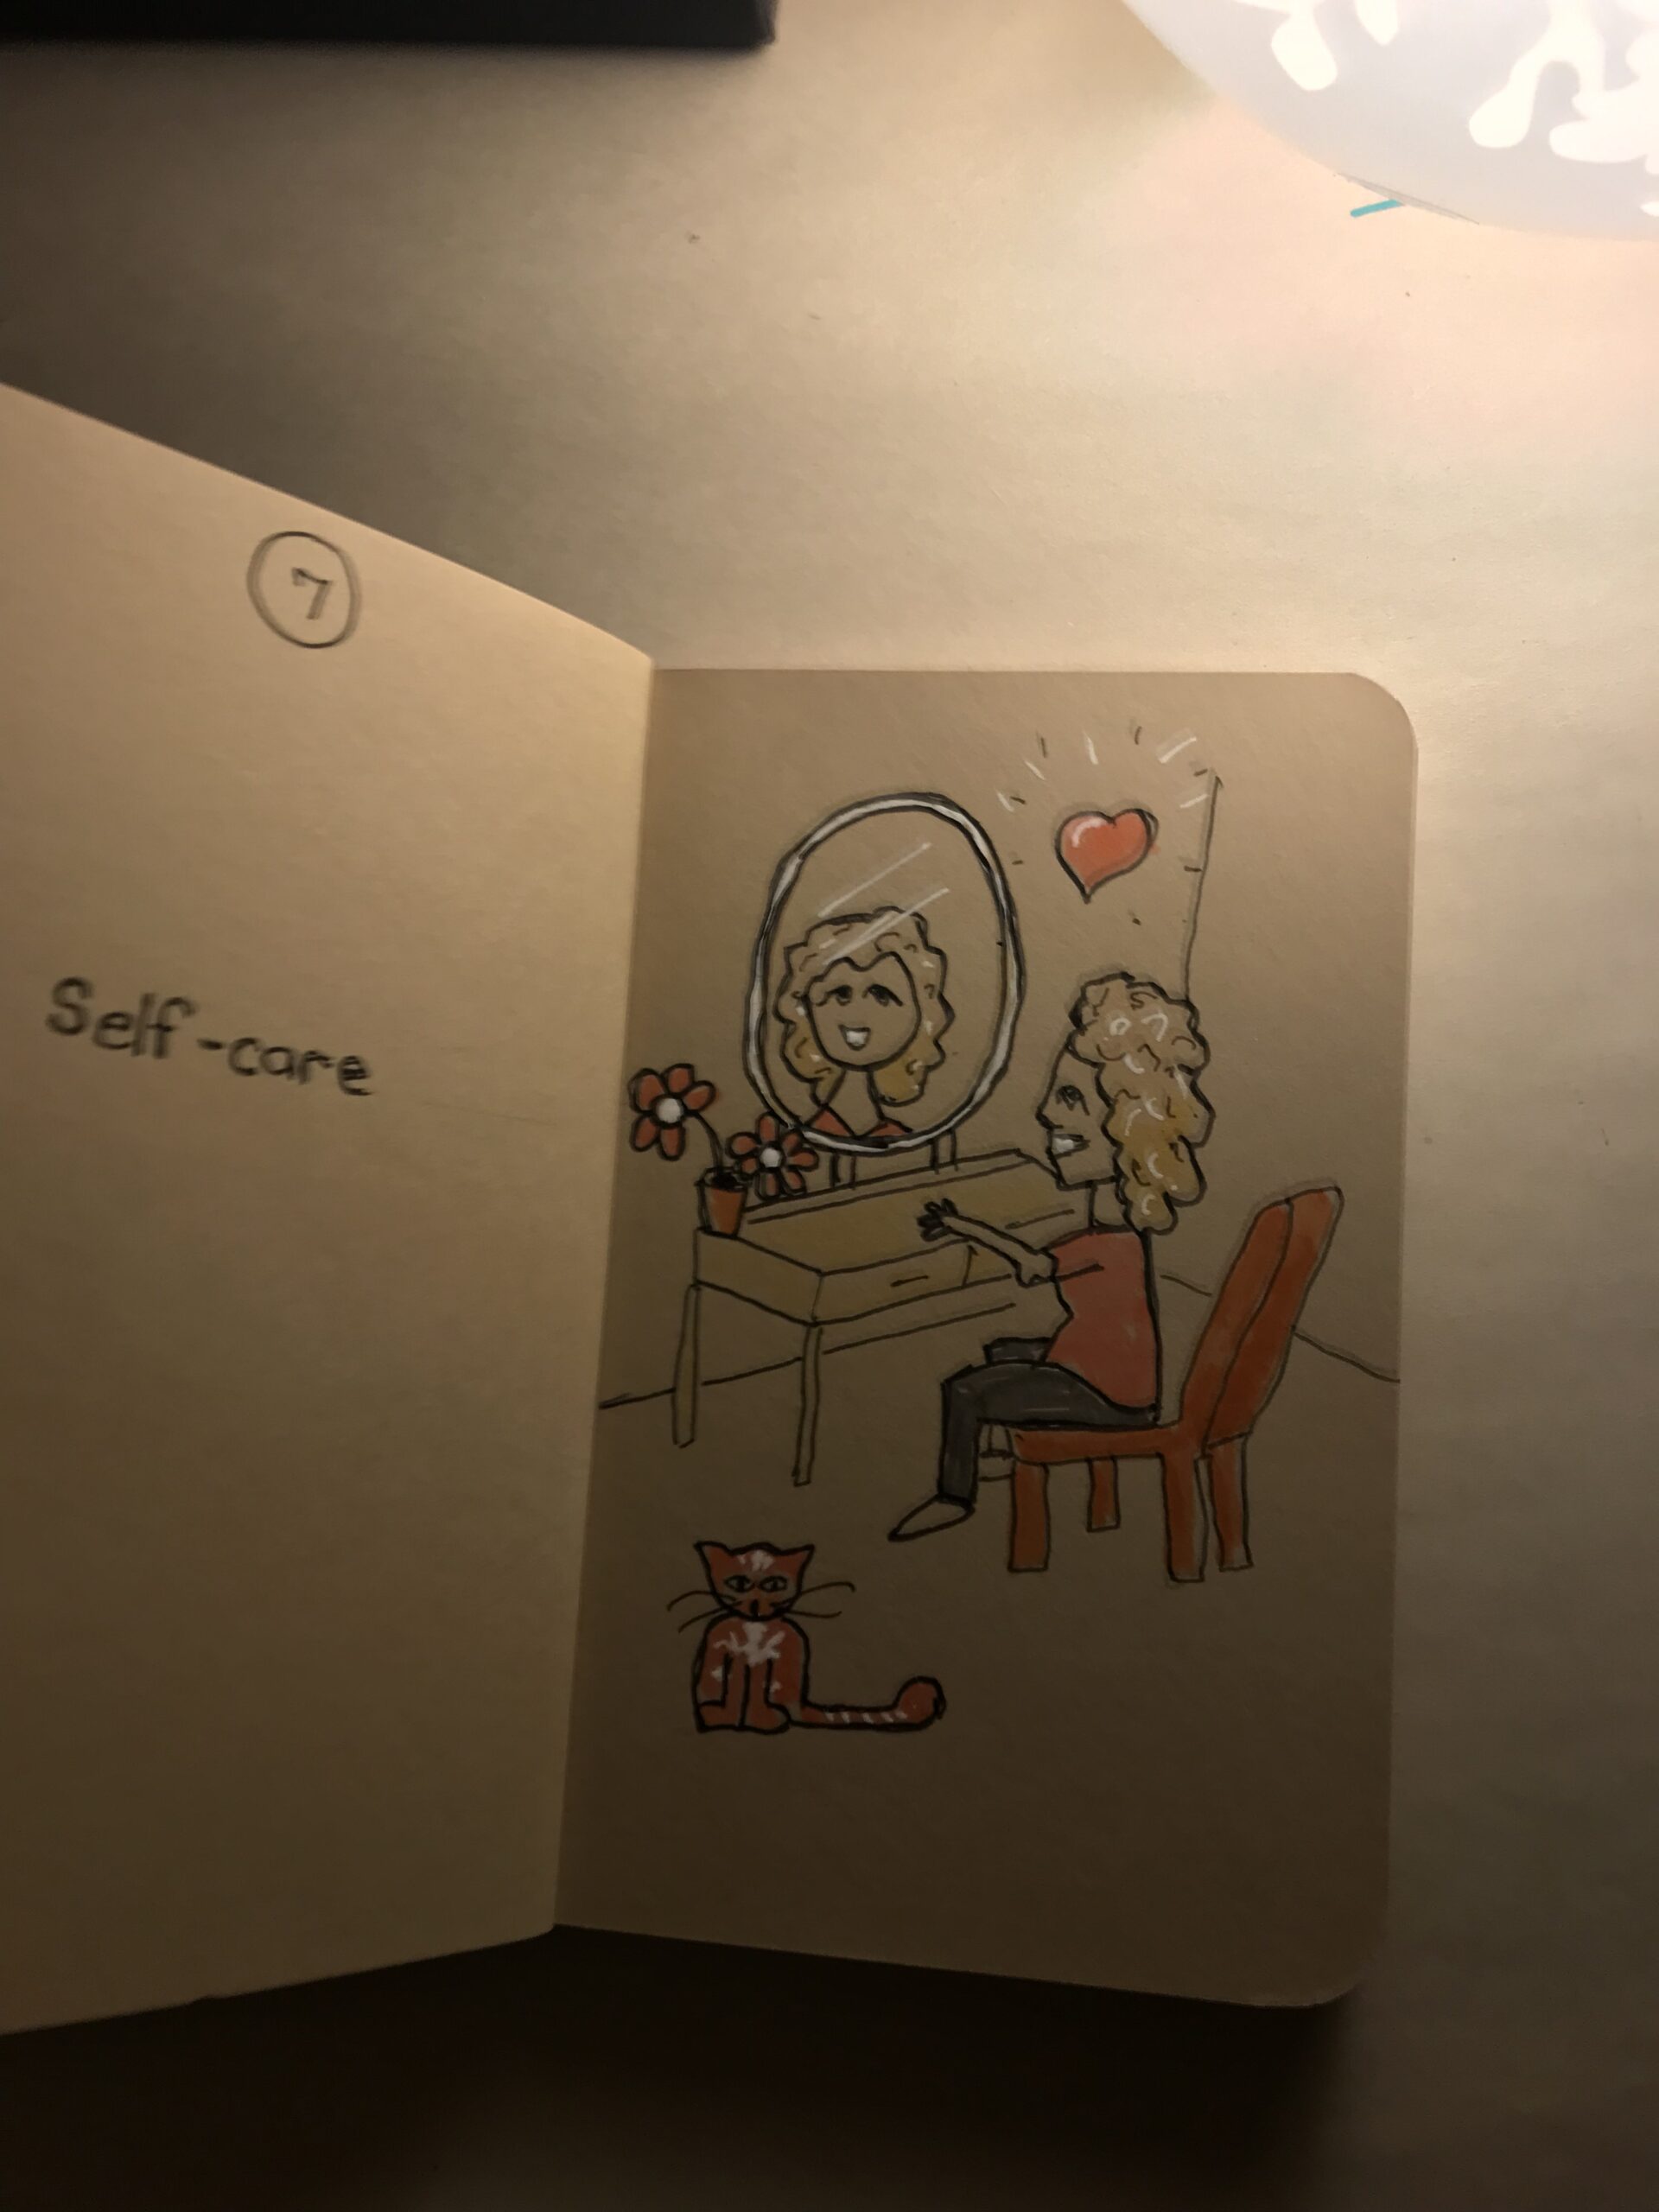
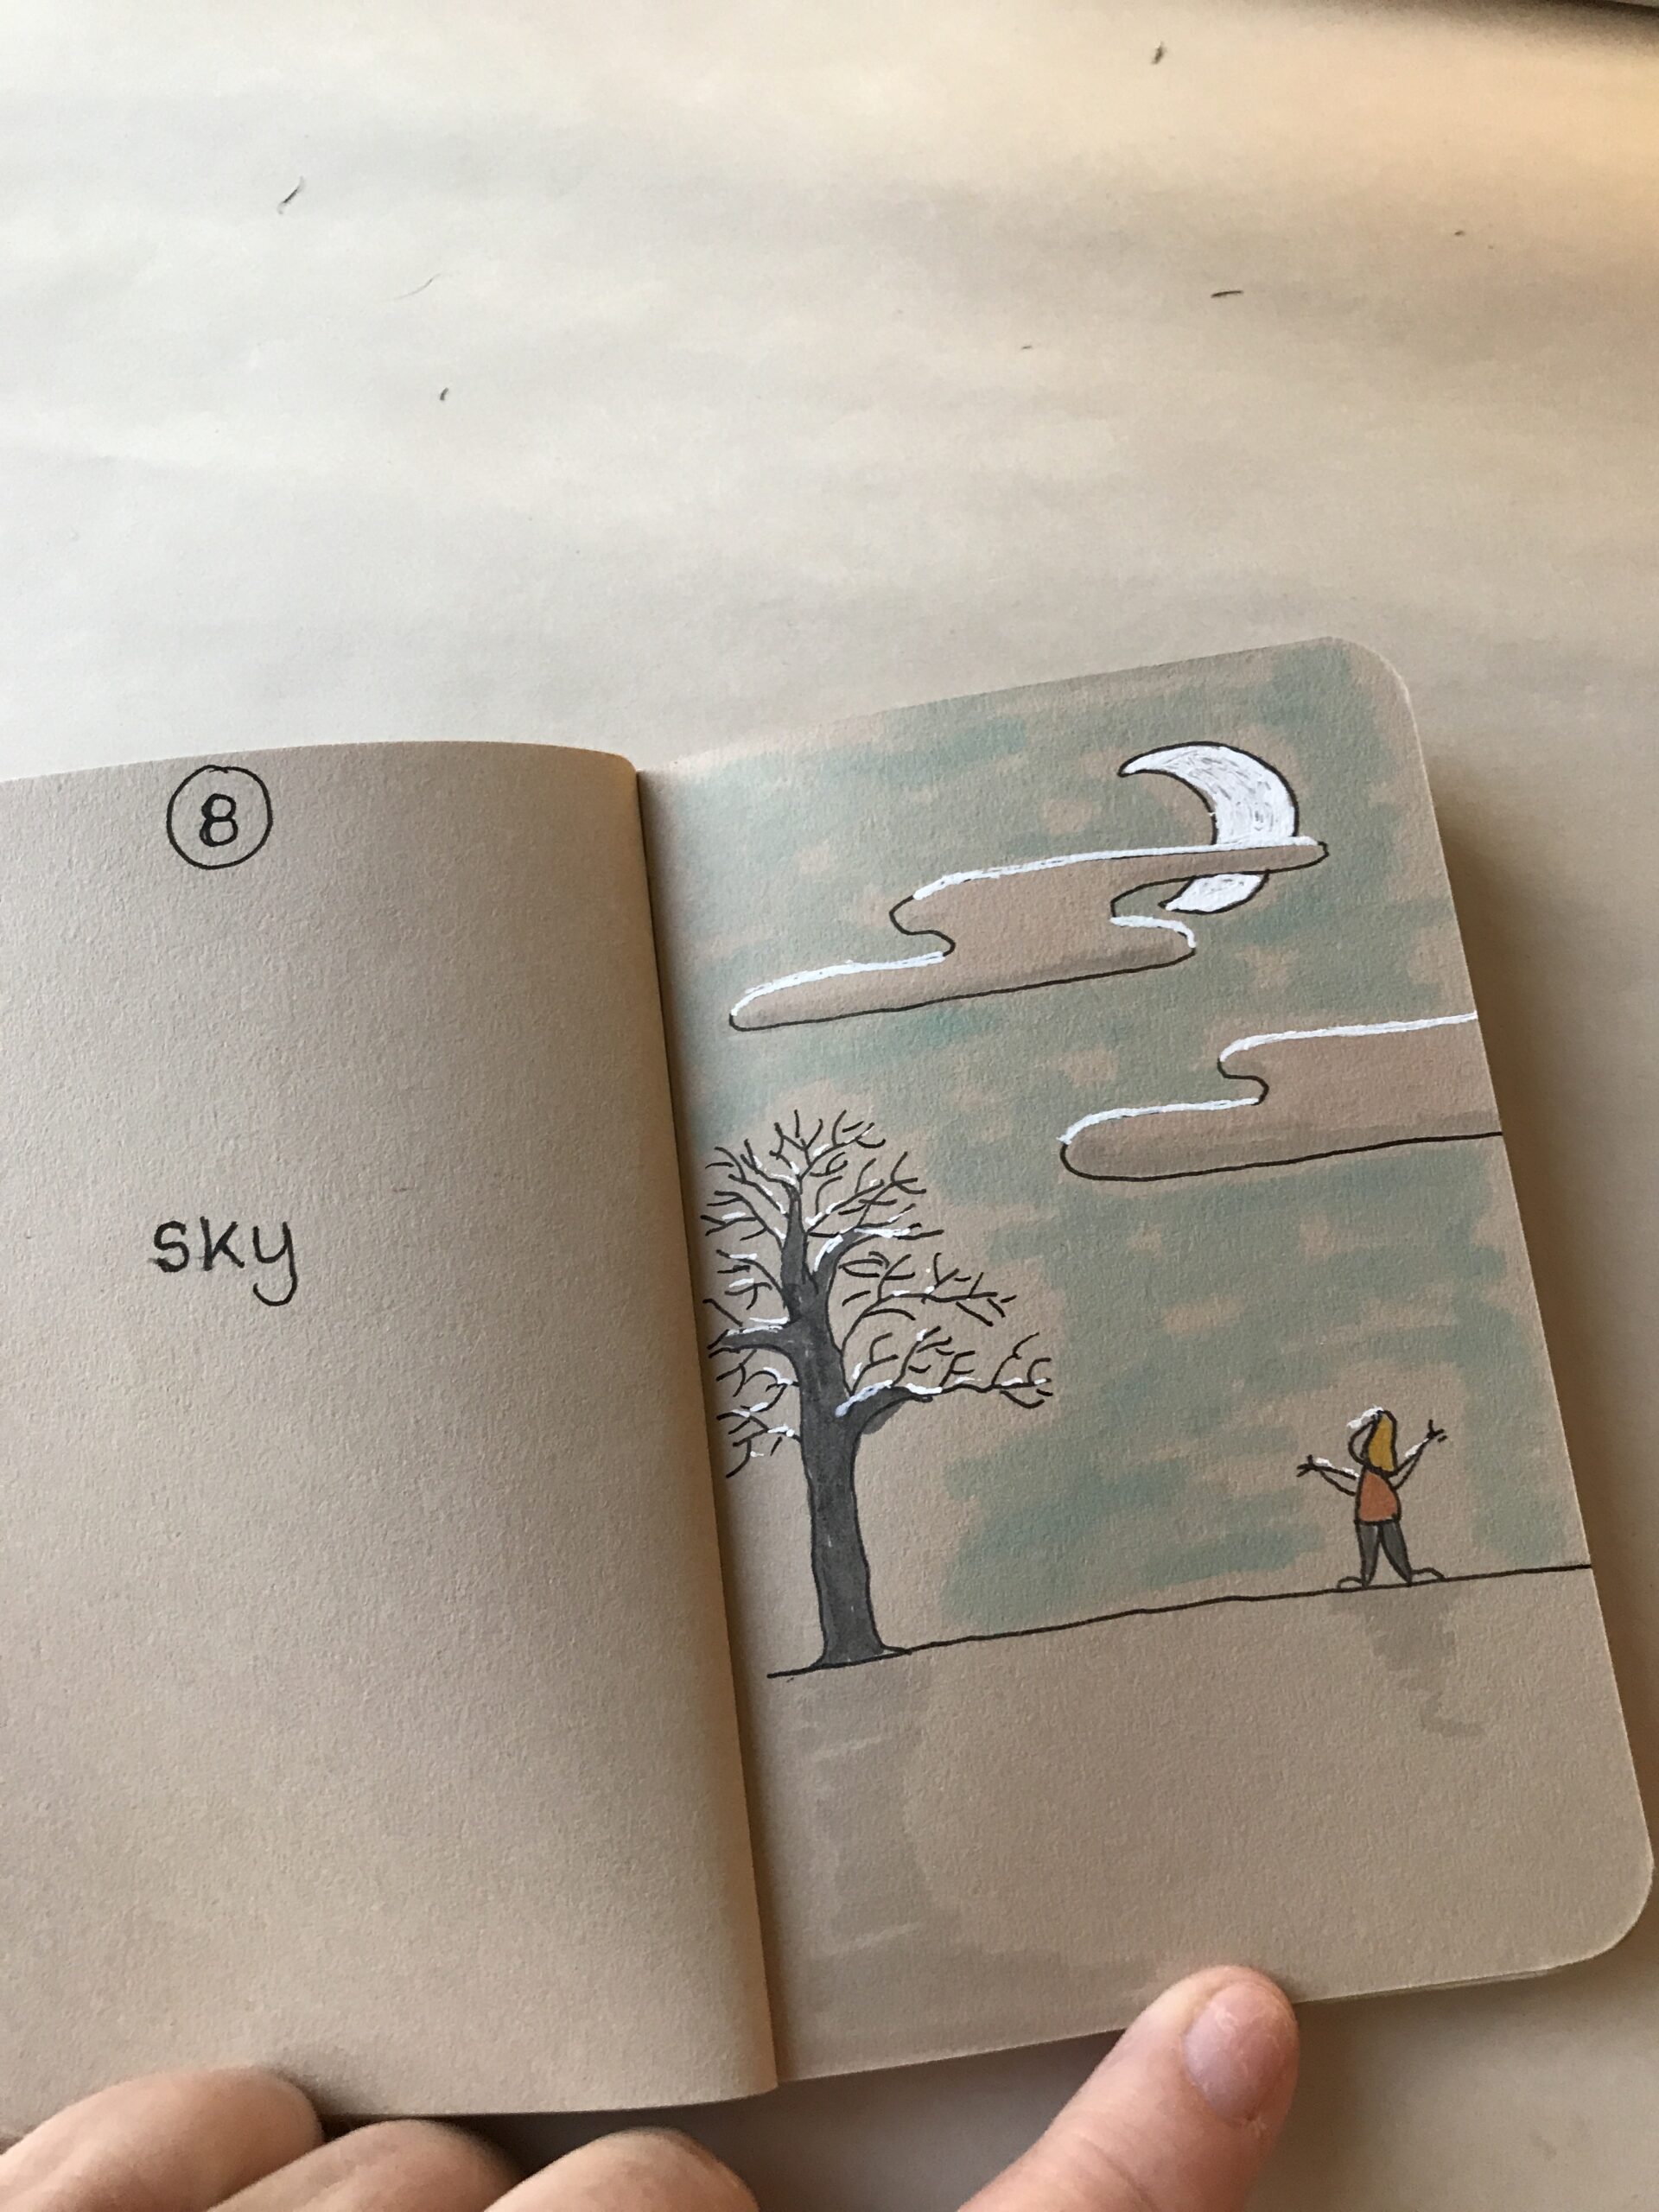
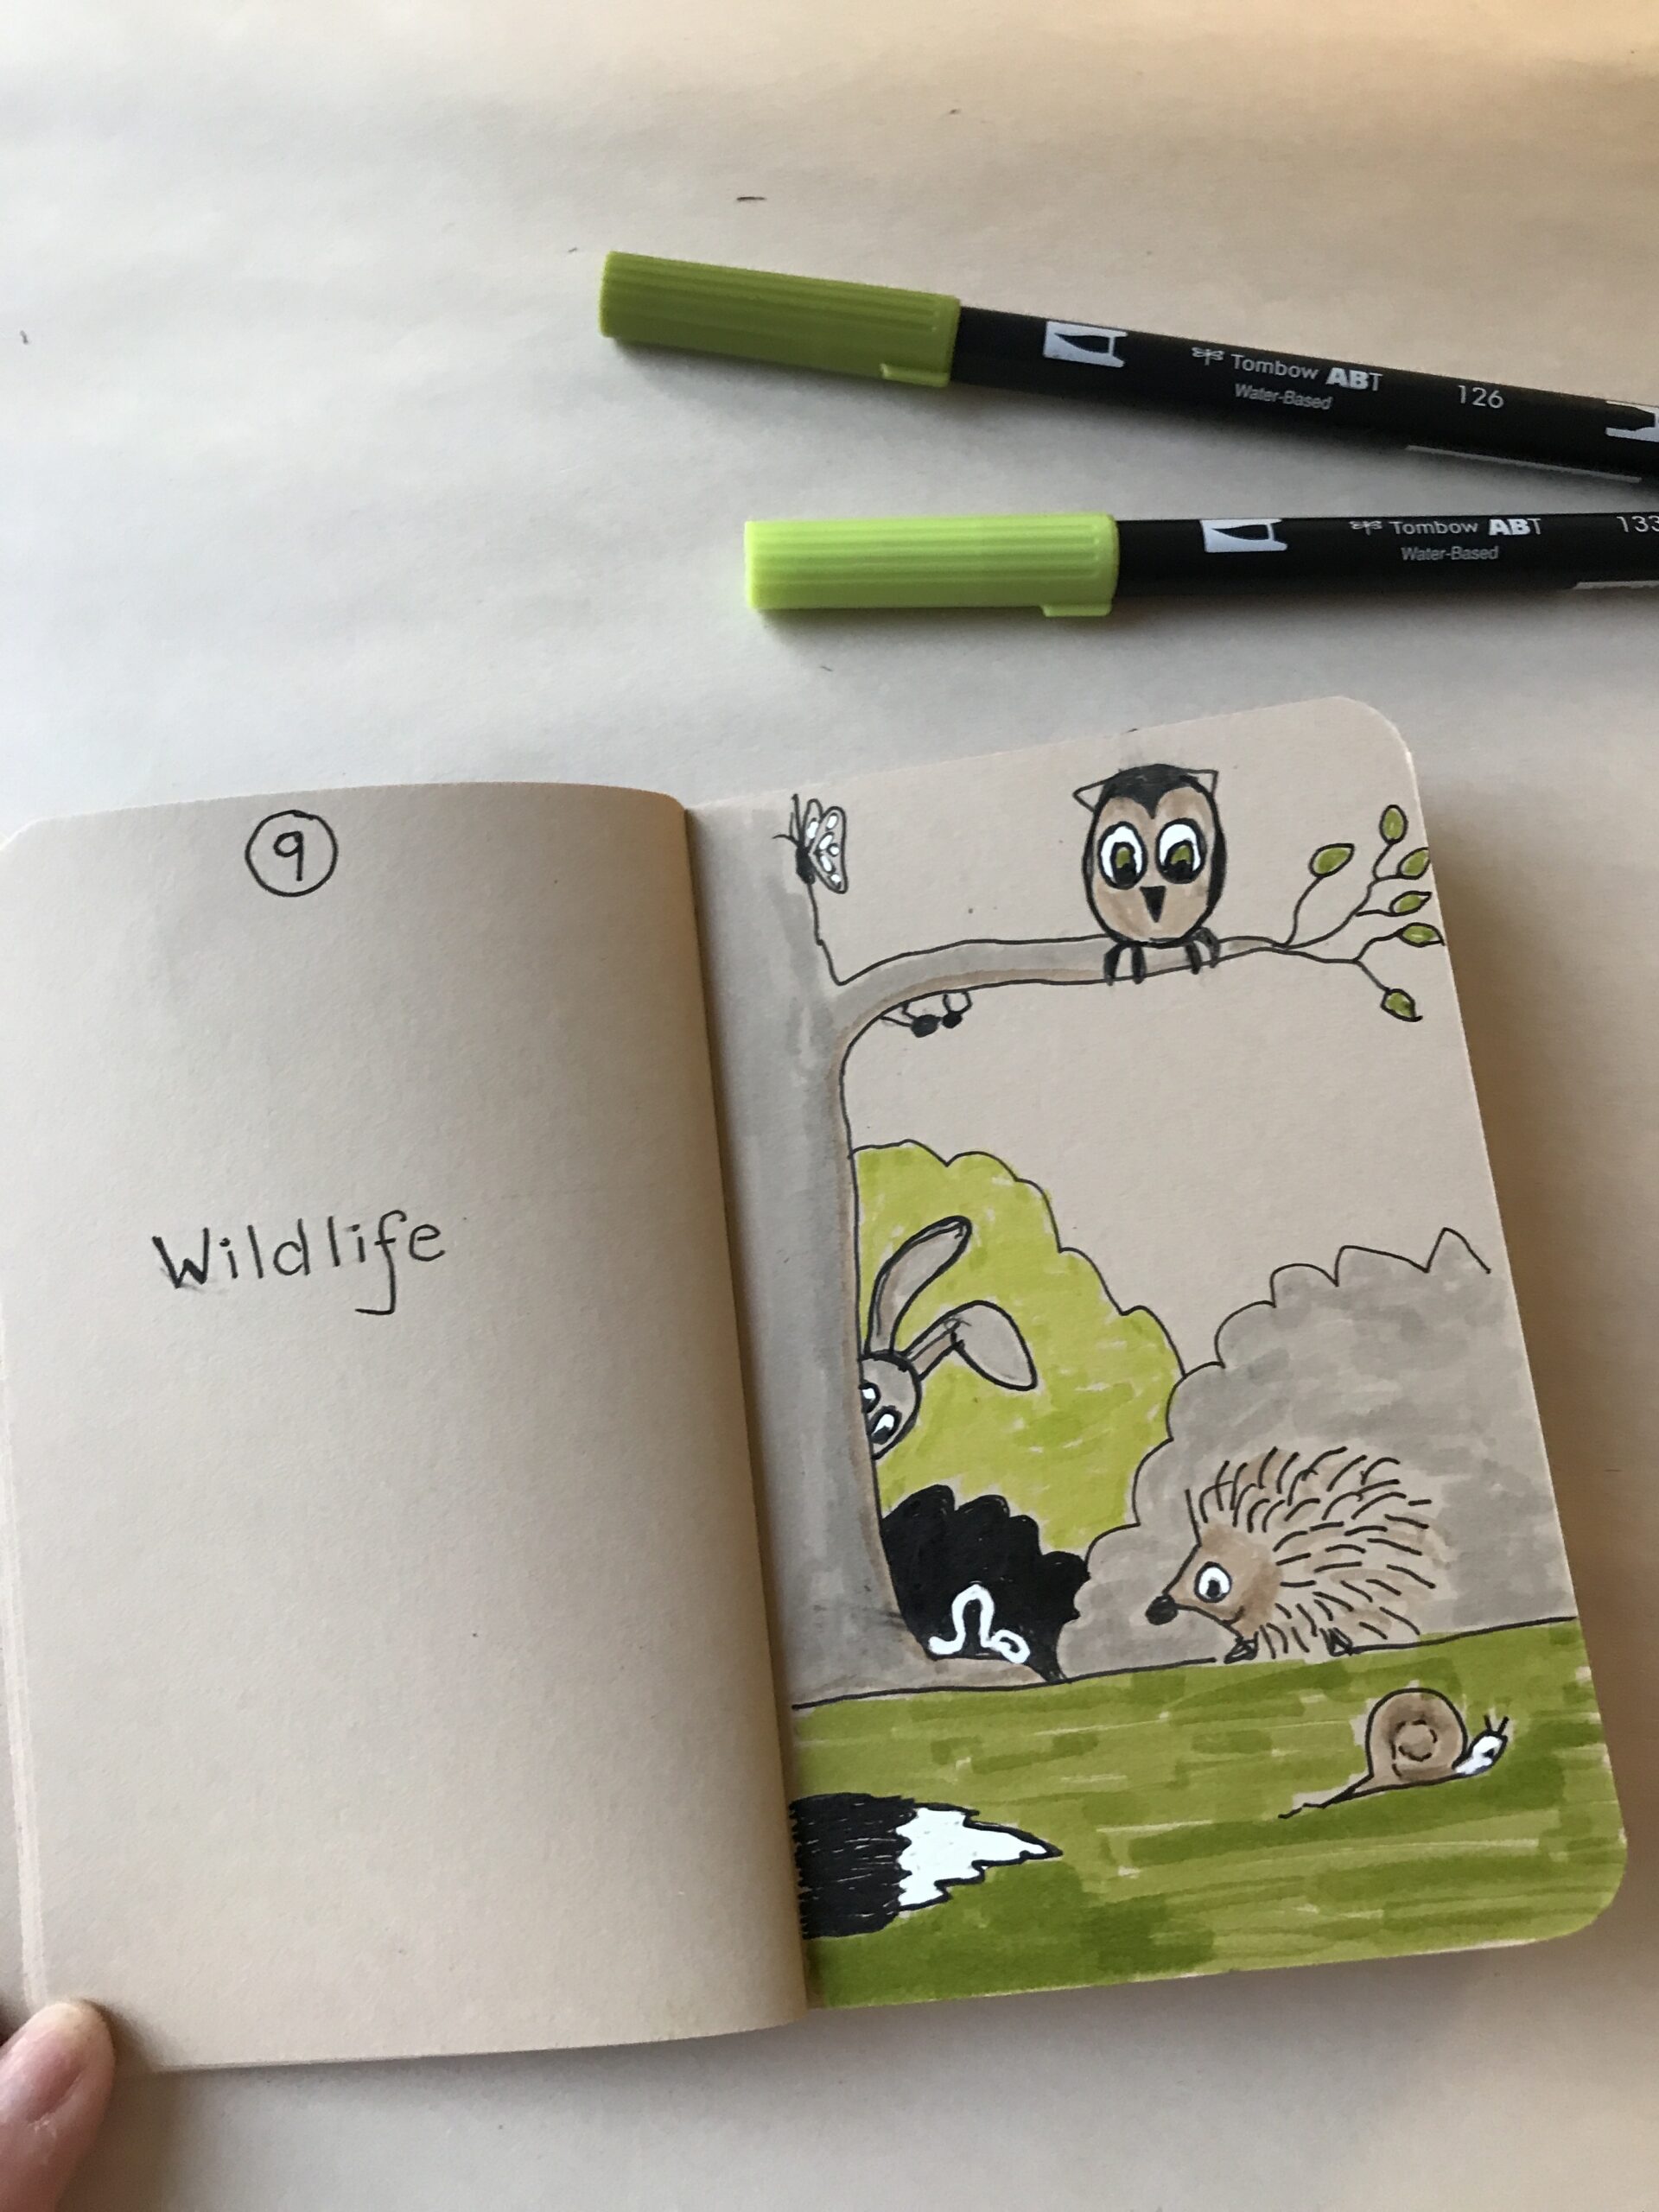
As an aspiring artist, I have created my own Inktober prompts this year and they are all related to self-care. I plan to use my Inktober drawings as the basis of a coloring book which I plan to publish next year.

This year my personal Alison Hazel Art Inktober theme is around supporting mental health, mindfulness and neurographic topics like rest, reflection and the work/life balance. I feel these are the topics I mainly focus on in my art practice and I want to share them with you.

Inktober Journal

I have a new journal dedicated to Inktober this year it is a Stillman and Birn Nova Series sketchbook with toned paper. The size is 3 ½ by 5 ½ inches or 9cm by 14cm. Note that this is a pocket sized notebook.

I believe this will help me complete Inktober because I only have to draw a small artwork. It has over 60 pages which is more than the 31 pages I need for one page per day.

I usually only draw on the right-hand page and leave the left side empty as it is the back of the previous artwork.

Cover Page

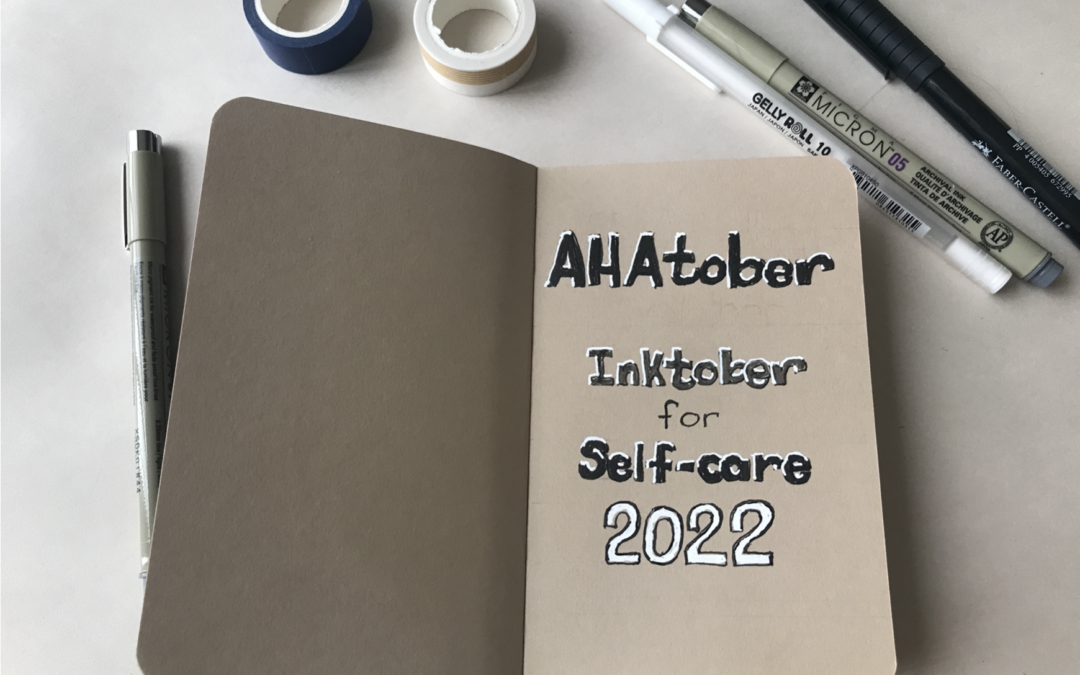
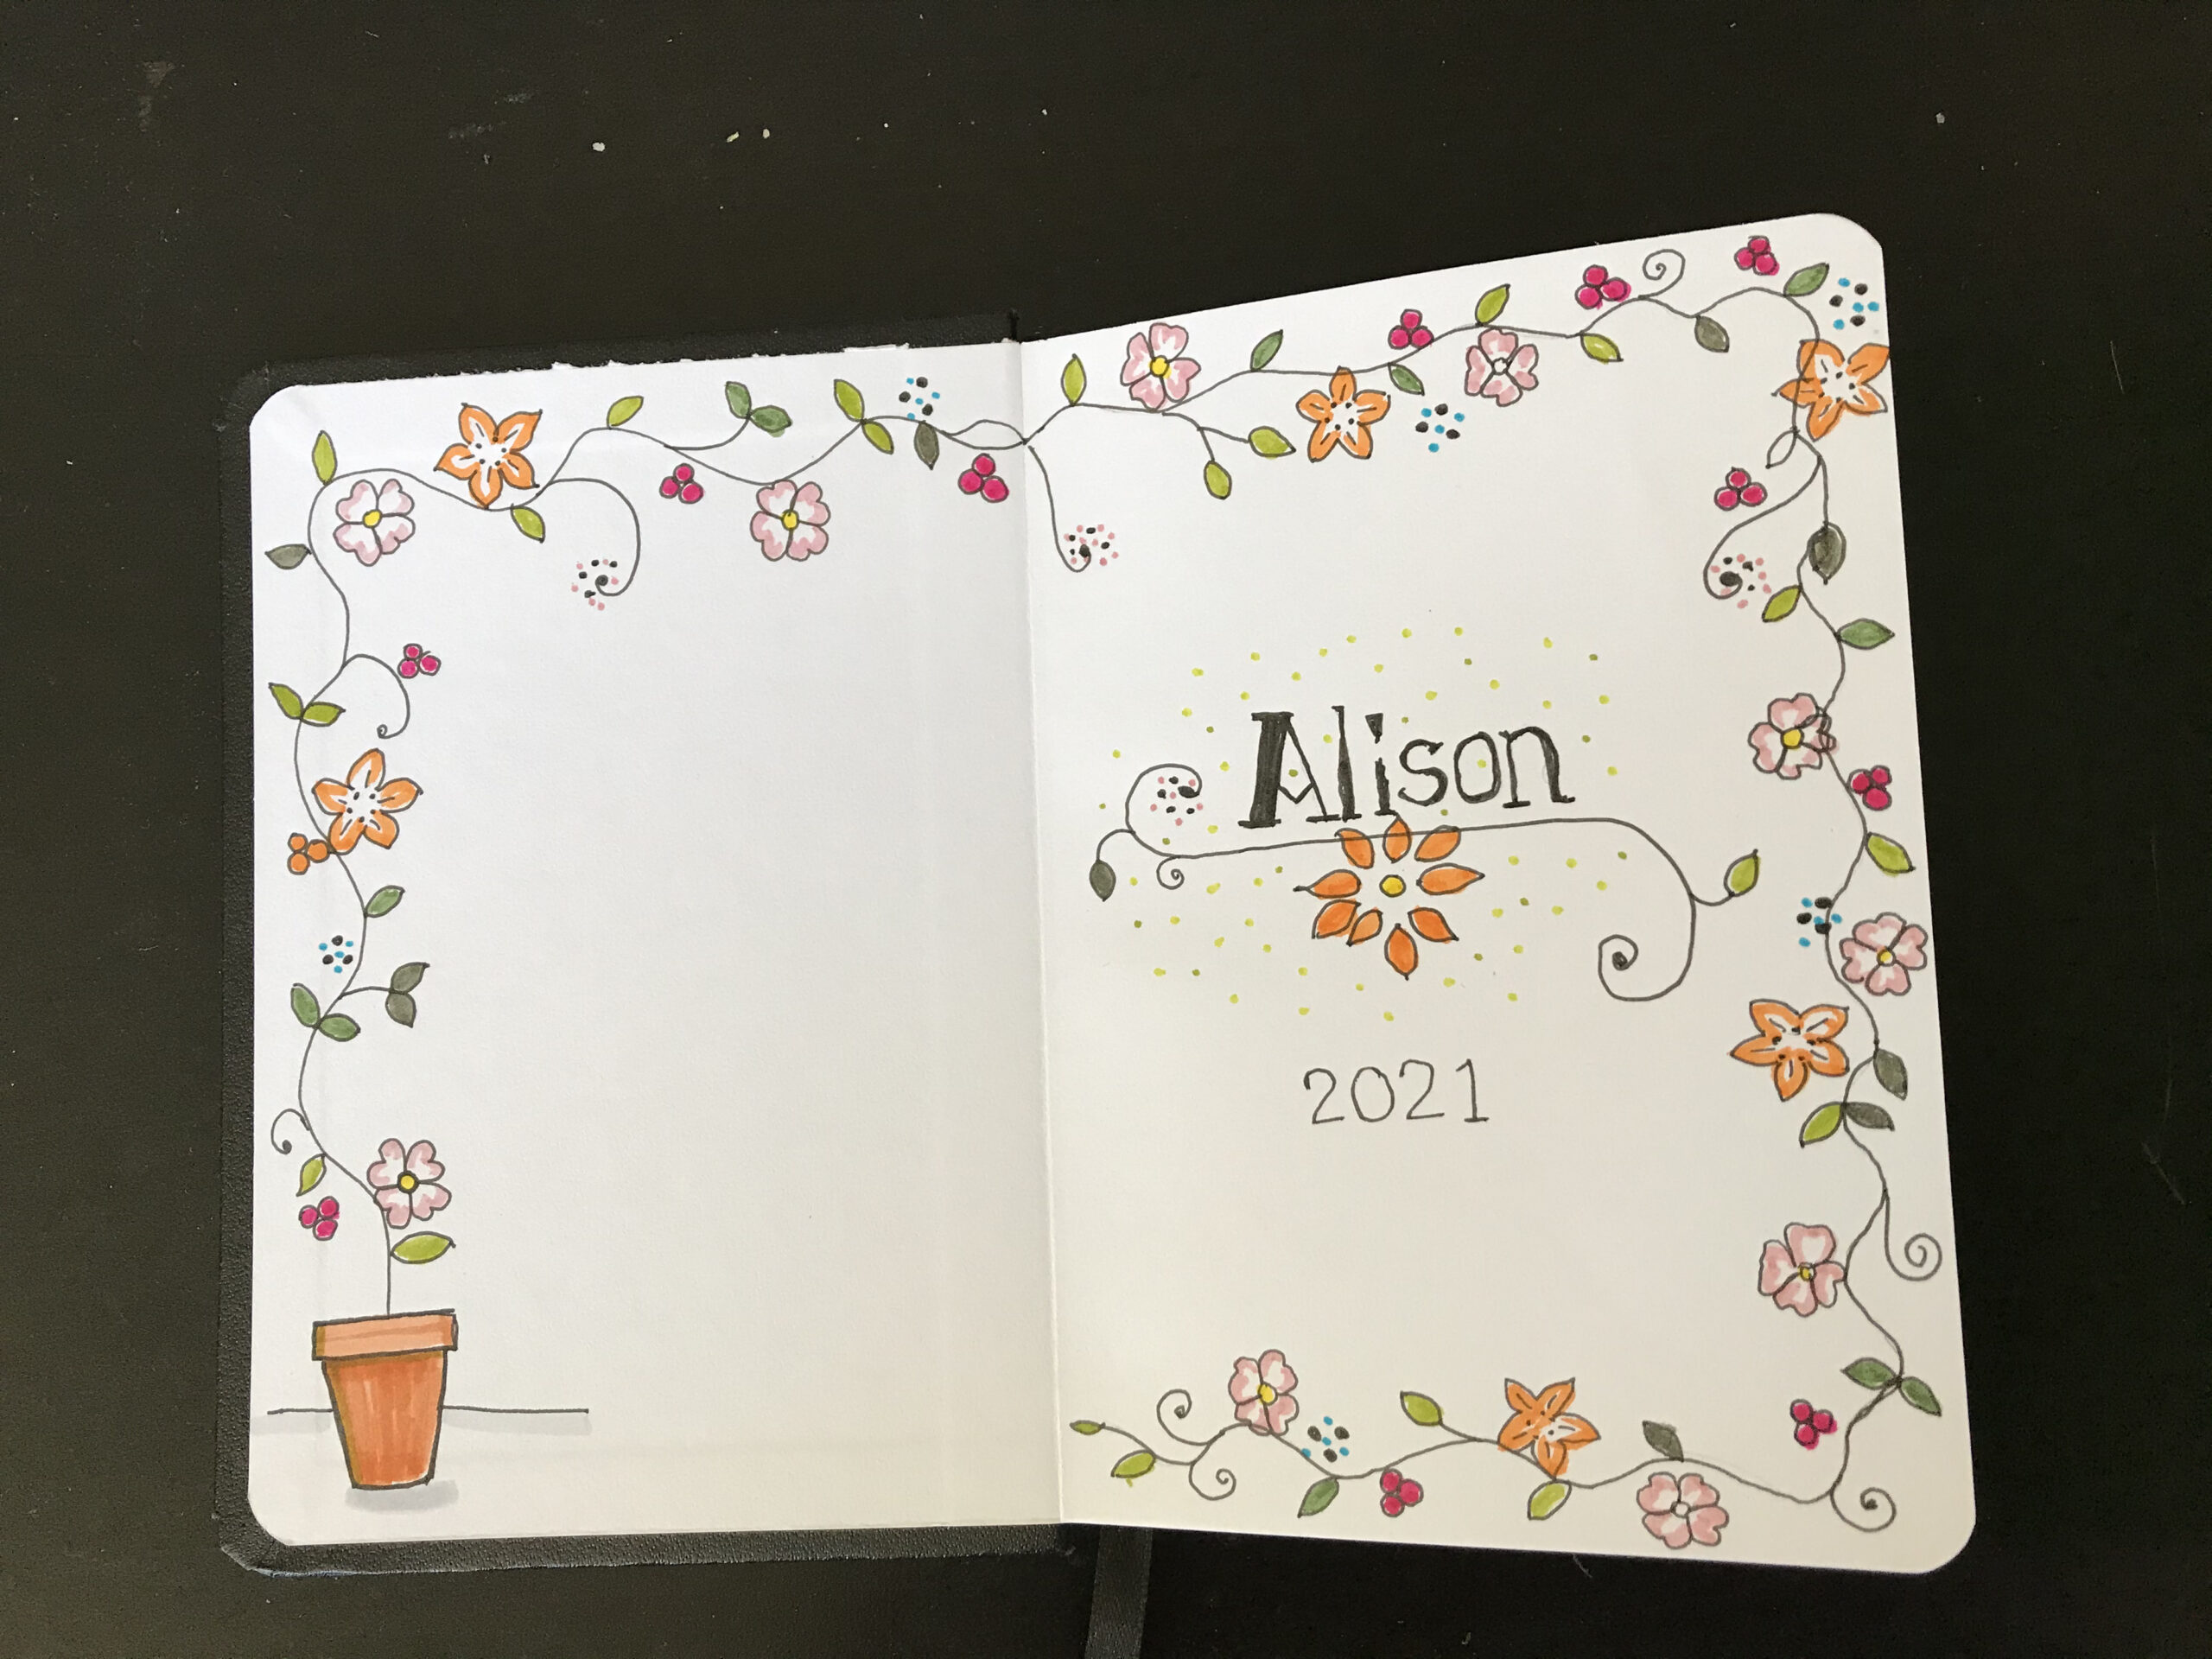
Below is my inside cover page. It is clearly written AHAtober, Inktober for Self-care. So now when I look back at this journal in years to come I will immediately be reminded what it was all about.
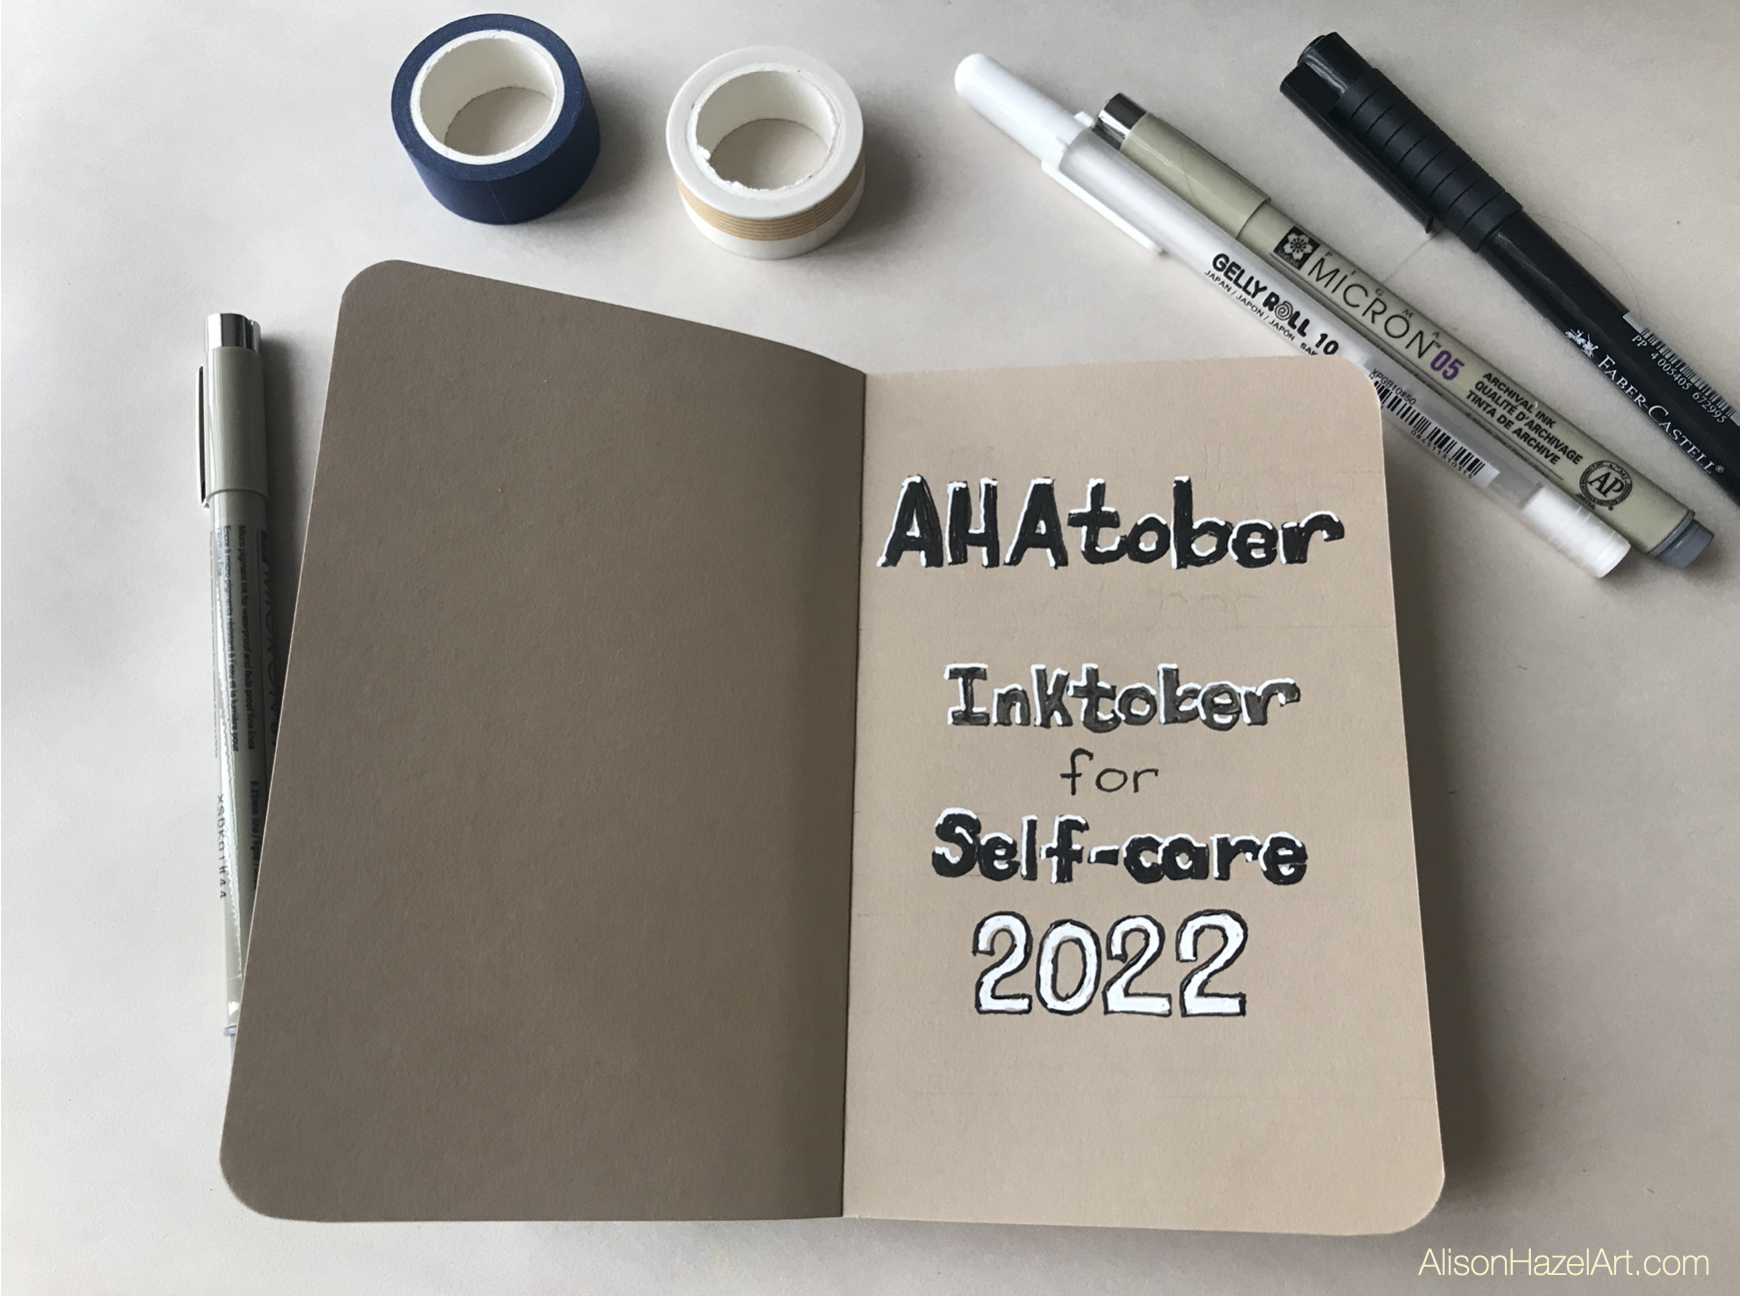
AHAtober journal cover page

Prompts Two-Page Spread

On the next full two-page spread I’ve written the full list of AHAtober prompts. I have the 1st to the 16th or October on the left-hand page column and the 17th to the 31st on the right-hand page column.

This way when I’m out and about with my AHAtober journal I can see the day’s prompts and get right on drawing the artwork. I plan to start these sketches early in the day. I may be at a coffee shop or on my lunch break and I have no reason not to at least draft the outlines.
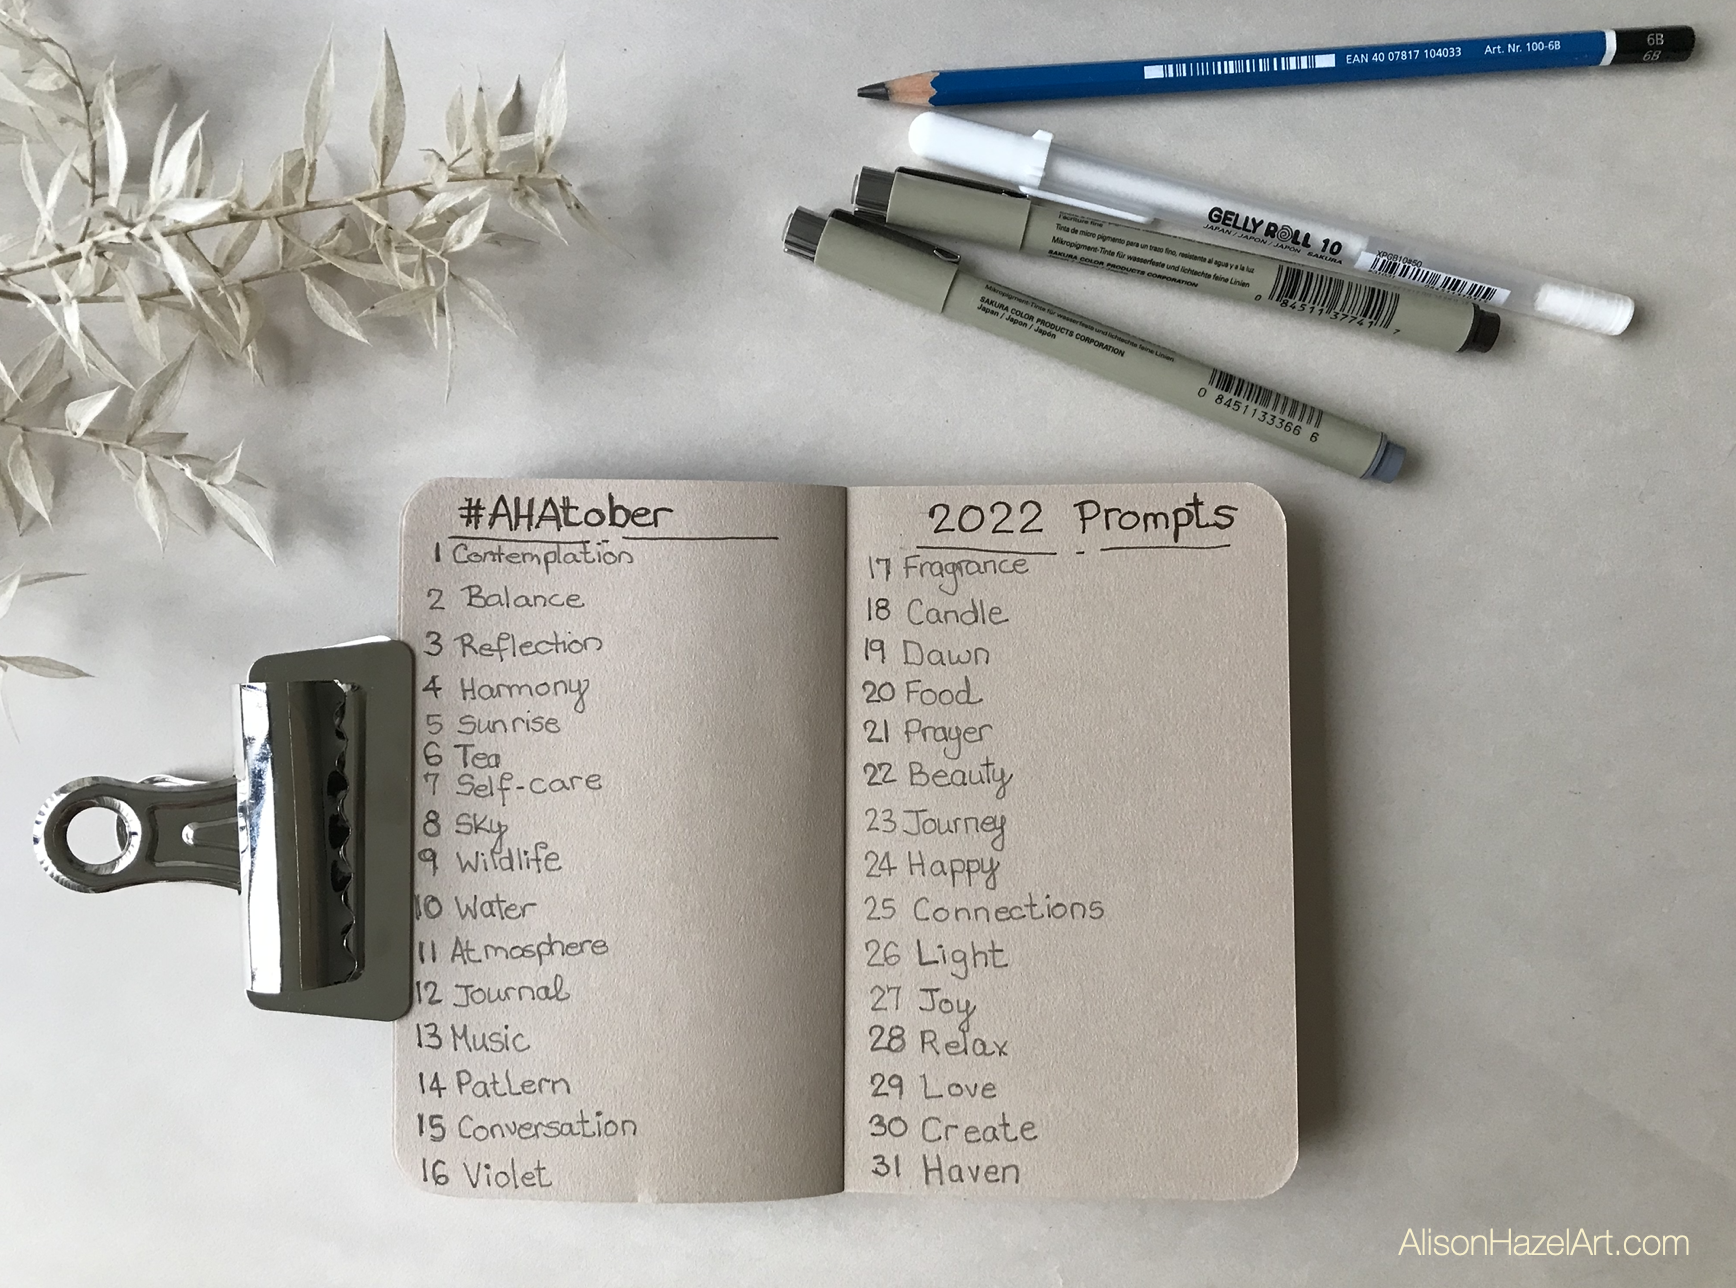
 

AHAtober 2022 prompts list

Drawing Inks and Supplies

I recently started working with colored inks and I plan to use this medium in my Inktober challenge this year.

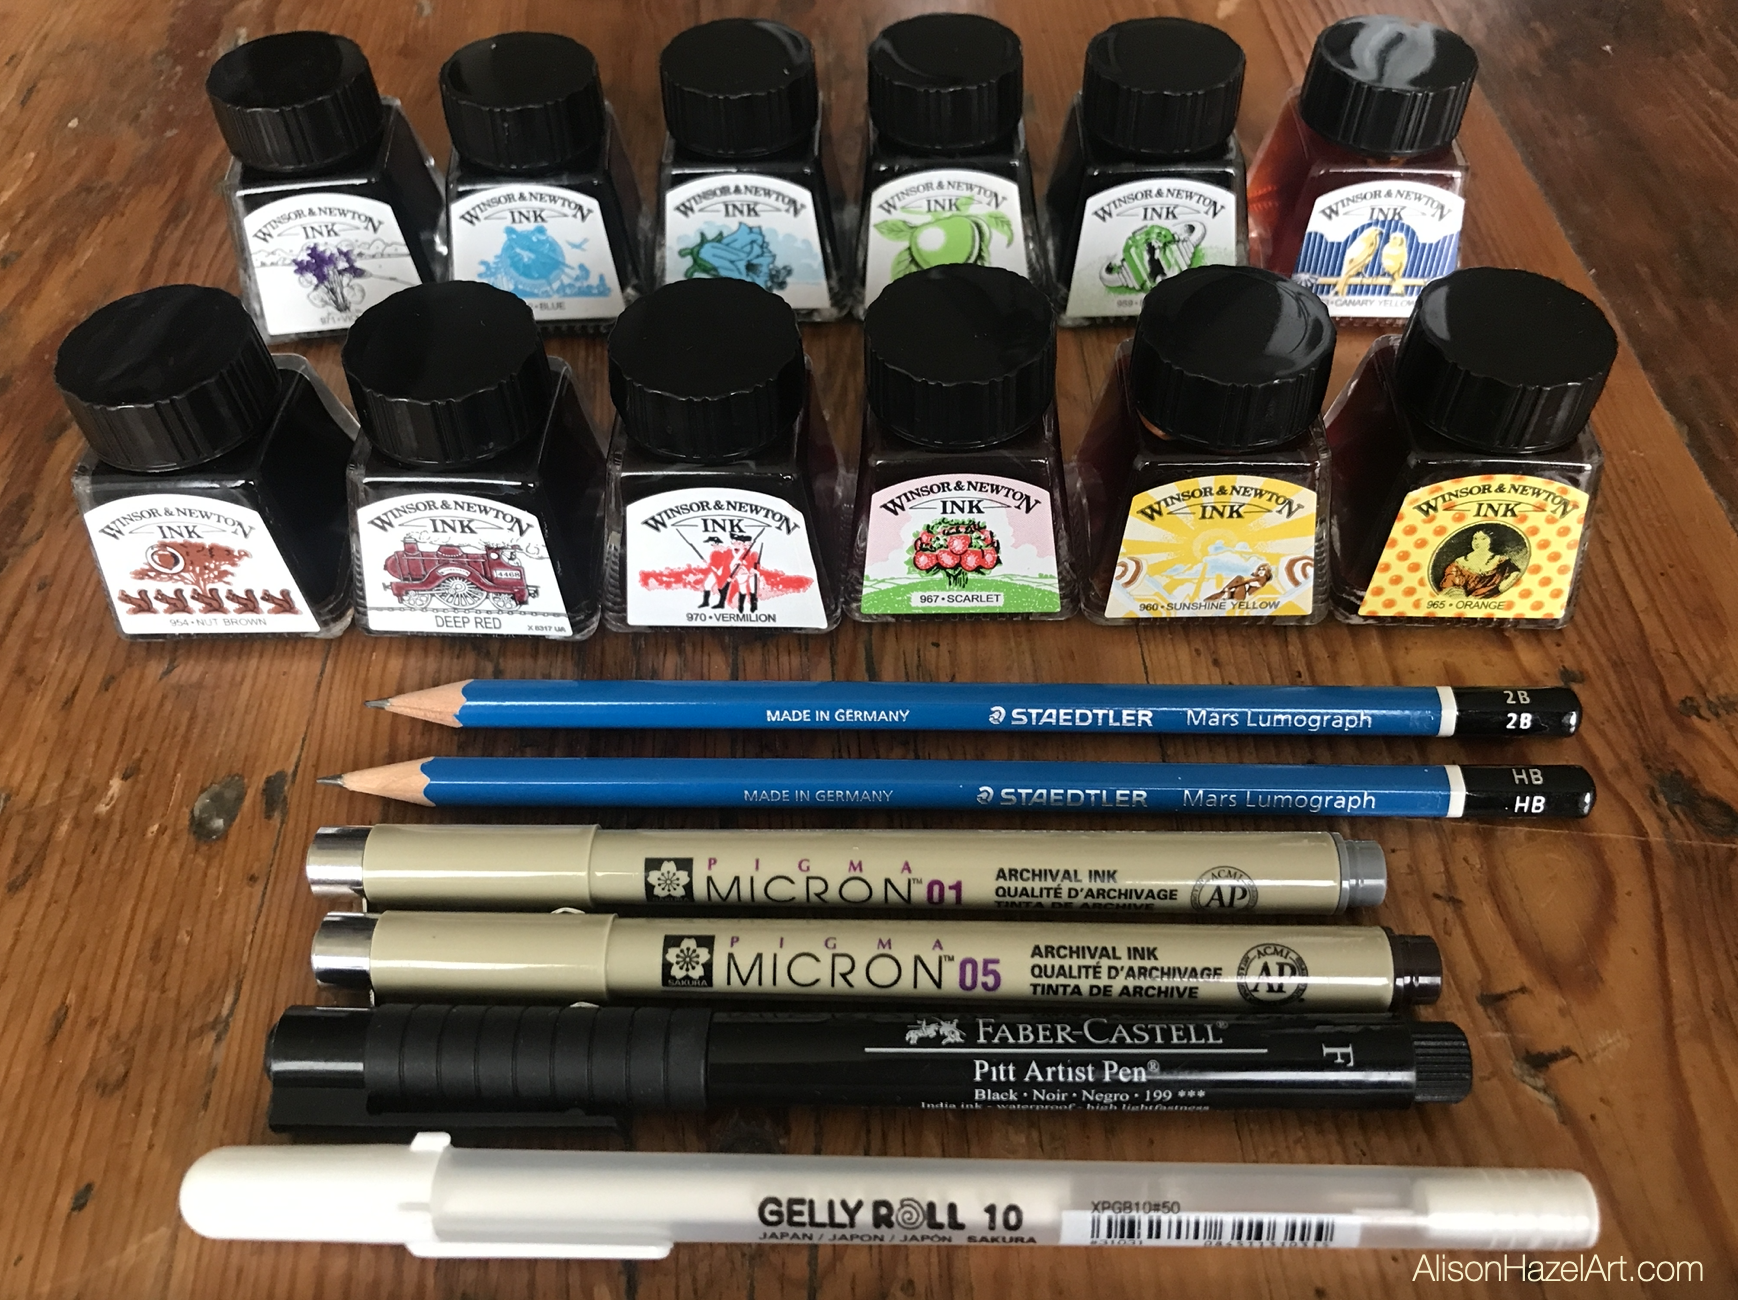
The art supplies I’ll be using are:

Art supplies

My Art Style and Process

As with most of my pen and ink drawings, I plan to start with a pencil sketch. I’ll also have a border typically 1cm or half an inch wide. Then I’ll do the black pen outline. Next, I’ll add colored inks either with a pen or with a paintbrush.

Inktober Strategy

My strategy for Inktober for this year is as follows:

  • I hope to win at Inktober.
  • I plan to only compete with myself.
  • I will draw every day.
  • I propose to learn more about how to work with inks.


Aspiring Artist Activity

Gather your Inktober sketchbook, pens and ink and please do the following:

Inktober Prompts

  • Decide whether to use the official Inktober prompts, my Inktober prompts or create your own Inktober prompts.

Inktober Journal Setup

  • On the first page write your name.
  • Write the year.
  • On the second page write the prompts list. This may flow over to two pages.
  • On October 1st, start your first drawing perhaps on the right-hand page.
  • Keep going inking every day and complete the challenge.

Share

  • If you are comfortable, share your artworks with the hashtags #inktober or with my hashtag #AHAtober.

AHAtober Artworks

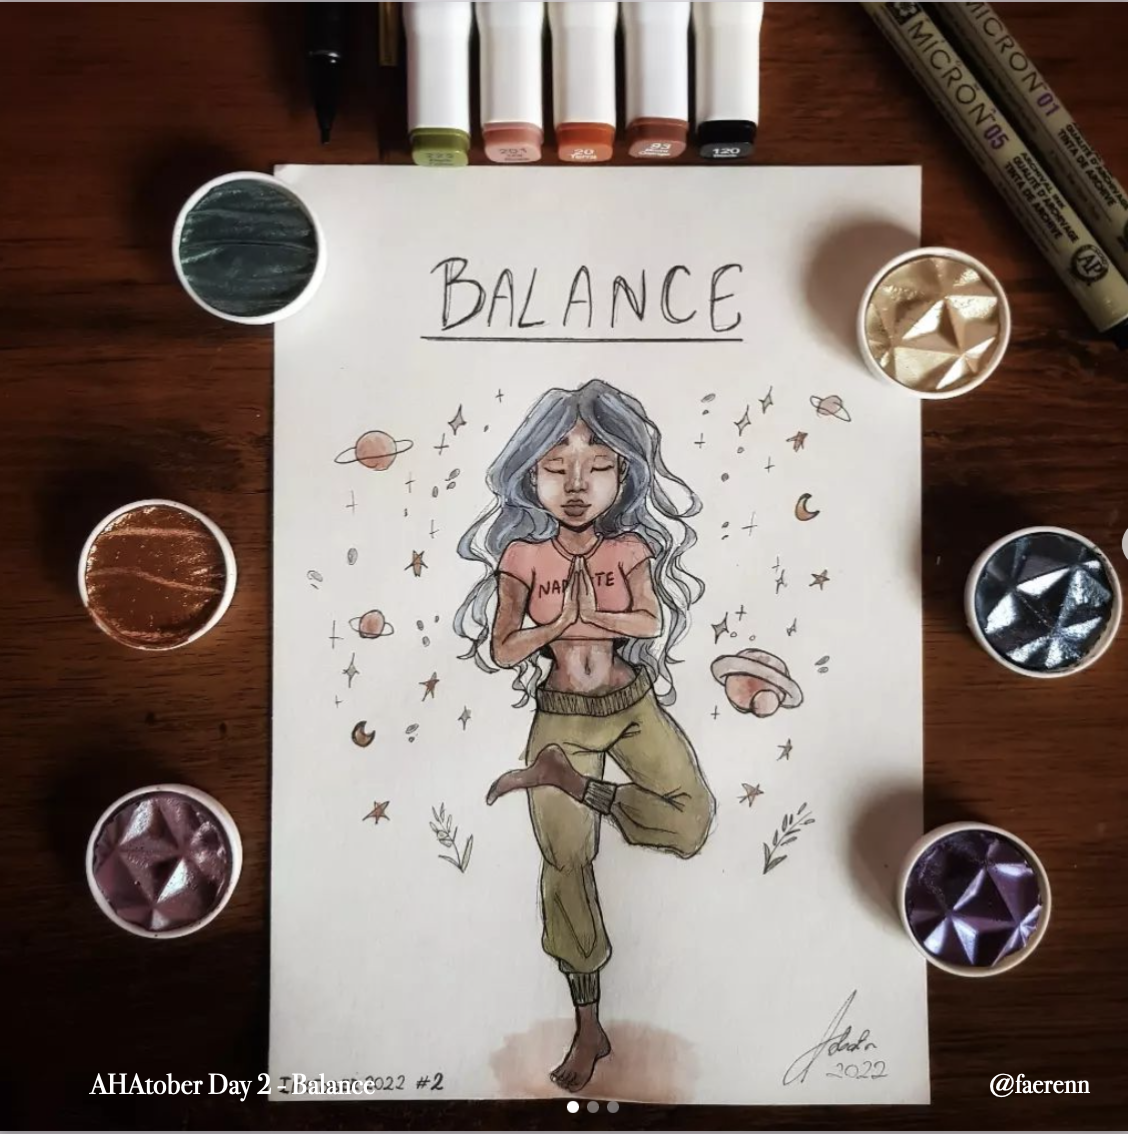
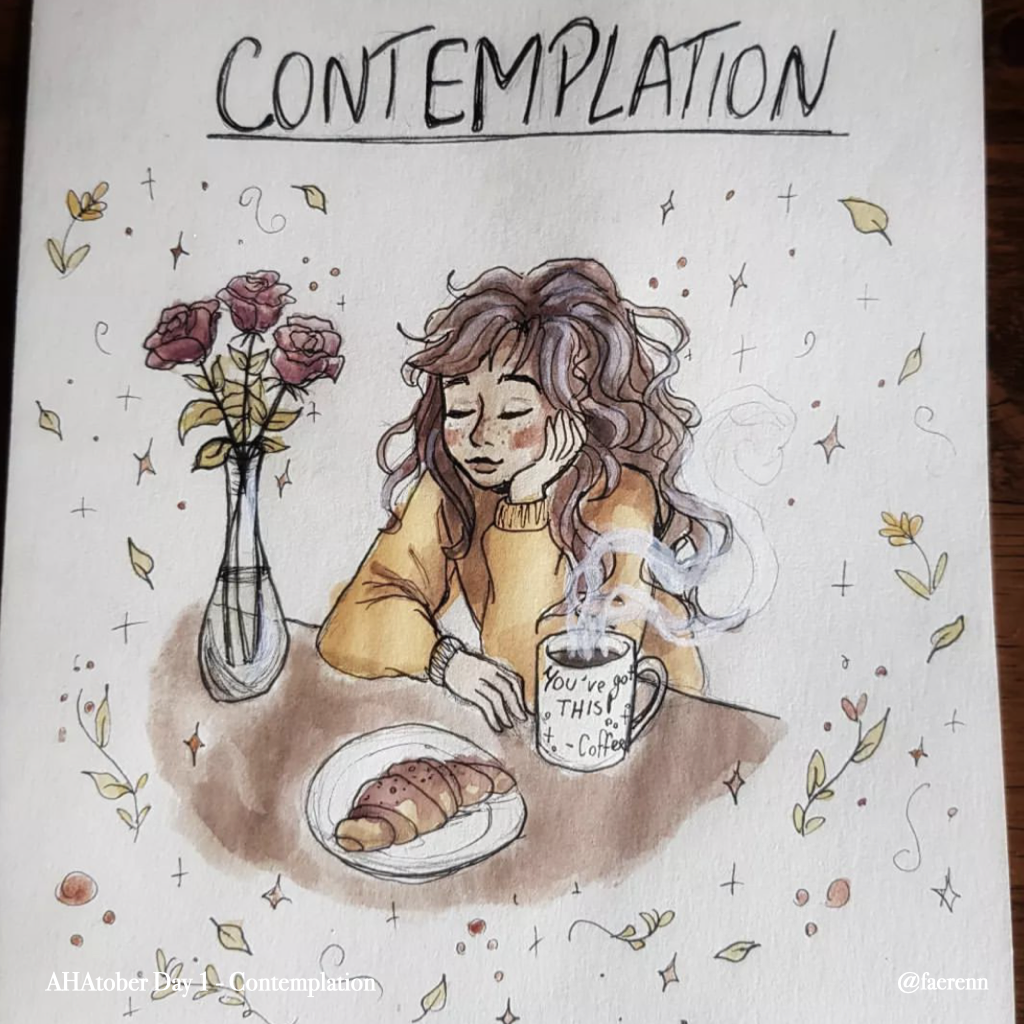
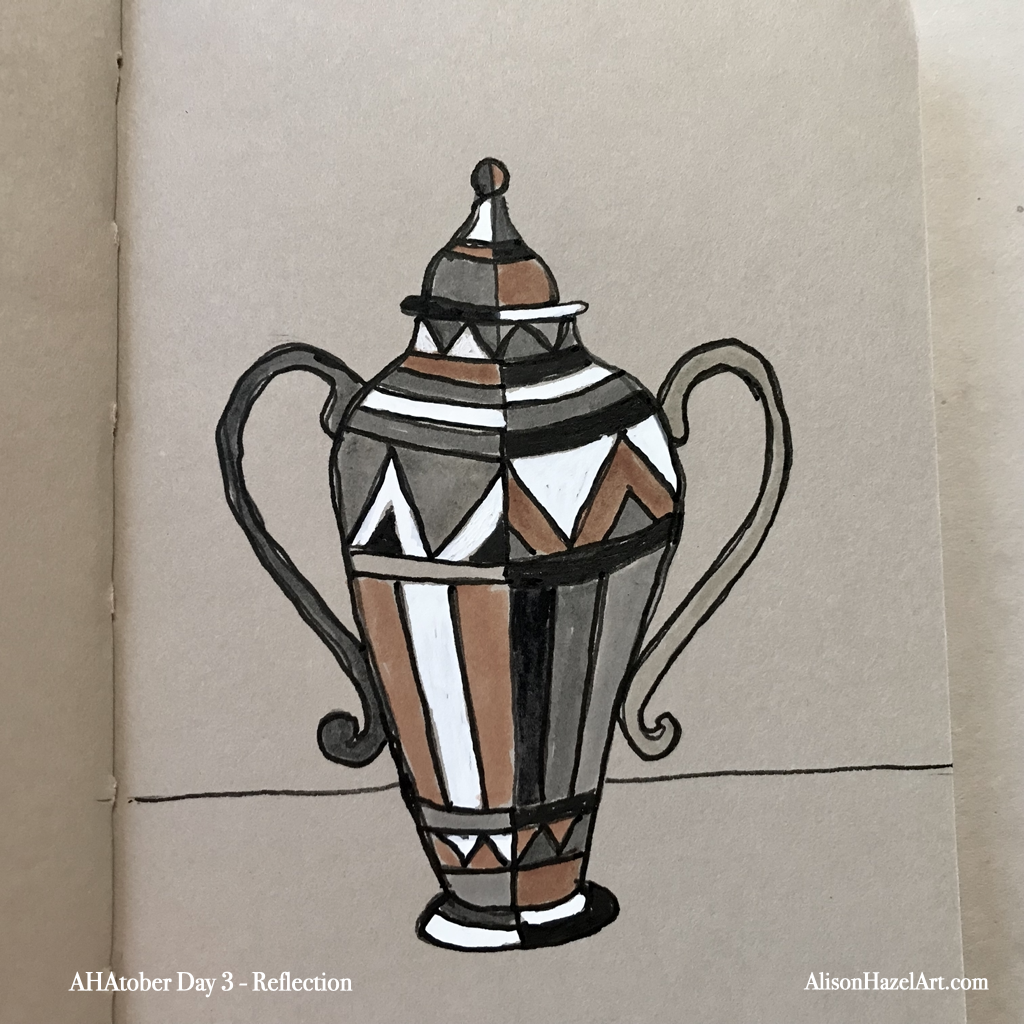
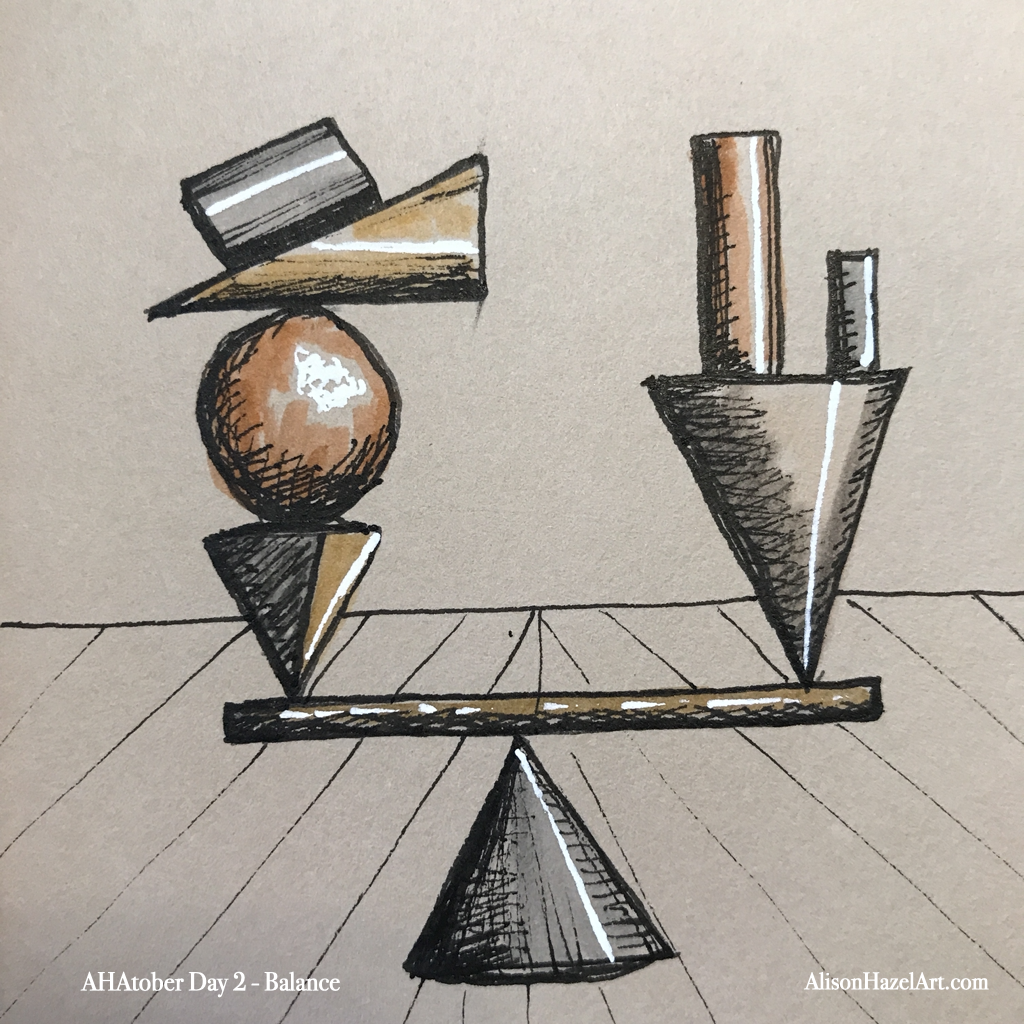
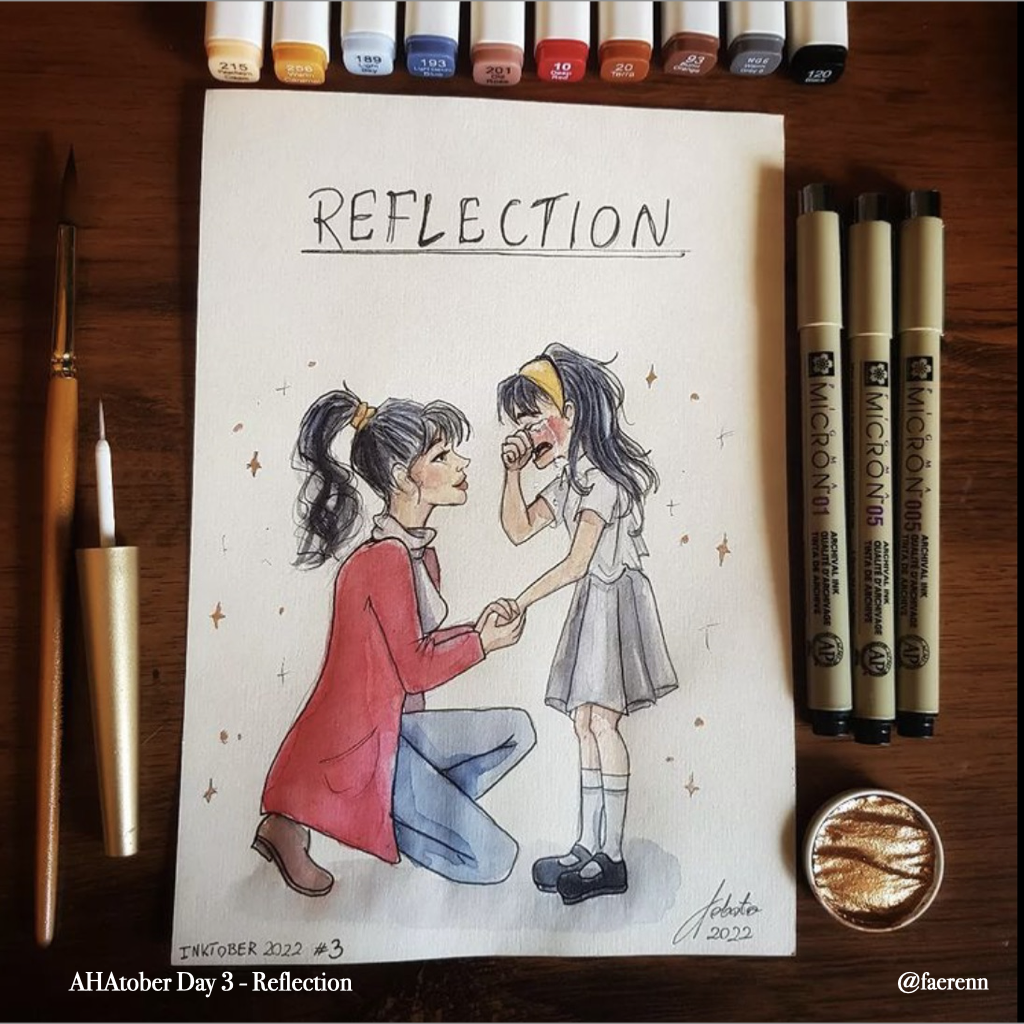
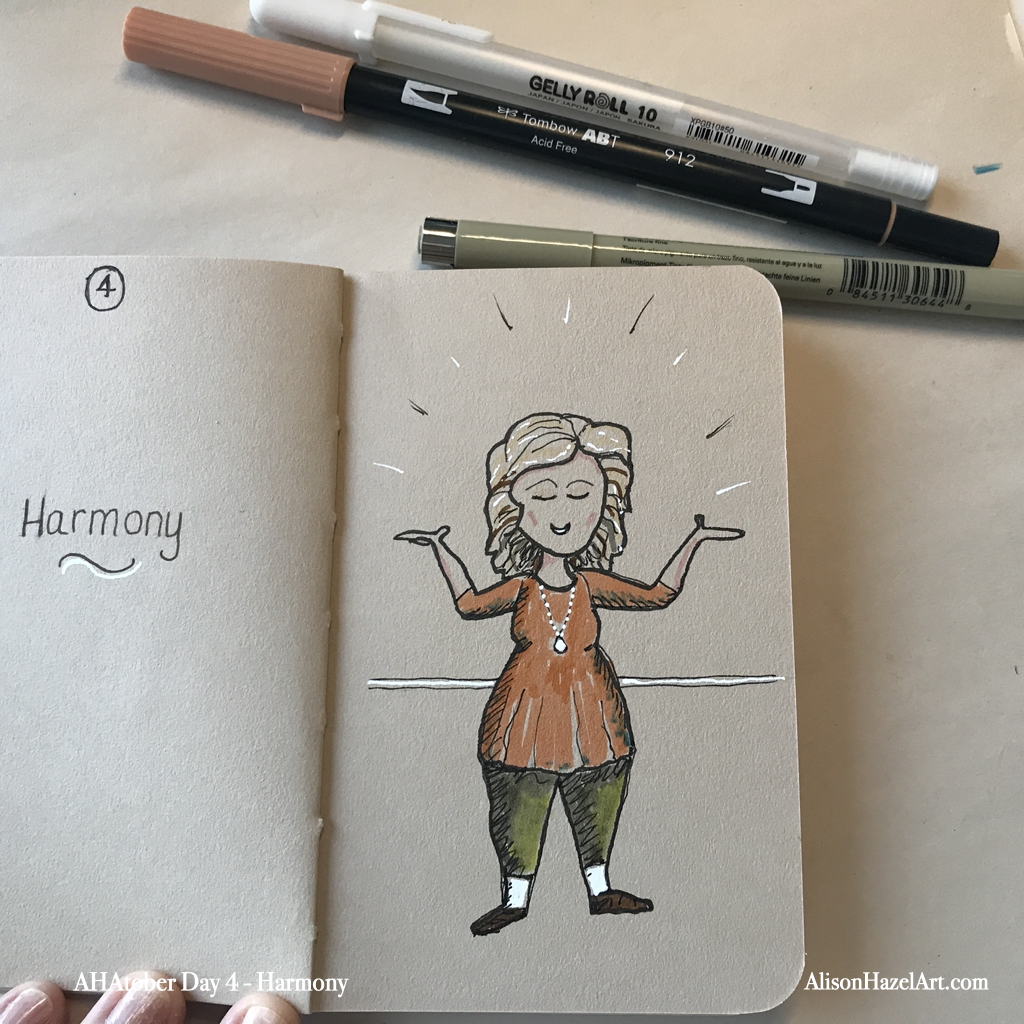
Below are some of the AHAtober artworks from you and me. Tag me on your drawings and I’ll add them below.
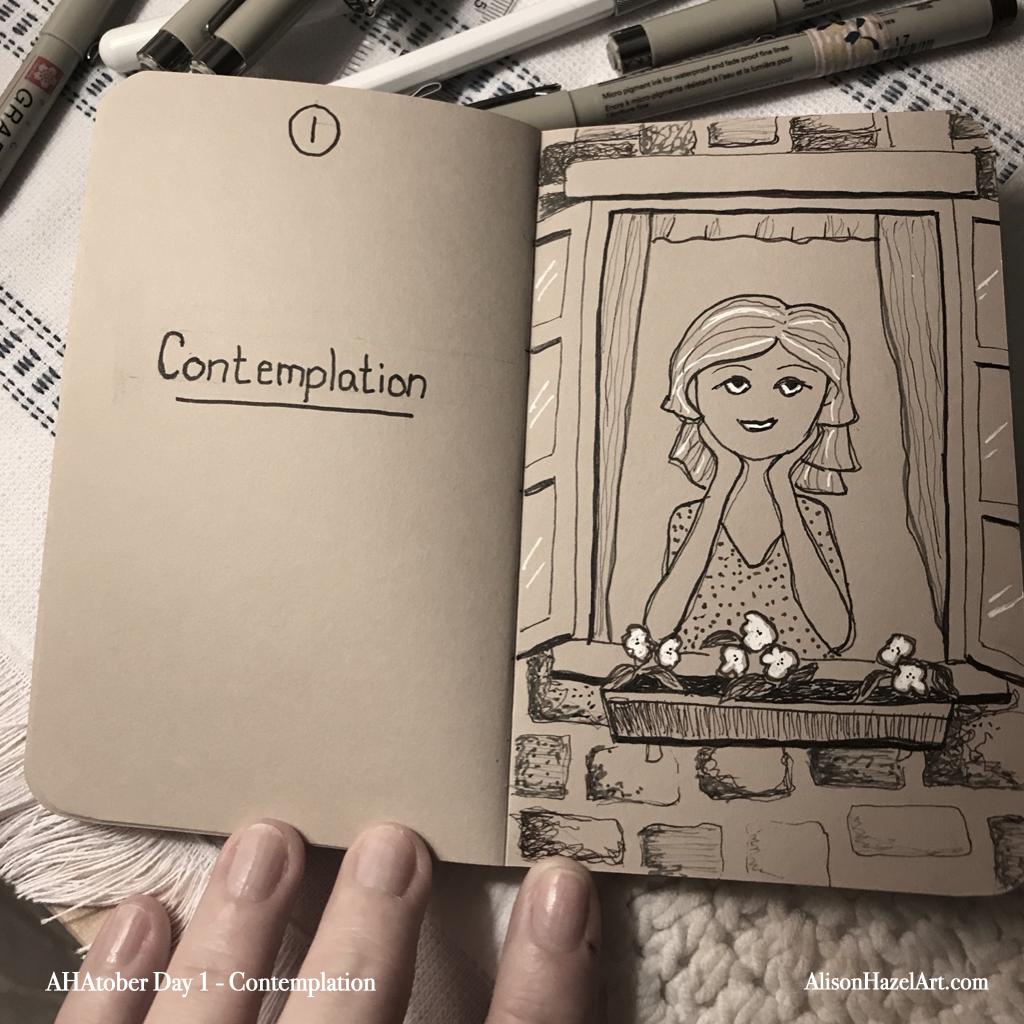
AHAtober Diary

October 11th

I managed to get the first 9 drawings done on time, but since day 10, I’m now officially running behind. I hope to catch up three days worth of artwork later on today. To do a daily art challenge is exactly that – a challenge.
 

Alison Hazel

Author Bio: Alison Hazel

Alison Hazel is a hobby artist and she shares her ongoing journey about becoming an artist later in life. She creates simple art that anyone can make. She hopes to inspire you to reach your creative potential in the area that suits you.
Read more about Alison’s story.

Send Alison a quick message.

Seasons of Art: Spring

Seasons of Art: Spring

Seasons of Art: Spring 2023 Group Meeting Learn more about the recent Seasons of Art group meeting. See more about the Seasons of Art group here.  Satvvir's Artwork Below is Satvvir's artwork (Instagram @theambivertsbb). She used watercolor and combined orabges...

Acrylic Overpainting: Ikea Artwork

Acrylic Overpainting: Ikea Artwork

Author: Alison Hazel   -   Published: January 2024 Overpainting Last month I decided to paint over, or overpaint, a large Ikea artwork I had in my living room. Over painting is a technique used by many of the great artists when supplies were short and canvasses hard...

Inukshuk – Pen and Ink

Inukshuk – Pen and Ink

Author: Alison Hazel   –   Published: June 2022

Inspiration

As a part of working on my nature journal, last weekend I went down to the beach at the coast in Vancouver. I was there last week but this week I walked further round the promenade and came across the massive inukshuk.

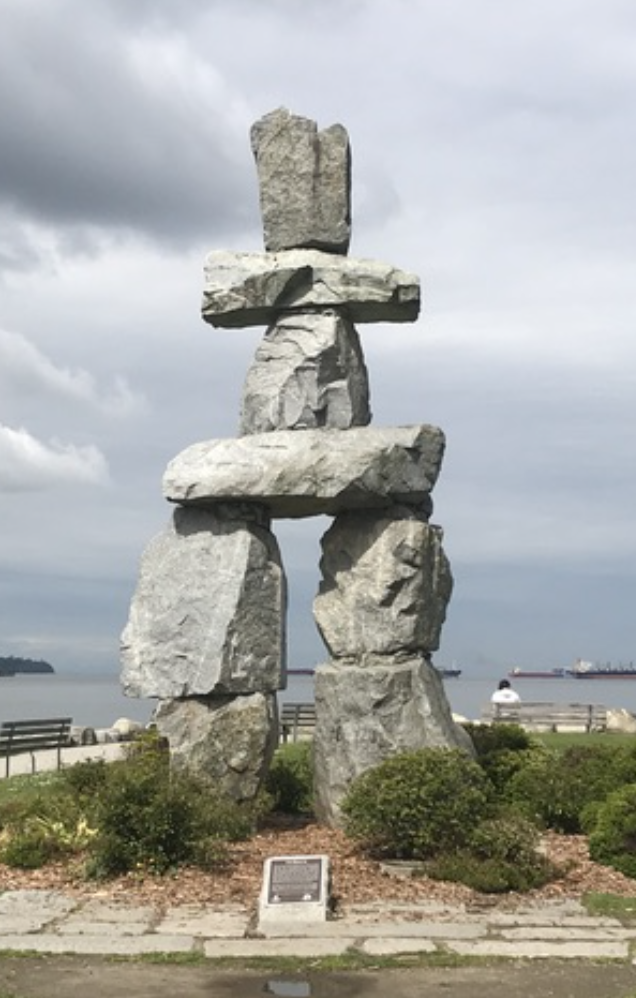
An inukshuk is a figure made of piled stones or boulders constructed to communicate with humans throughout Northern Canada and the Arctic and the arms point the way. The inuksuk may historically have been used for navigation, as a point of reference, a marker for travel routes, fishing places, camps, hunting grounds, places of veneration or to mark a food cache. The inukshuk in Vancouver was designed by Alvin Kanak.

Although it’s not technically a nature sketch, it certainly is outdoorsy enough for me to want to add it to my nature journal. The grey granite rocks themselves were remarkable from which this sculpture was made.

Process

I packed my little travel sketch bag with a sketchbook two pencils and an eraser. I made sure I had my phone so I could take photographs. I also loaded my Starbucks card so I could get a coffee beforehand. I had my hat and sunglasses and off I went.

I also took my transit pass which is critical for bus rides in Vancouver. I caught the bus down Davie Street to English Bay alighting at Denman Street. From there I walked back along the promenade.

The inukshuk is slightly further down from where I was the previous week when I was drawing the Canada Geese and you can check out that video here. And by the way, I noticed there’s this massive barge that beached itself about 100 meters further south from the inukshuk position. I’ll probably go and do that sketch next time so do lookout for that.

inukshuk-vancouver

Field Sketch

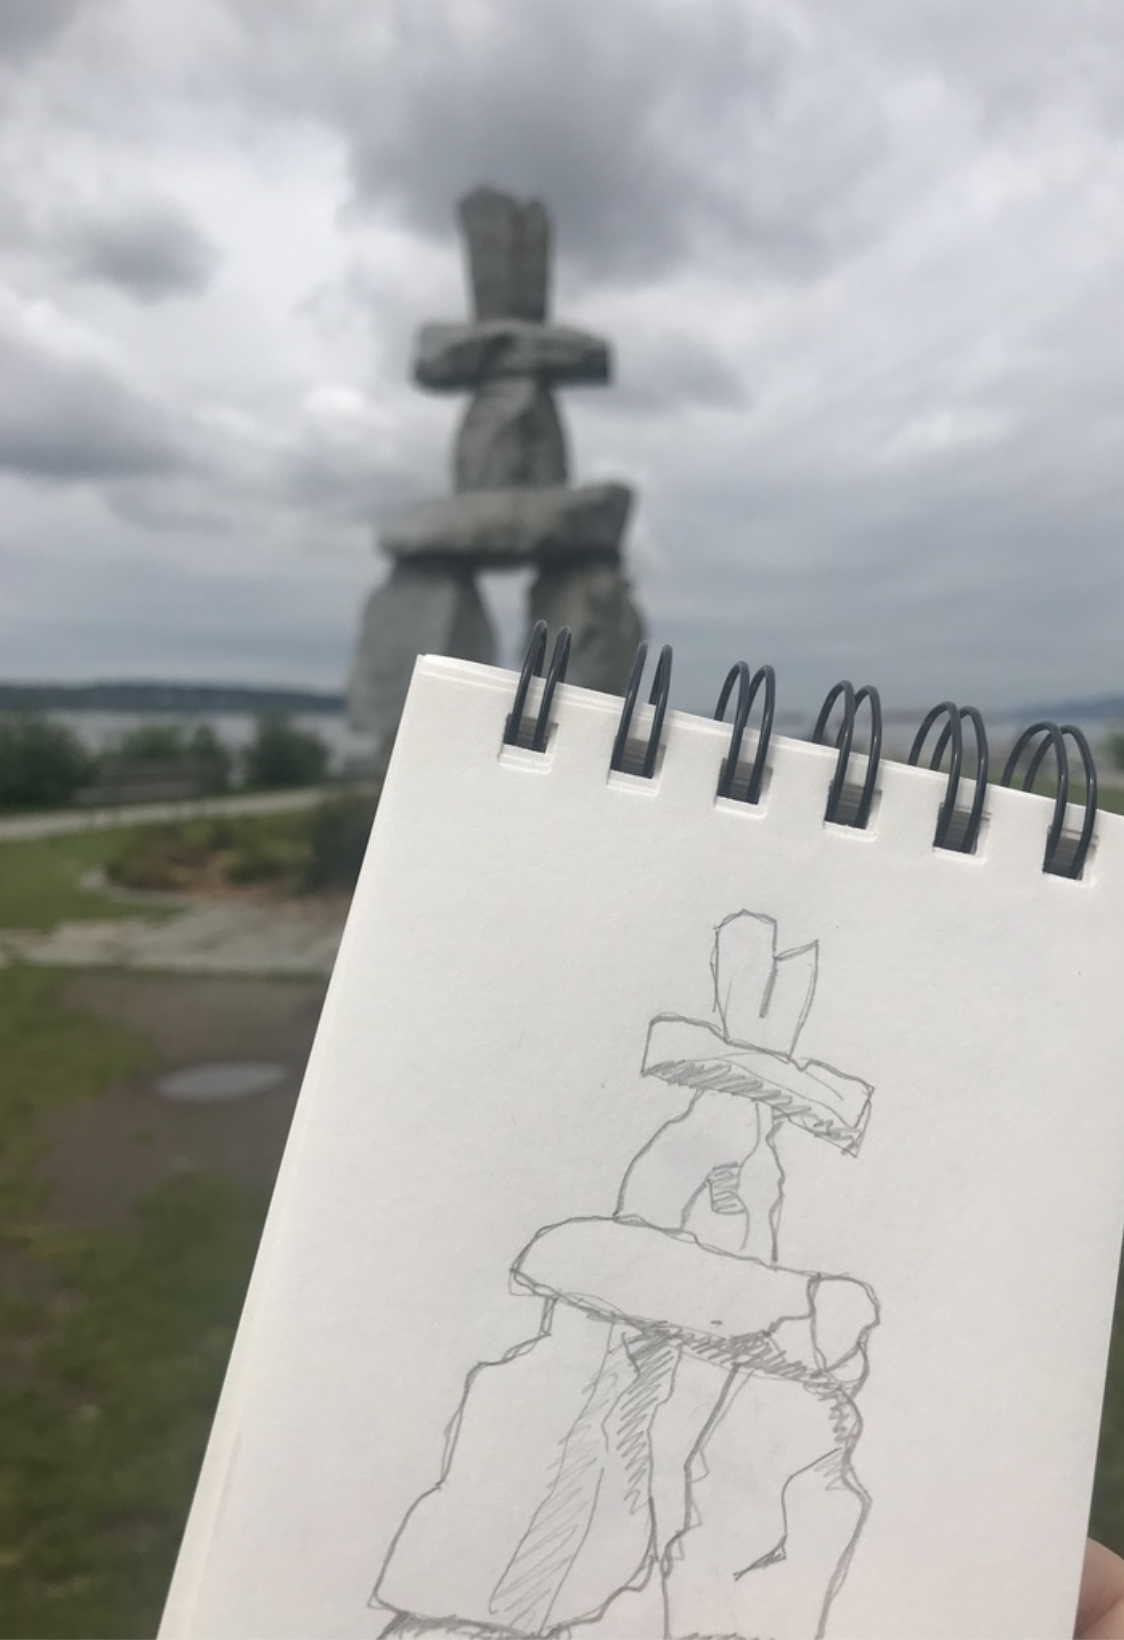
I took my little field notebook with me and a 2H and a 2B pencil as well but I didn’t use it. 

Inukshuk East Face

I decided to sketch the inukshuk monument from the front which is facing west so the ocean is behind it. This is generally the virw most people see as they come down the promenade at the waterfront.

inukshuk-east-face

Inukshuk South Face

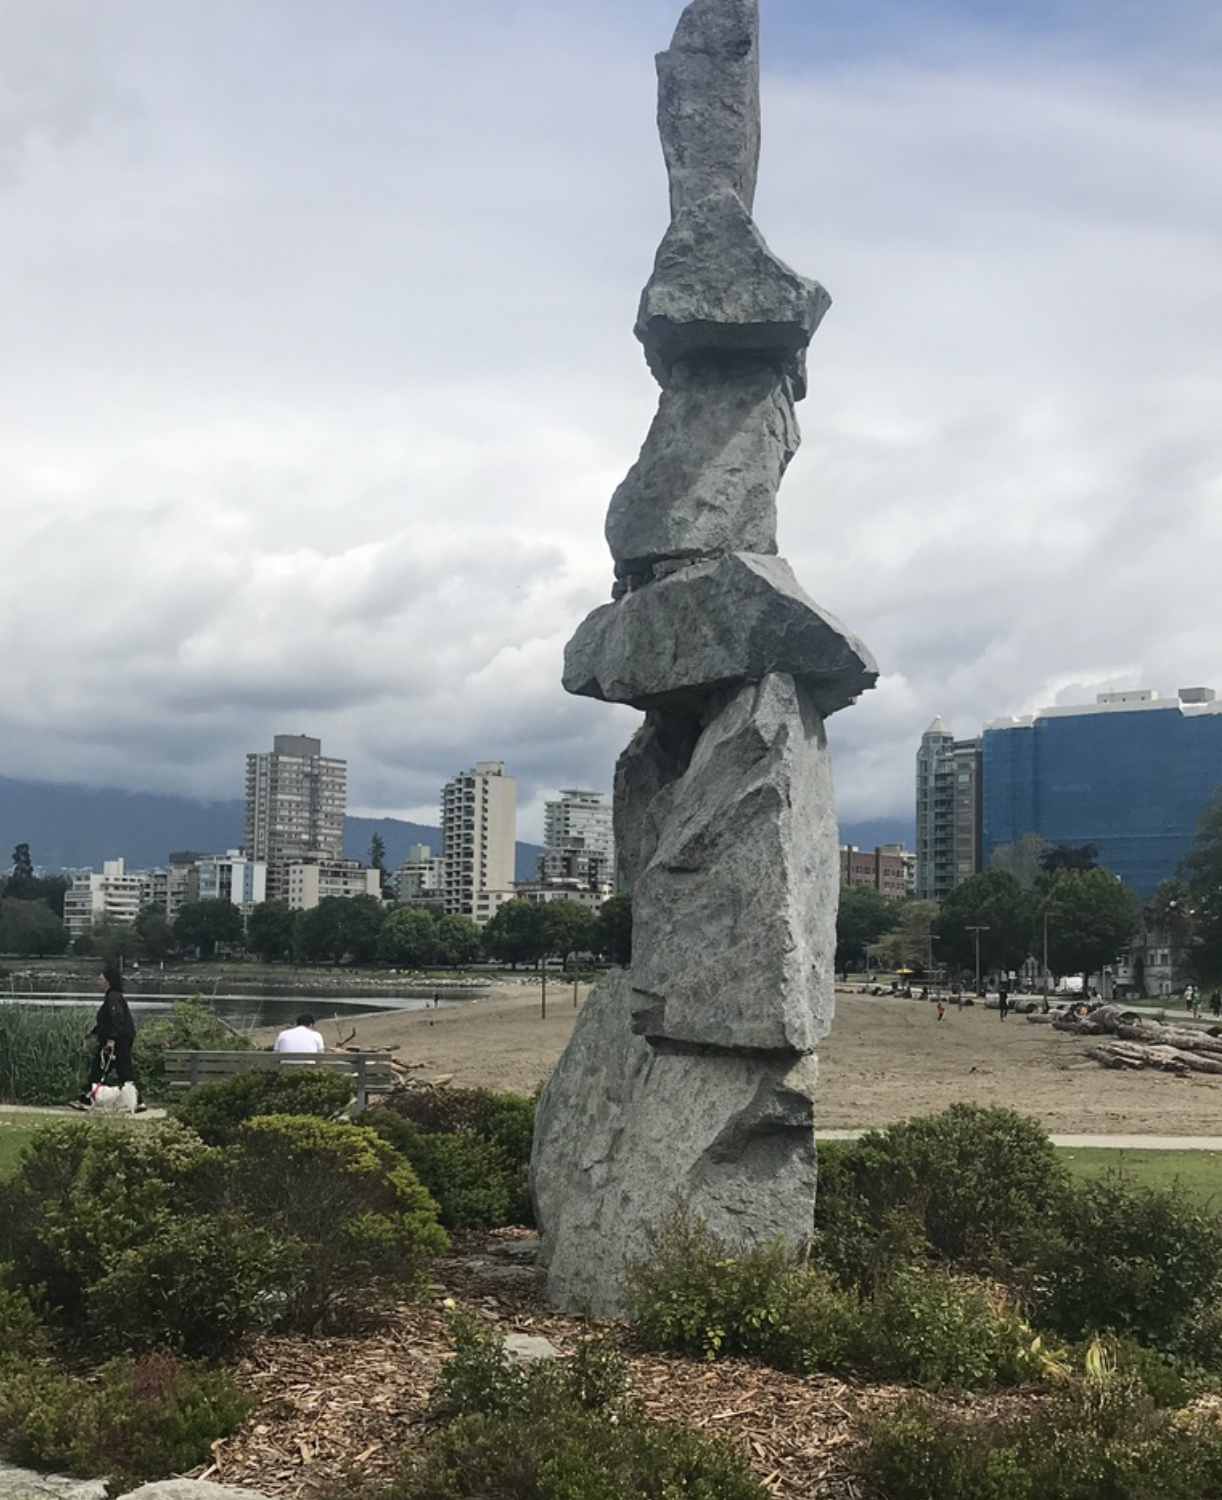
I then moved around so that I was looking at the south face of the monument but facing north. I decided to draw this side view as well which really doesn’t show you much at all.

You can’t tell by this drawing whether this is an inukshuk or not, but the rocks were super interesting. I knew I wanted to create a pen and ink and grayscale ink drawing, so this was the perfect subject.

inukshuk-south-face

Inukshuk West Face

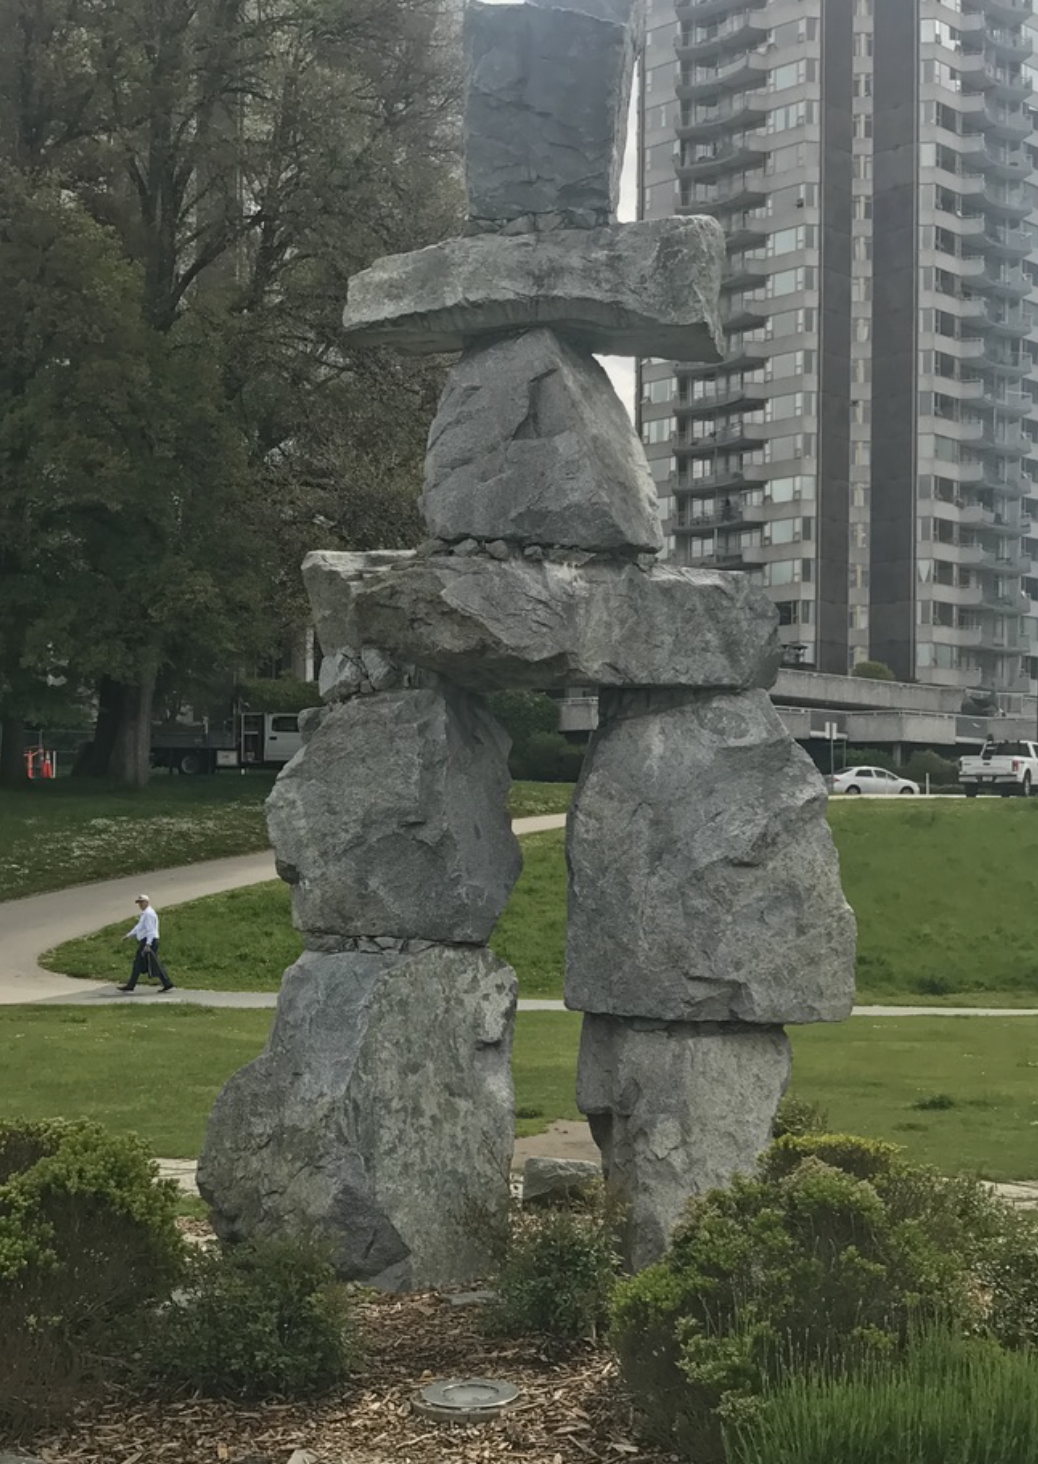
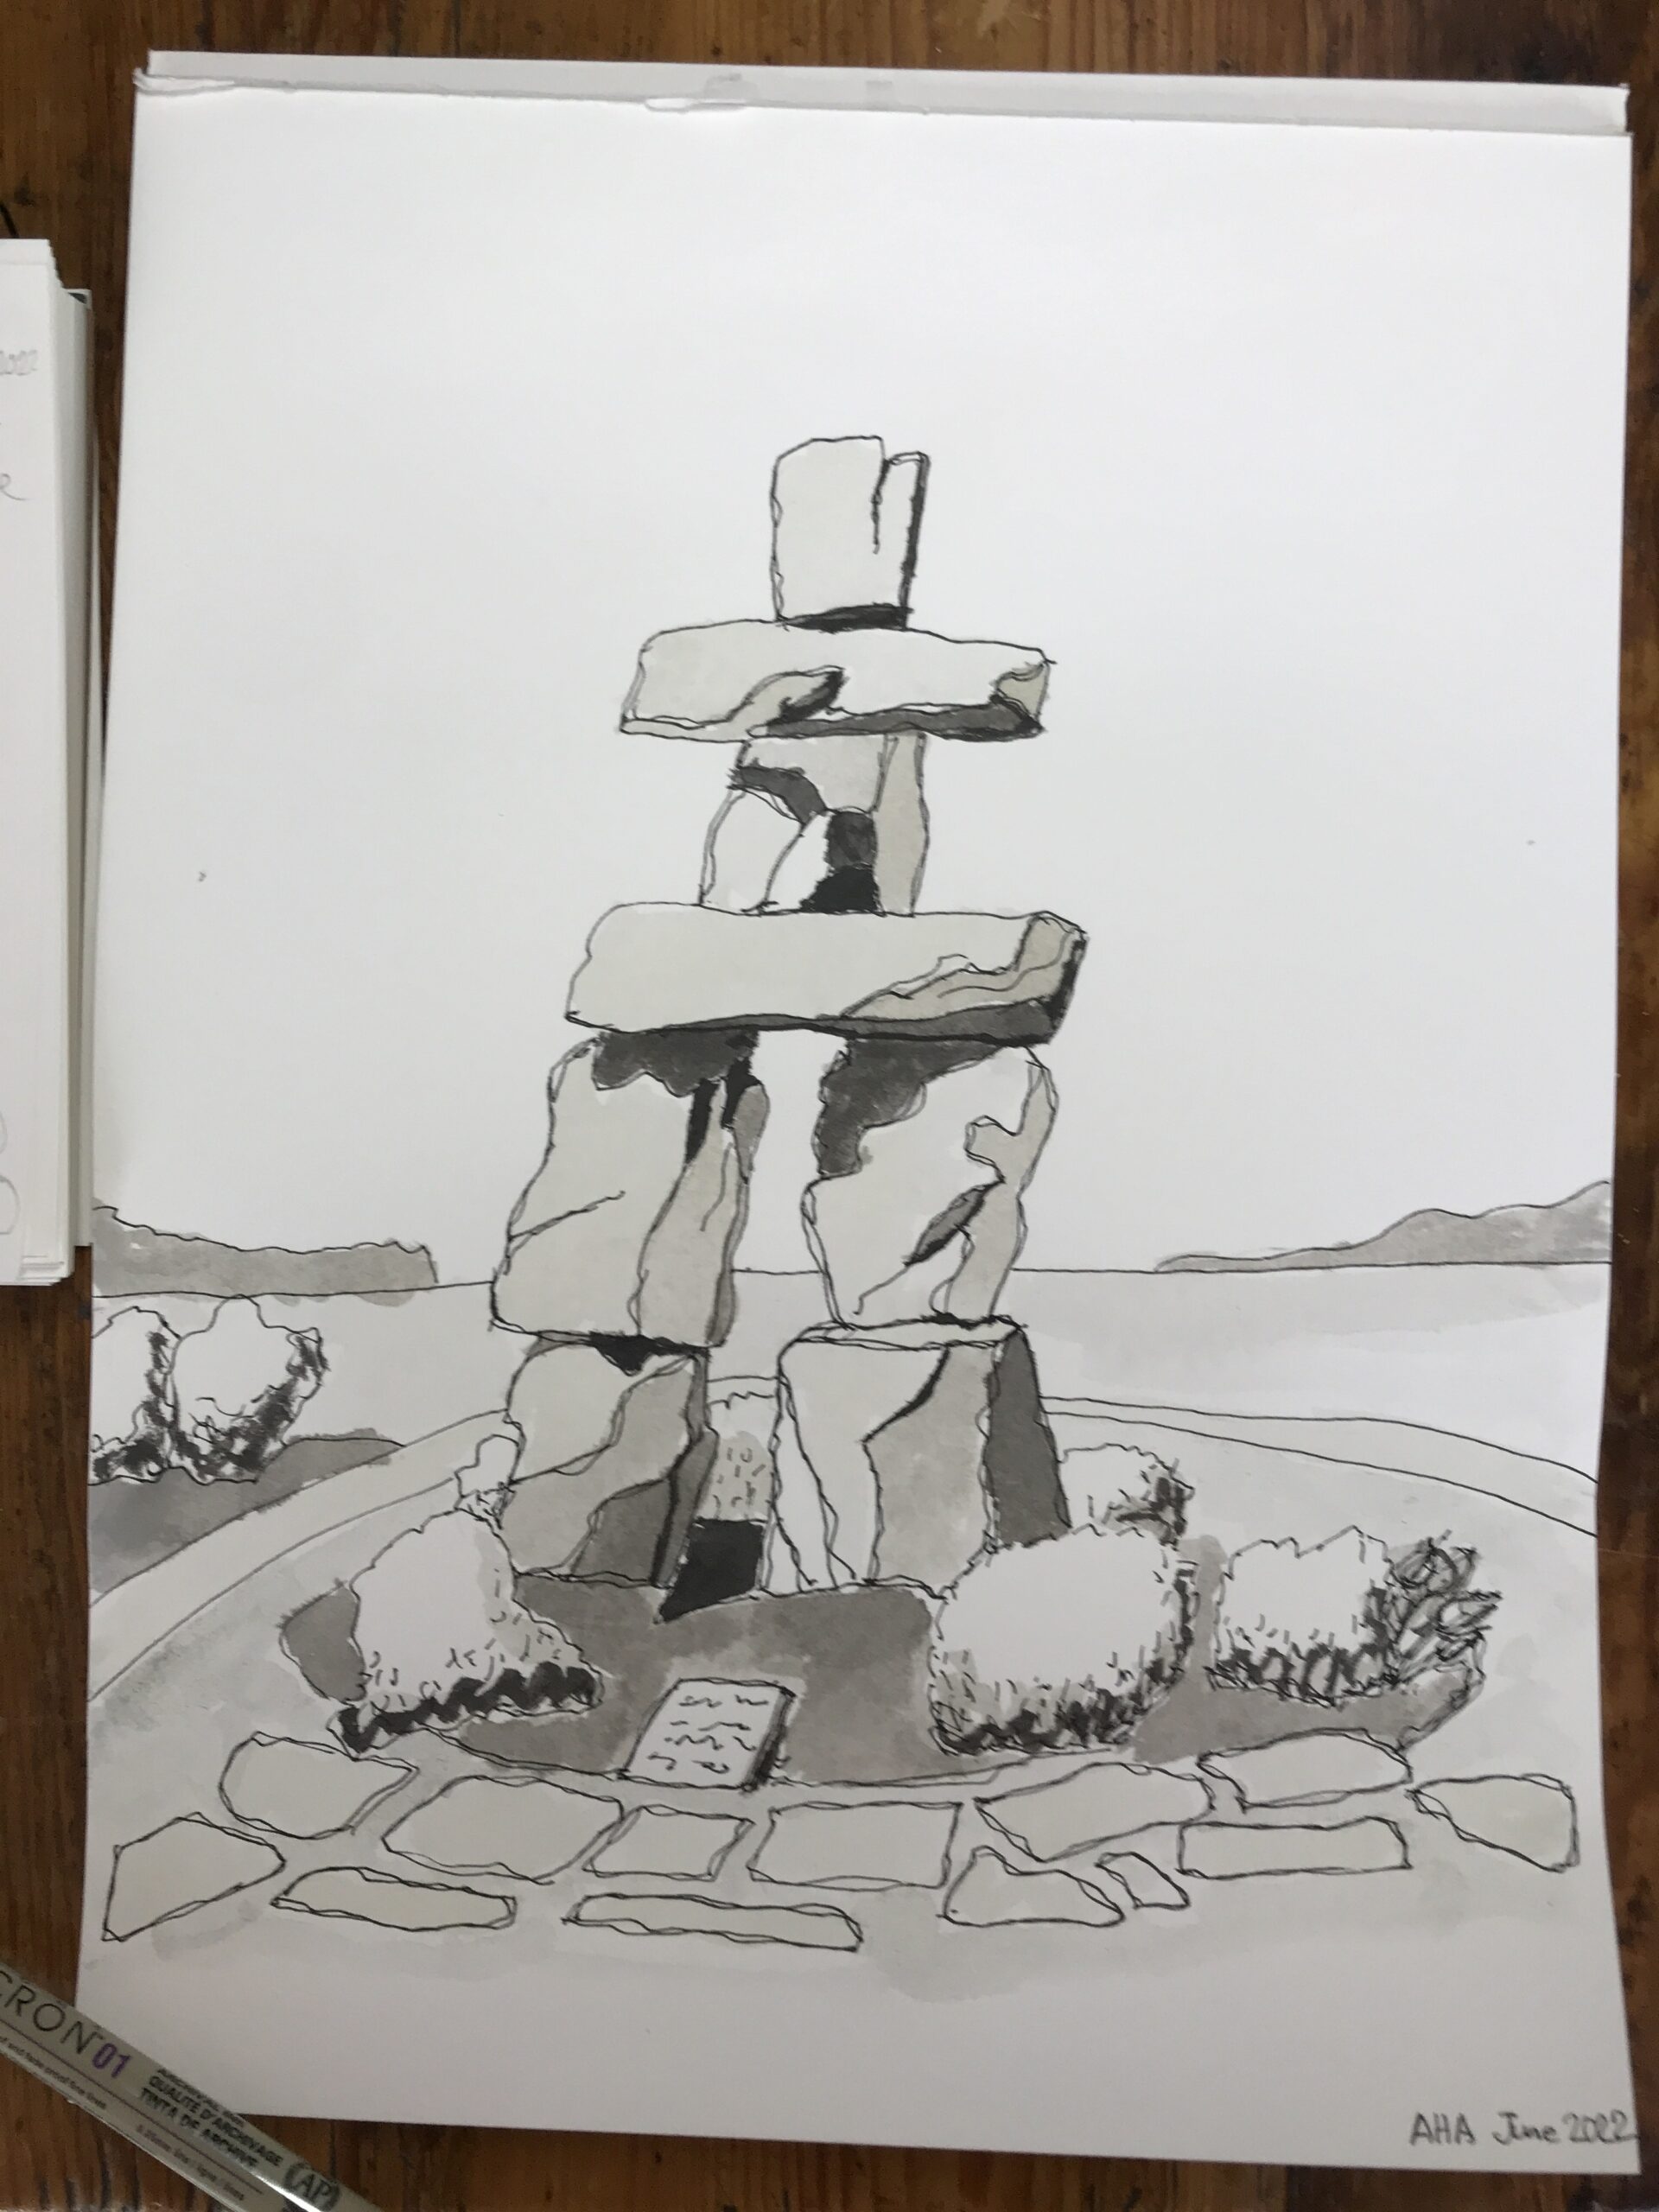
I went around to the back of it facing inland. This is the west view that you would see if you were on a ship coming into the harbor. I drew the west face of this sculpture which you can see here. 

inukshuk-west-face

Inukshuk North Face

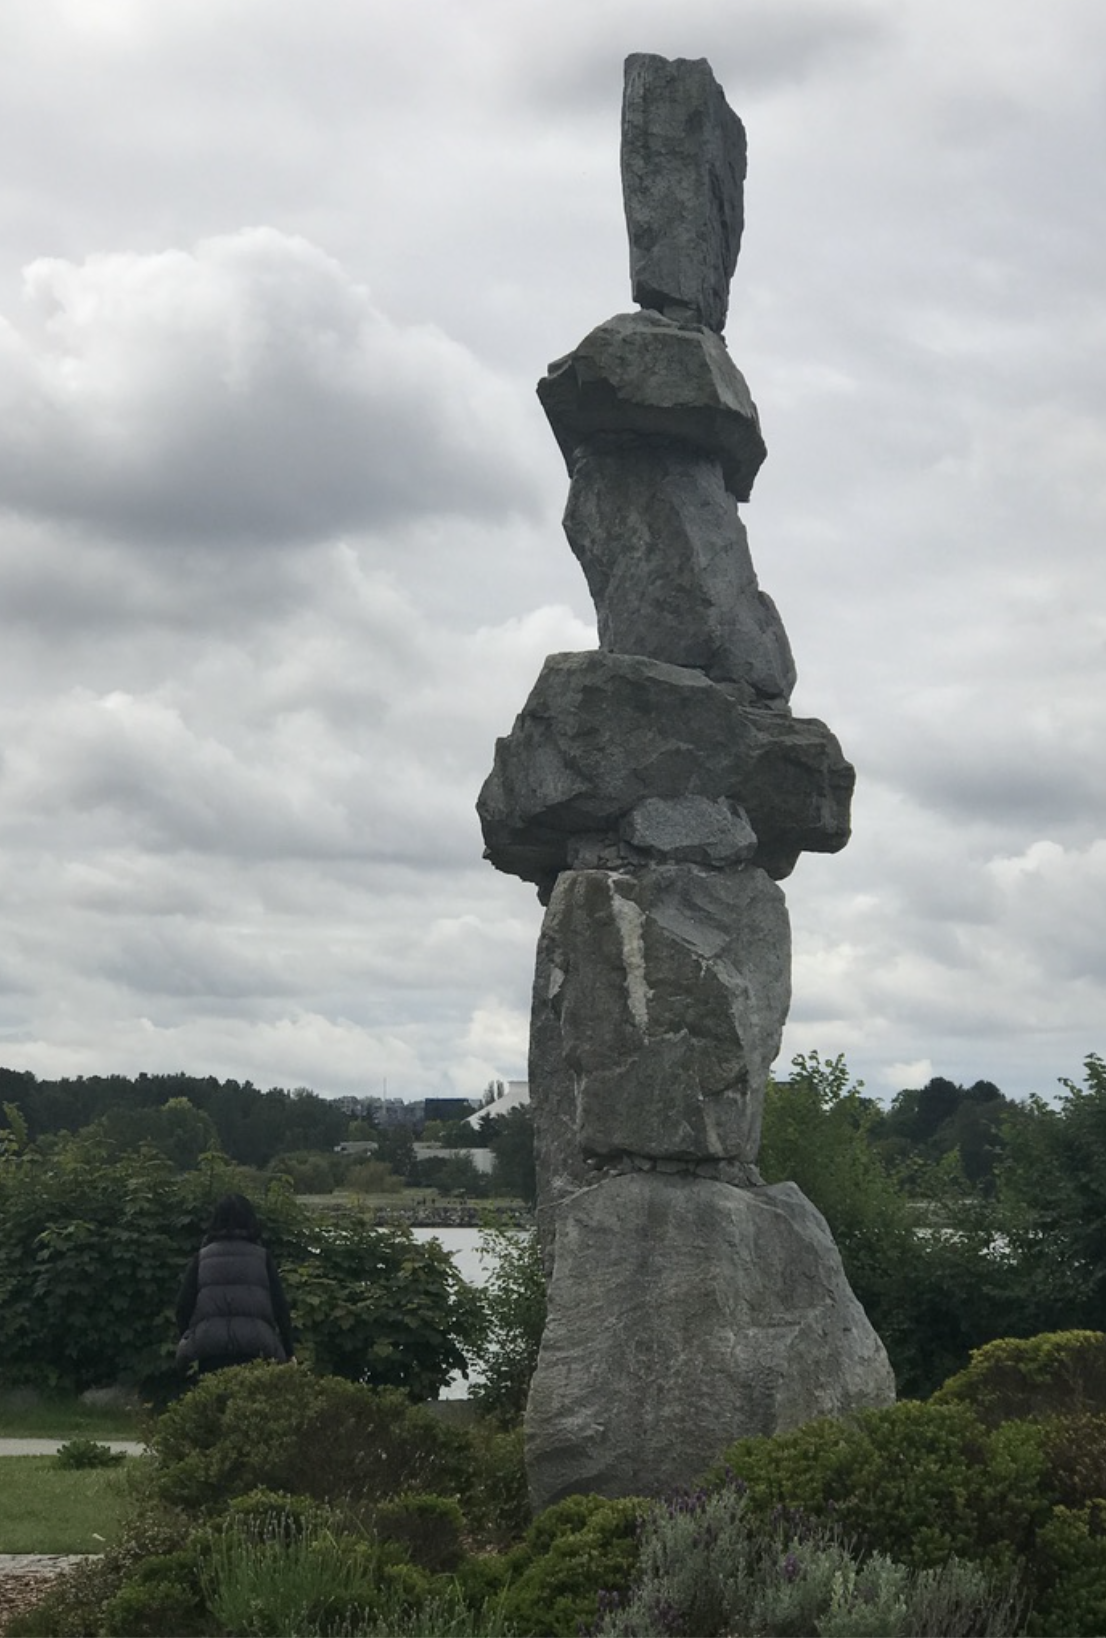
Finally, I moved round to the north facing side (looking south) of the sculpture and drew again the very vertical slimness of this sculpture.

inukshuk-north-face

Photographs

In all I did four full sketches trying to pay close attention to the stone, to the shading under the massive blocks to understanding how these rocks are formed. This time I made sure to take photographs of each of these sides of the sculpture so that I have them when I go home as reference photos.

In the past I’ve been reminiscent doing this and I’ve ended up getting home and not quite having all the images I needed. I also took quite a bit of B-roll video to show you exactly where the sea is. We are right on the coast and that the inukshuk is quite a huge tourist attraction as well.

Studio Sketch

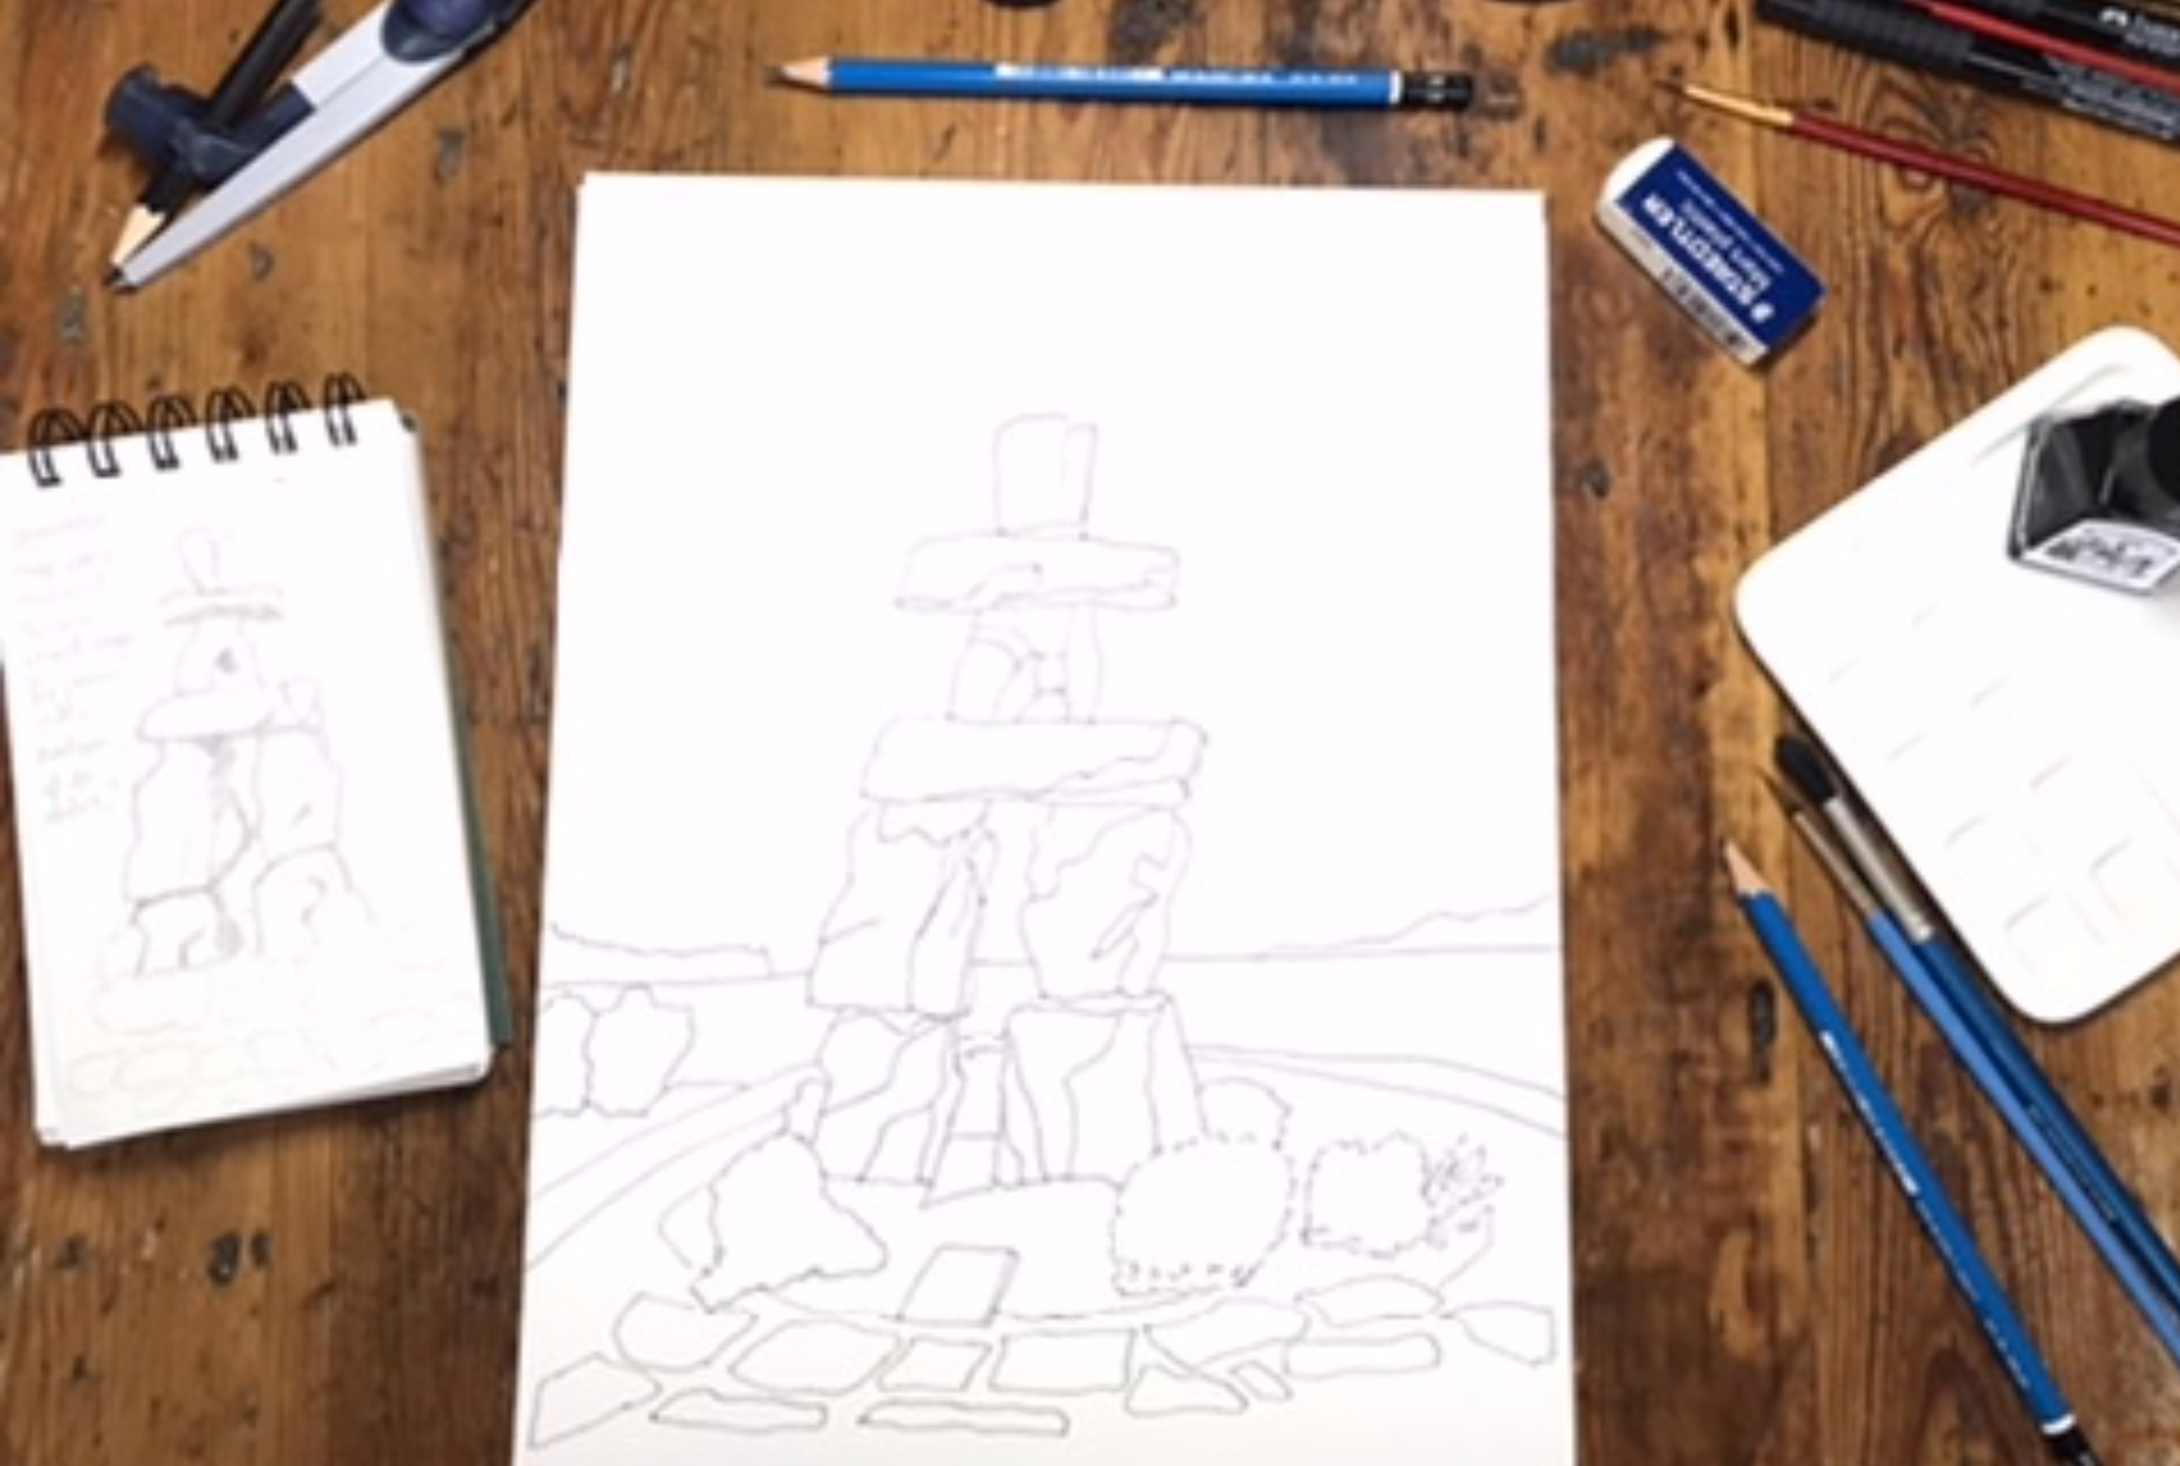
The next day, back in my studio, I got out my sketchbook and lightly sketched out the main image that I wanted to do for this inukshuk. My plan is to draw it in pencil then then pen lines and then use black ink to wash for the grey scales on these stones.

Pencil Sketch

I took a bit of time laying out this drawing because although it’s basically just stones, it was important to get it right because the boulders balance on each other. I spent quite a bit of time doing that and I also put edges on some of the chamfered sides of these massive stones.

I added a little bit of the garden below the sculpture to give it some context and form within the page. I then decided to add the sea behind it, because it basically is a naturescape and that’s what I’m going for here.

inukshuk-pencil-sketch

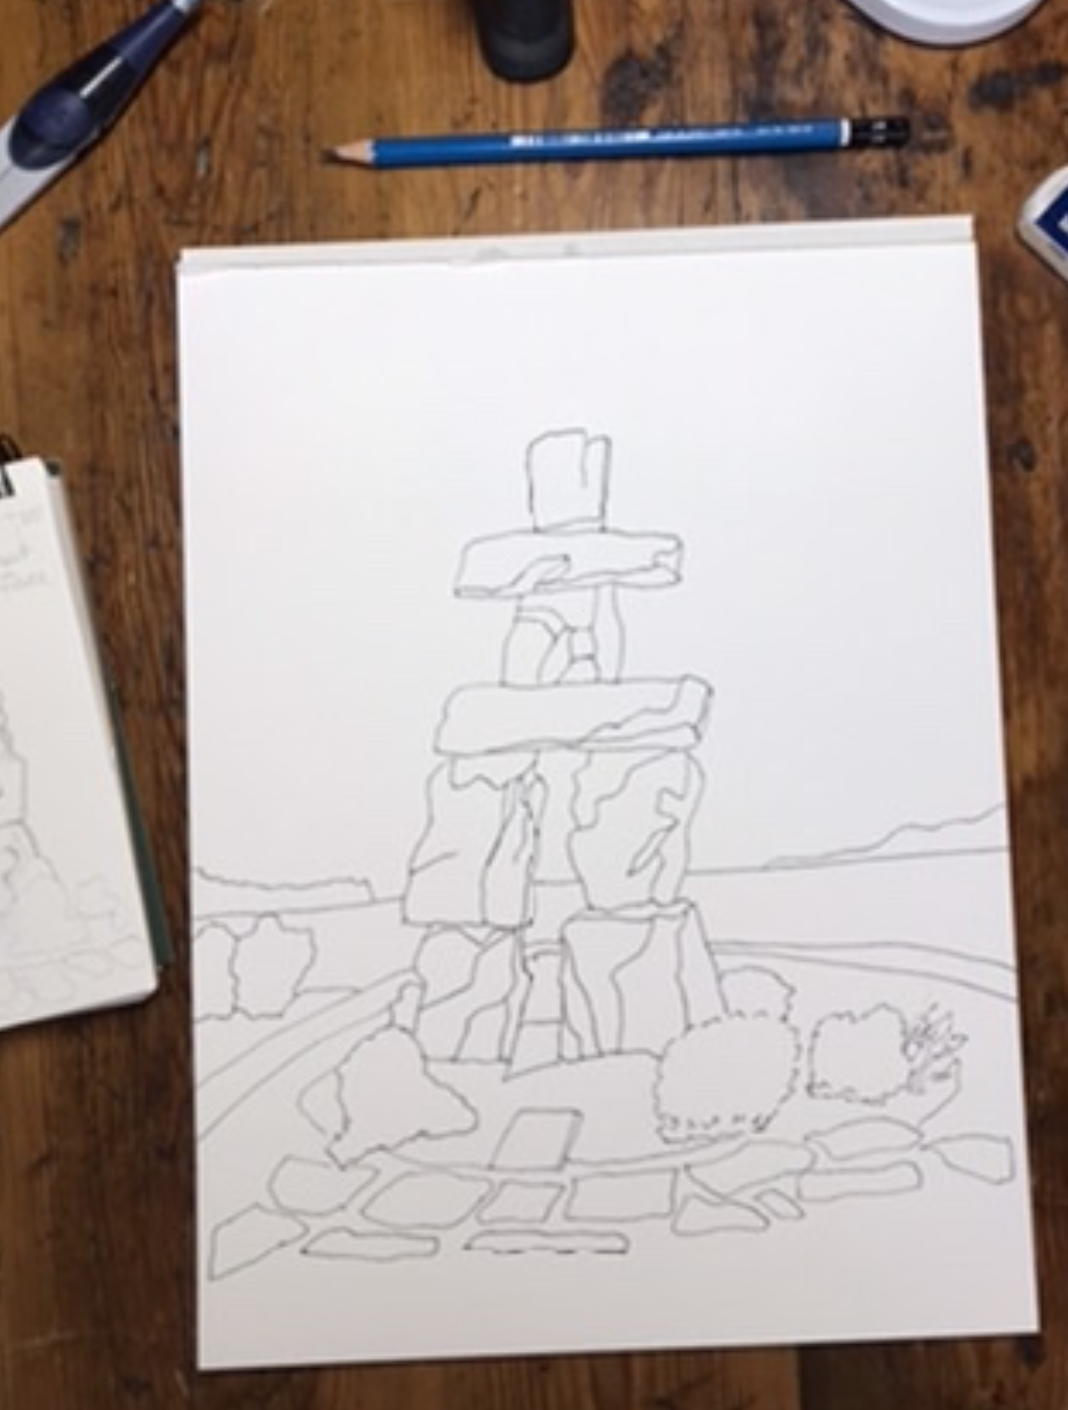
Black Outlines

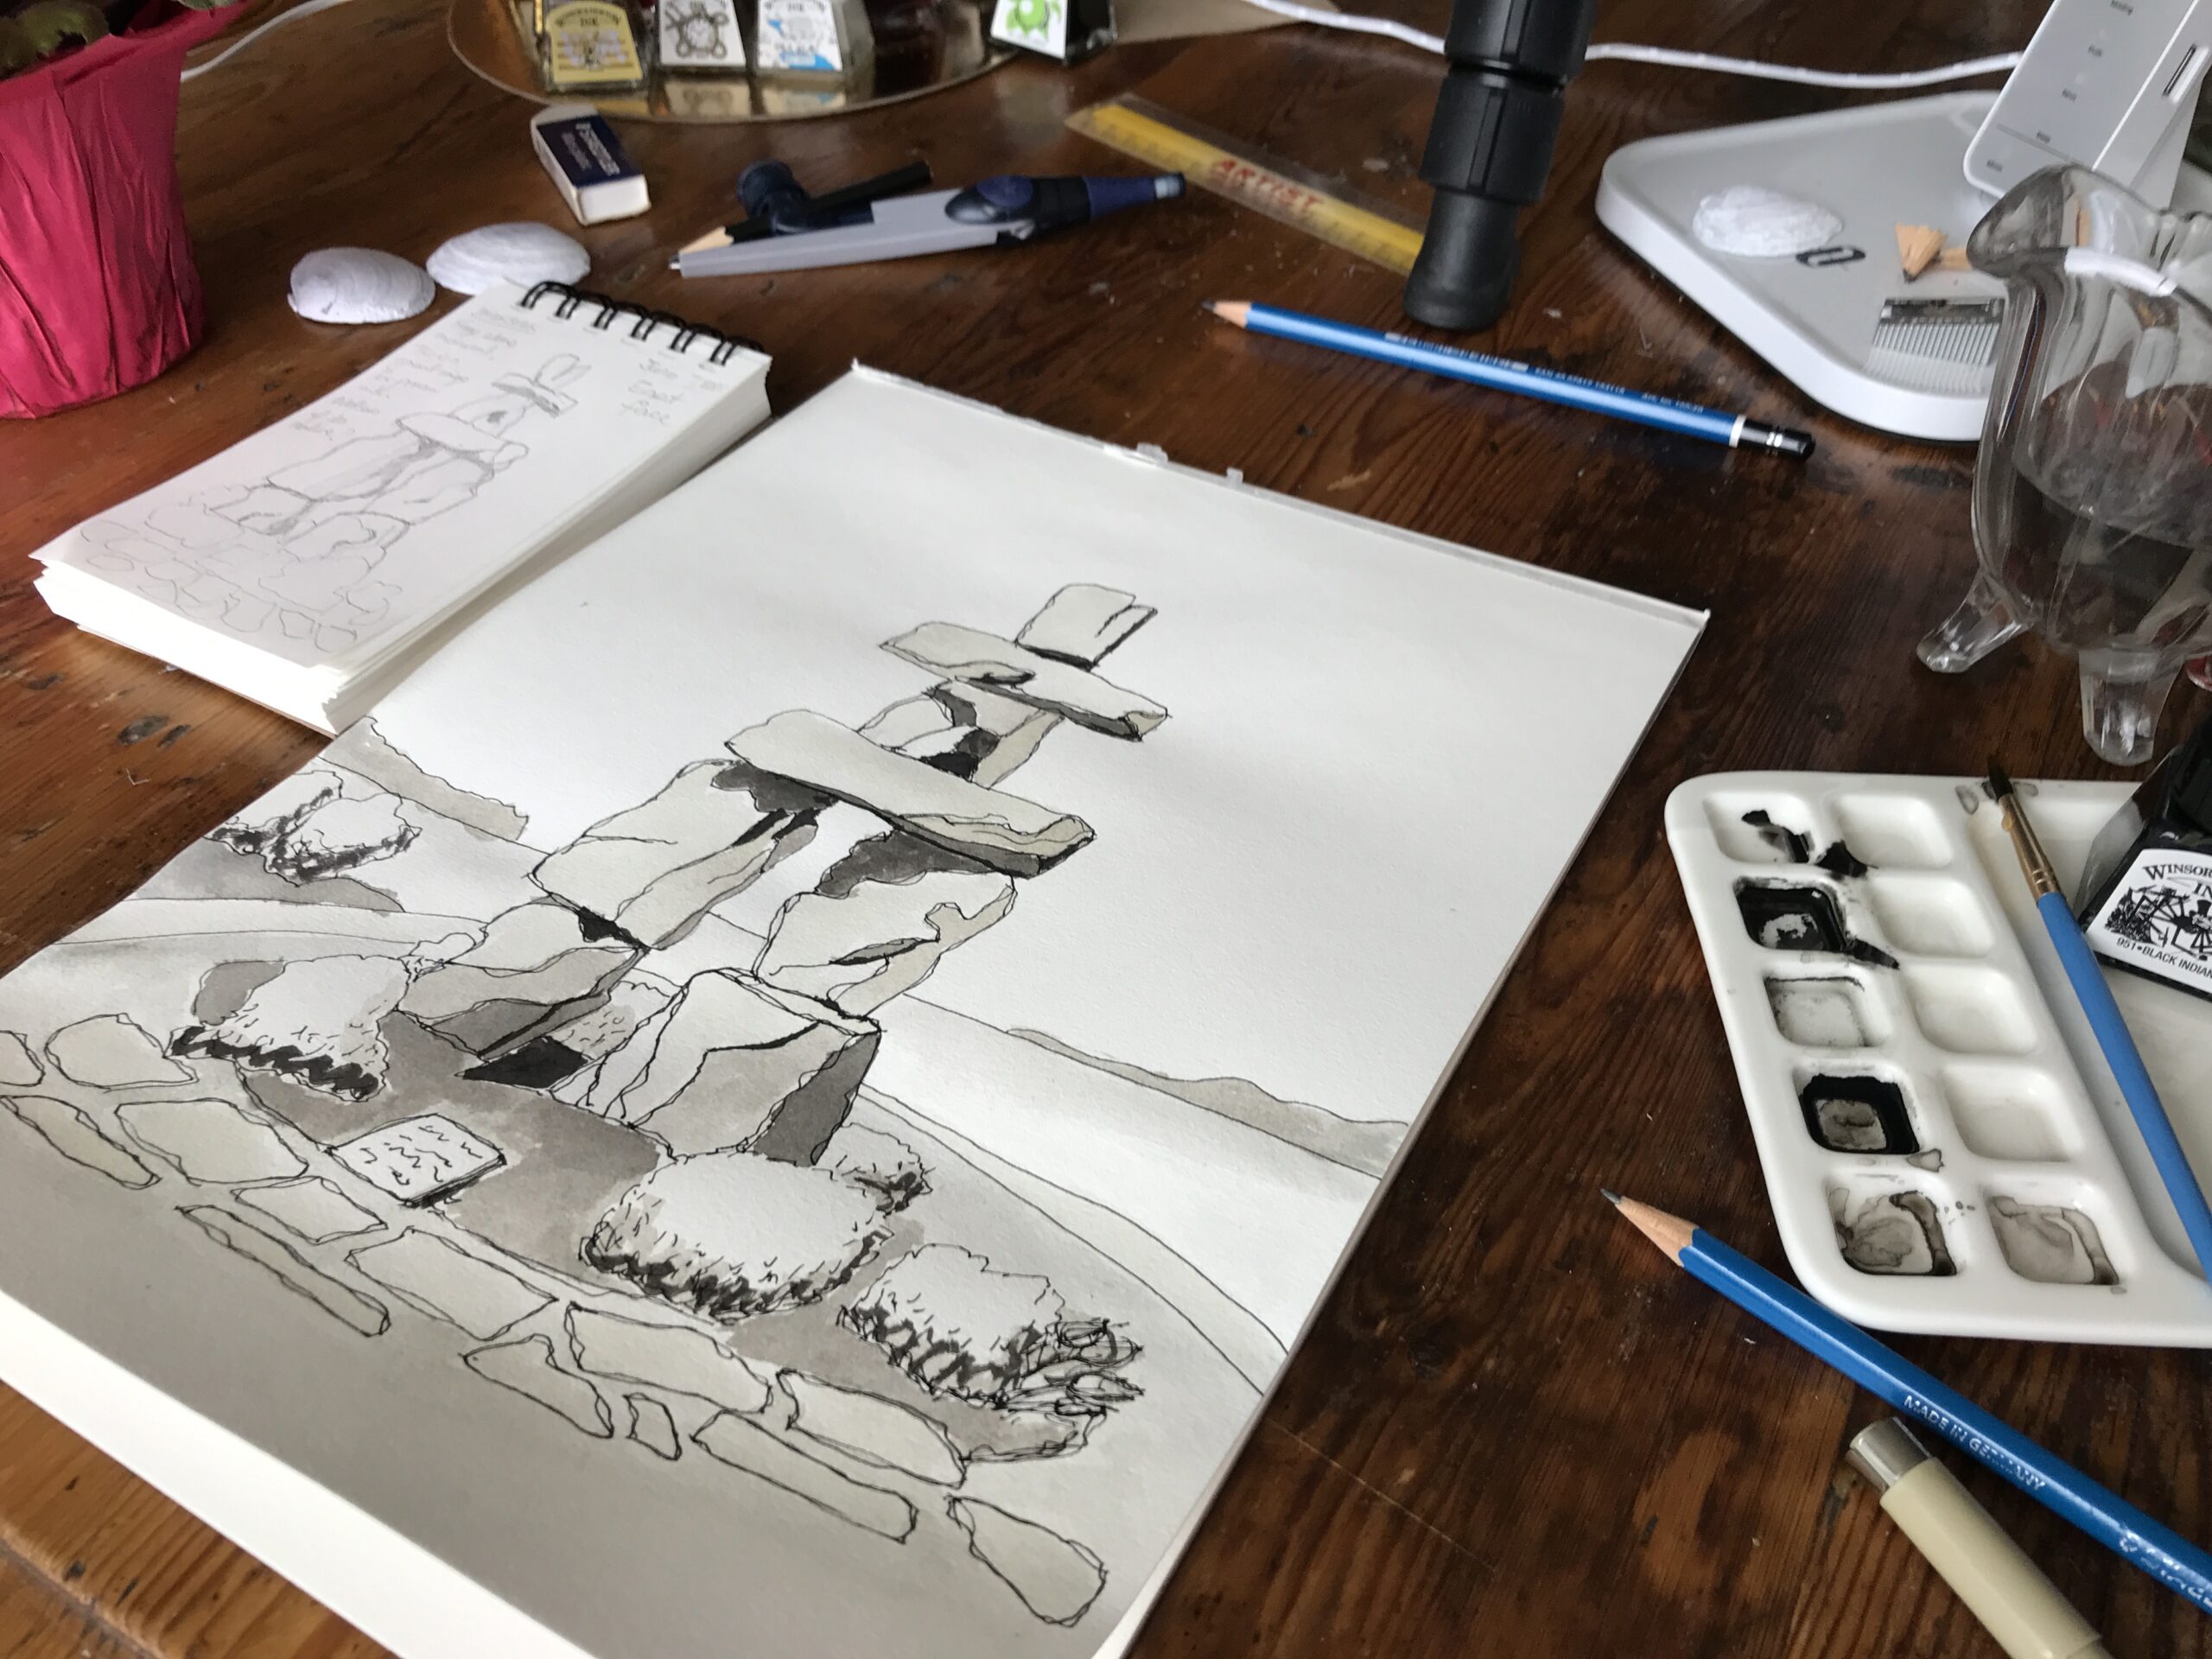
I took my 0.3mm black pen and went over the main outside lines of this drawing. I took my time here and tried to get it as accurate as I could as this will form the structure of this drawing.

When I was happy with the outlines, I took an eraser and removed all of the pencil lines. You must eliminate the pencil lines because once you put the ink wash on it can’t be removed.

inukshuk-black-outlines

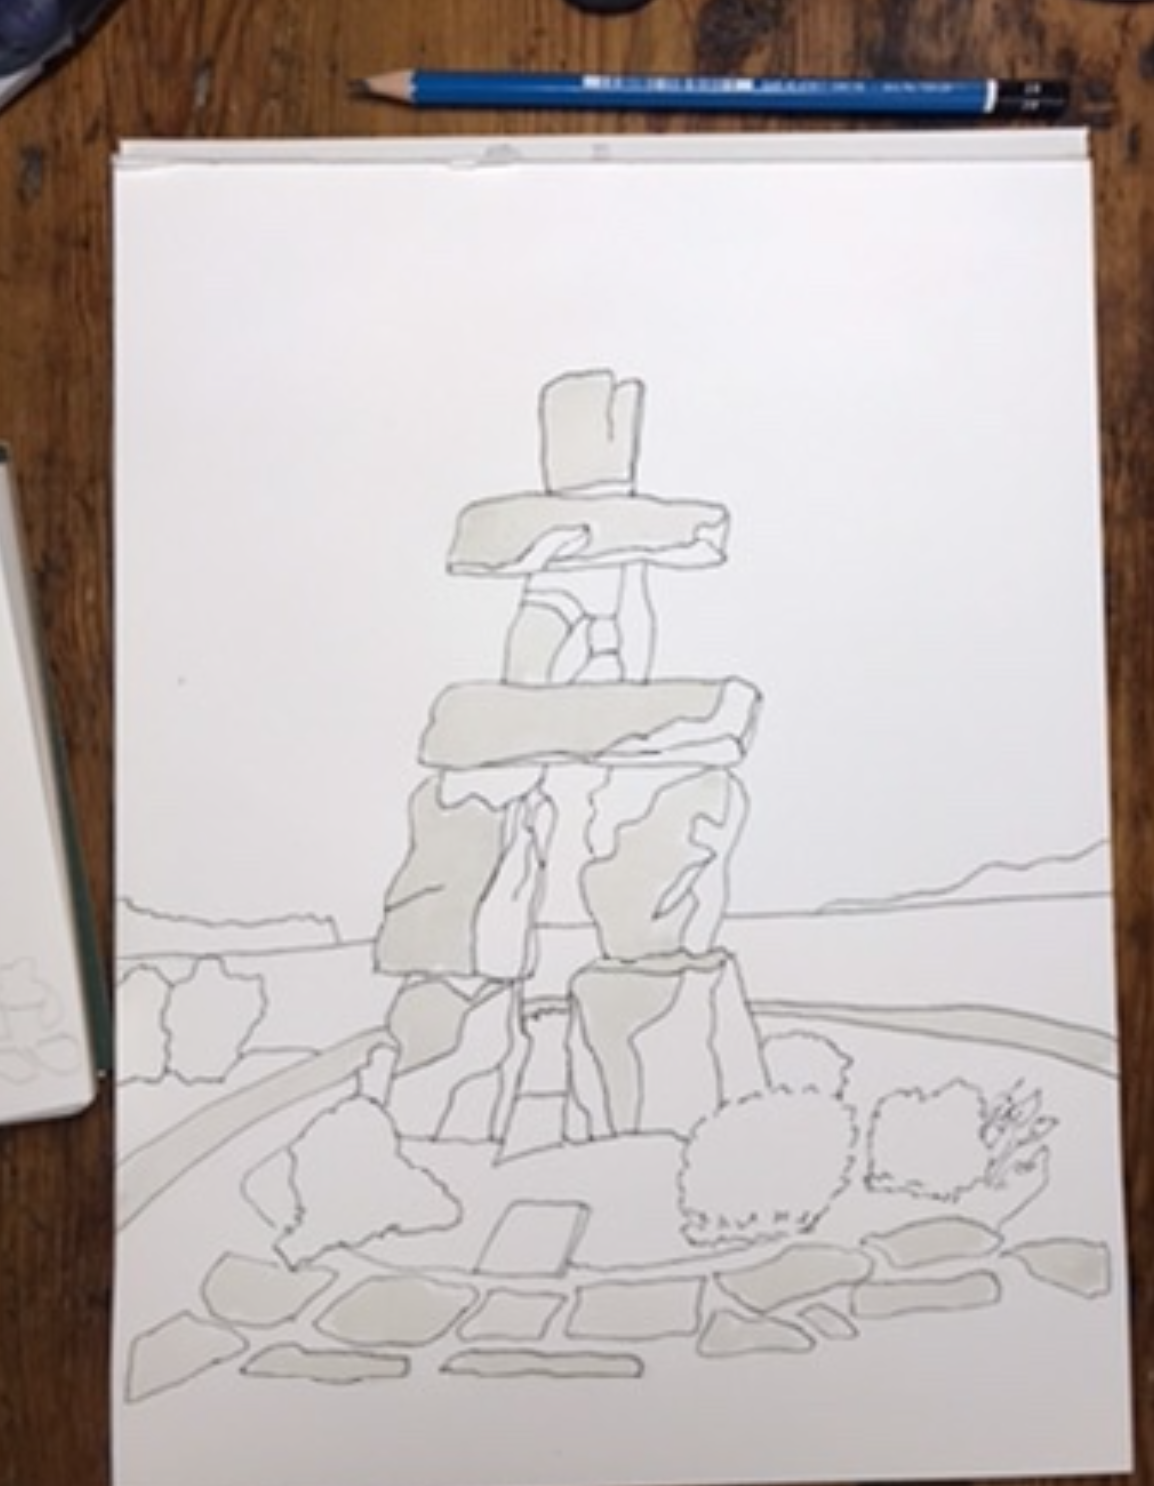
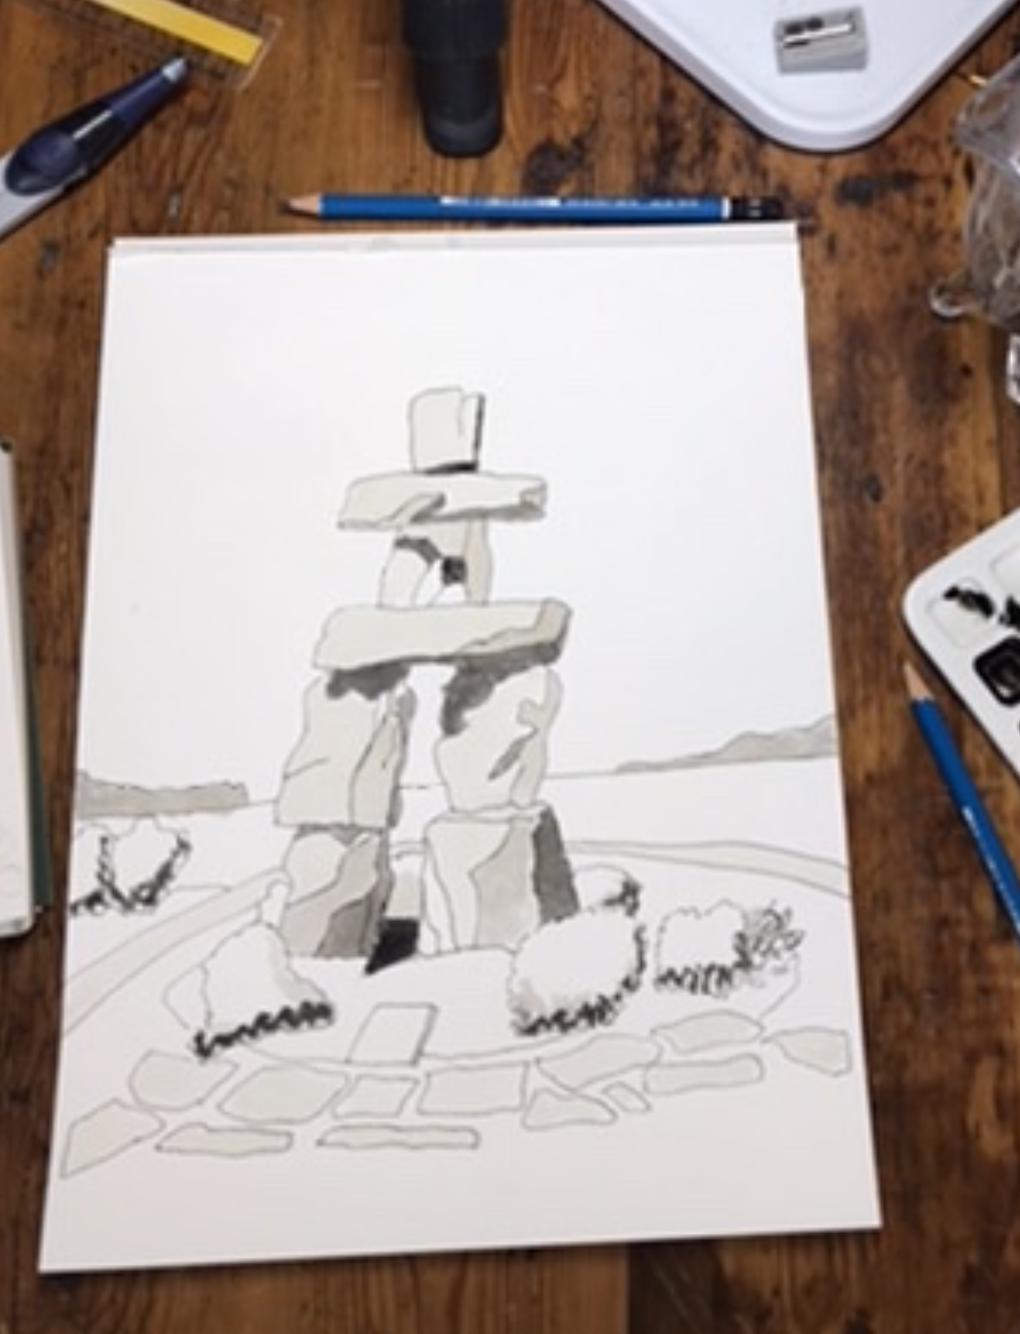
Ink Wash

I use Winsor and Newton black Indian ink which is both permanent and waterproof. In my palette I’ve got the main black ink in the one well and then the well below has water.

I’m trying to mix it two parts water to one part ink, so one drop of ink to two drops of water to make a light grey. I go down thinning and thinning and filling the wells until I’ve got the very lightest grey at the bottom.

My plan here is to put the lightest ink on the page first and then work up to the darker inks. The reason you want to do the lighter inks first is because ink is unforgiving, and you cannot lighten afterwards but you can always darken. This is something I’ve learned so there’s a tip for you.

inukshuk-ink-wash

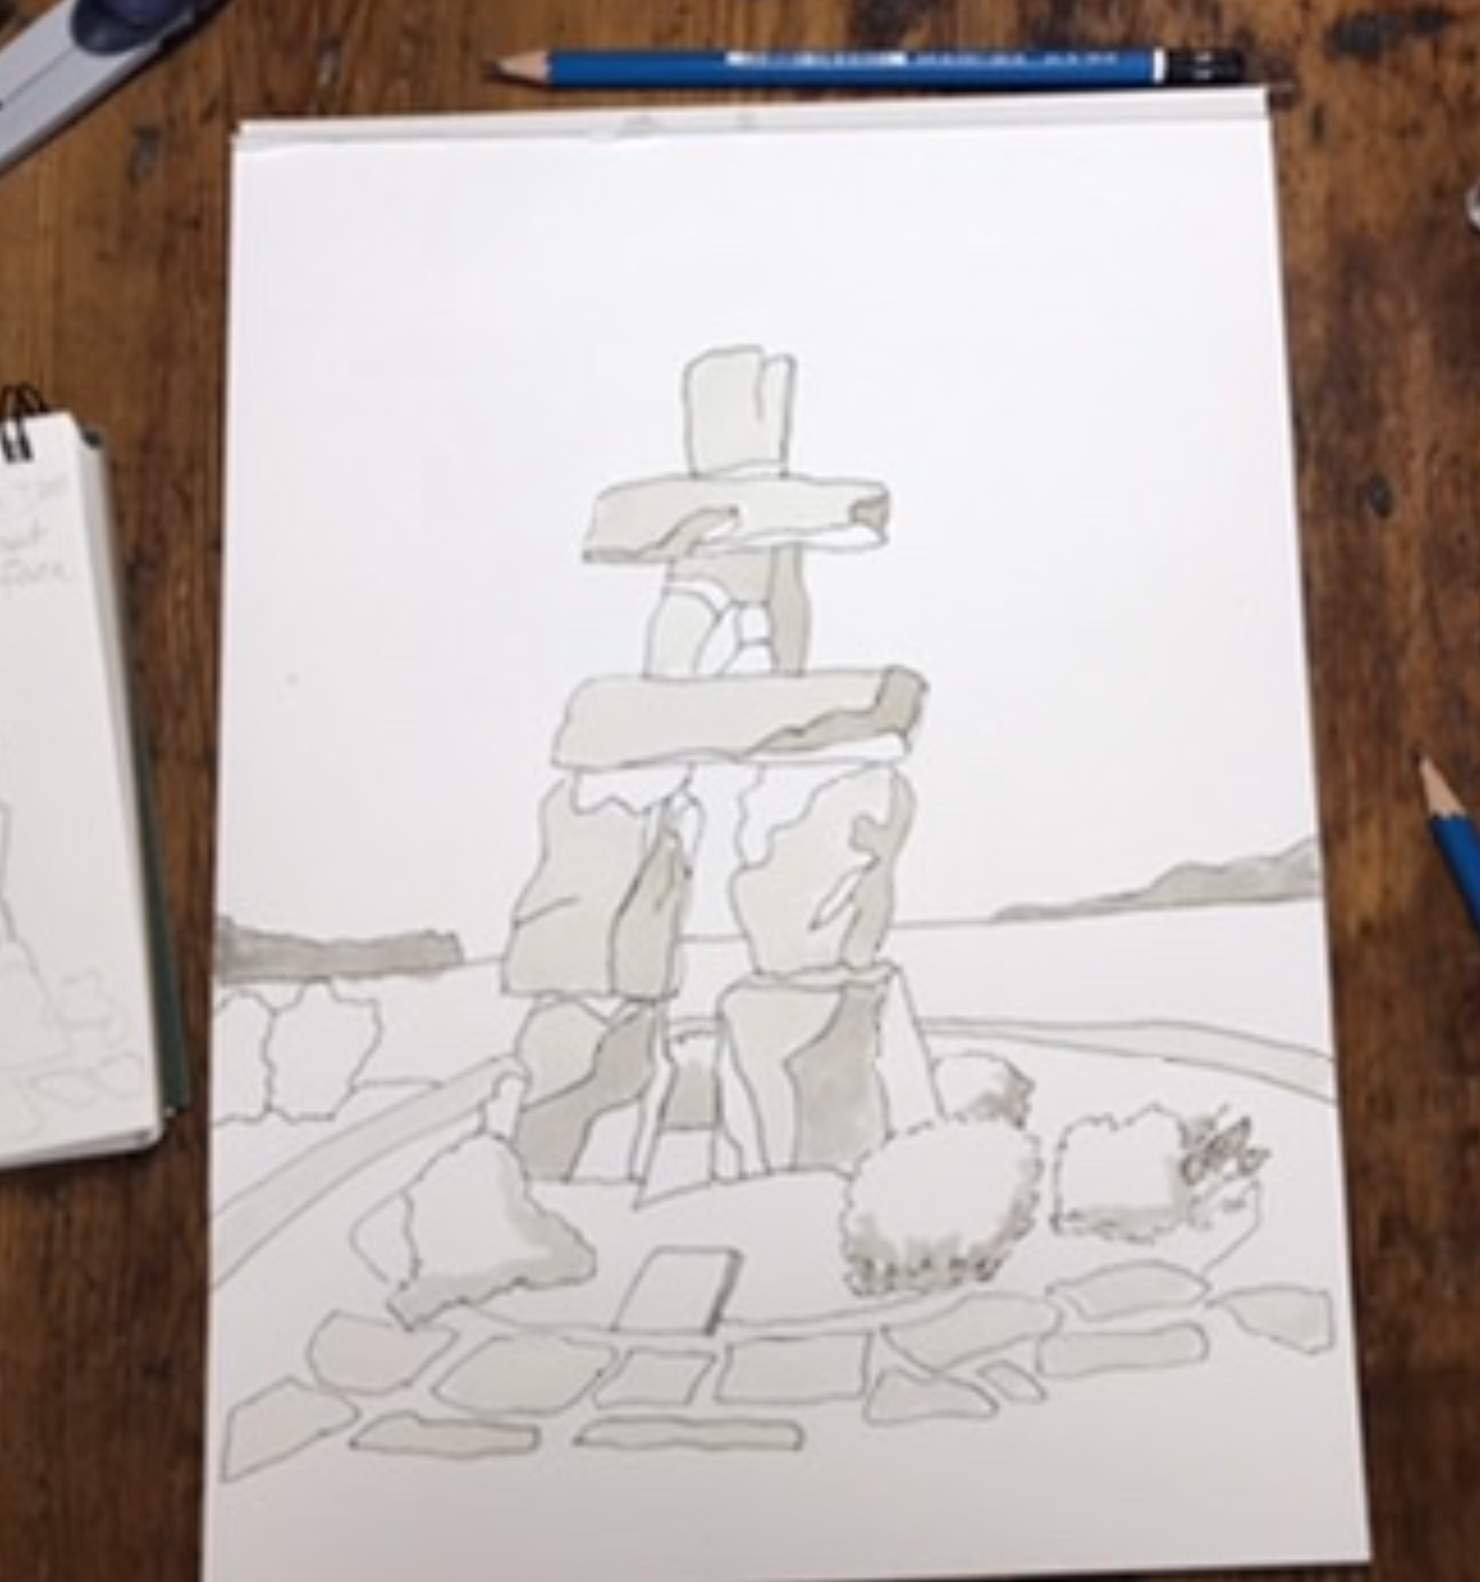
Mid Grey

I moved onto my next lightest grey and added some shades and shadows to the stonework. I continued on slowly and carefully building up the grey stone to the darkest shadows. I didn’t use plain black on these deep shadows. I diluted dark grey from the black ink.

inukshuk-mid-grey

Dark Grey

Between each of the different shades of grey I let the ink dry thoroughly. I made sure to have a very thin paintbrush because I did want to have good control over the ink on this drawing. In the past the ink has run away from me and I was trying to avoid that.

inukshuk-dark-grey

Gardens

To colour in the greenery in the gardens below this statue, I mixed some super light grey. I painted some of the bushes with this colour. For the shade under I added an absolute dash of black to give a darker colour to these bushes.

The Sea and Sky

For the sea I took even lighter grey and watered it down to give a light wash depicting the sea. I left the very pale sky as the white paper.

Black Pen

I went back over and added some extra black pen where I felt it was required it just to sharpen up the image. I signed it in the bottom right-hand corner with the pen. I was using watercolor paper, however, it still did buckle, so I will put it under some heavy books to flatten it out.

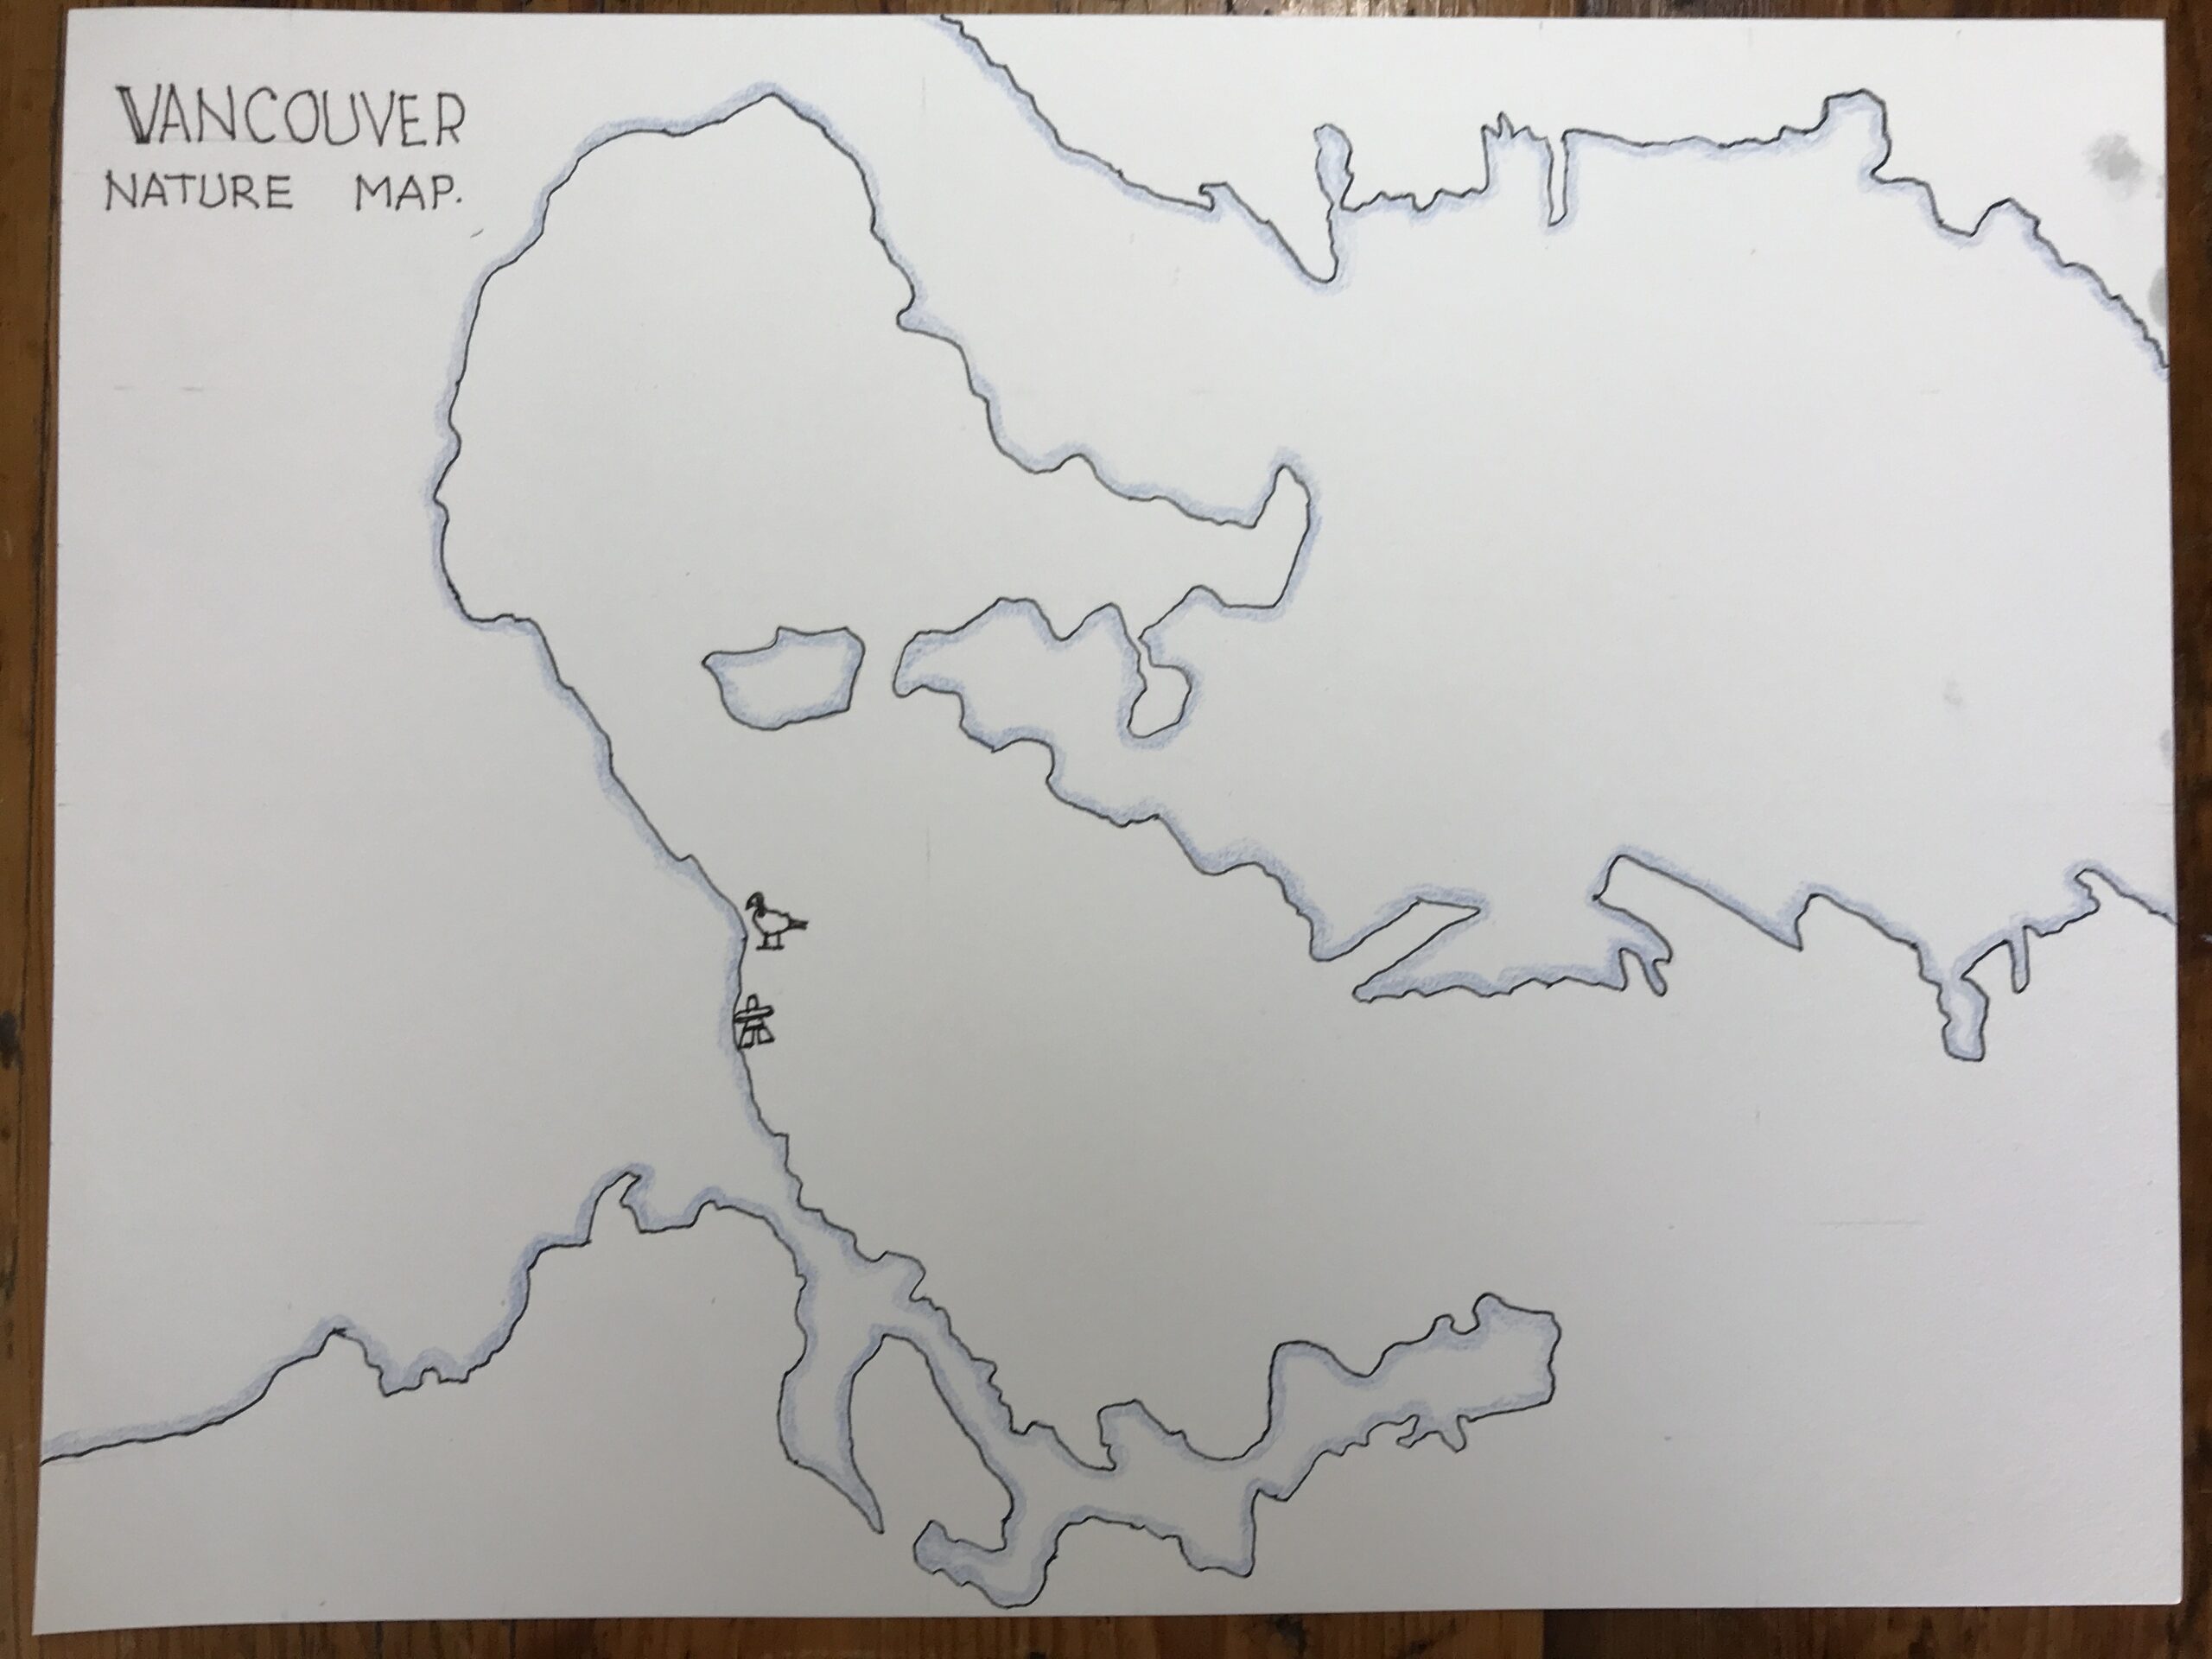
Vancouver Nature Map

I created my Vancouver Nature Map to show where I was when I made the sketches in my Perpetual Nature Journal. This time I was further down the coast from the Canada Geese from last time. In time, I hope It becomes a record of my nature journaling in my local area.

Alison Hazel

Author Bio: Alison Hazel

Alison Hazel is a hobby artist and she shares her ongoing journey about becoming an artist later in life. She creates simple art that anyone can make. She hopes to inspire you to reach your creative potential in the area that suits you.

Read more about Alison’s story.

Send Alison a quick message.

No Results Found

The page you requested could not be found. Try refining your search, or use the navigation above to locate the post.

Sketchbook African Violet Ink Wash

Sketchbook African Violet Ink Wash

Sketching

This weekend I had planned to go to the beach.

It’s a short bus ride from my home and very pleasant to spend time there on one of my precious days off.

Unfortunately, it continued to rain which seemed to be set in for the whole day.

My original idea was to go to the coast and do some sketching of the shore, the seaside, and seascapes.

I’m particularly interested in the pebbles and what is brought up on the beach by the high tide.

Objects such as shells and seaweed are always interesting things to draw.

However, I decided to stay at home because of the incessant downpour.

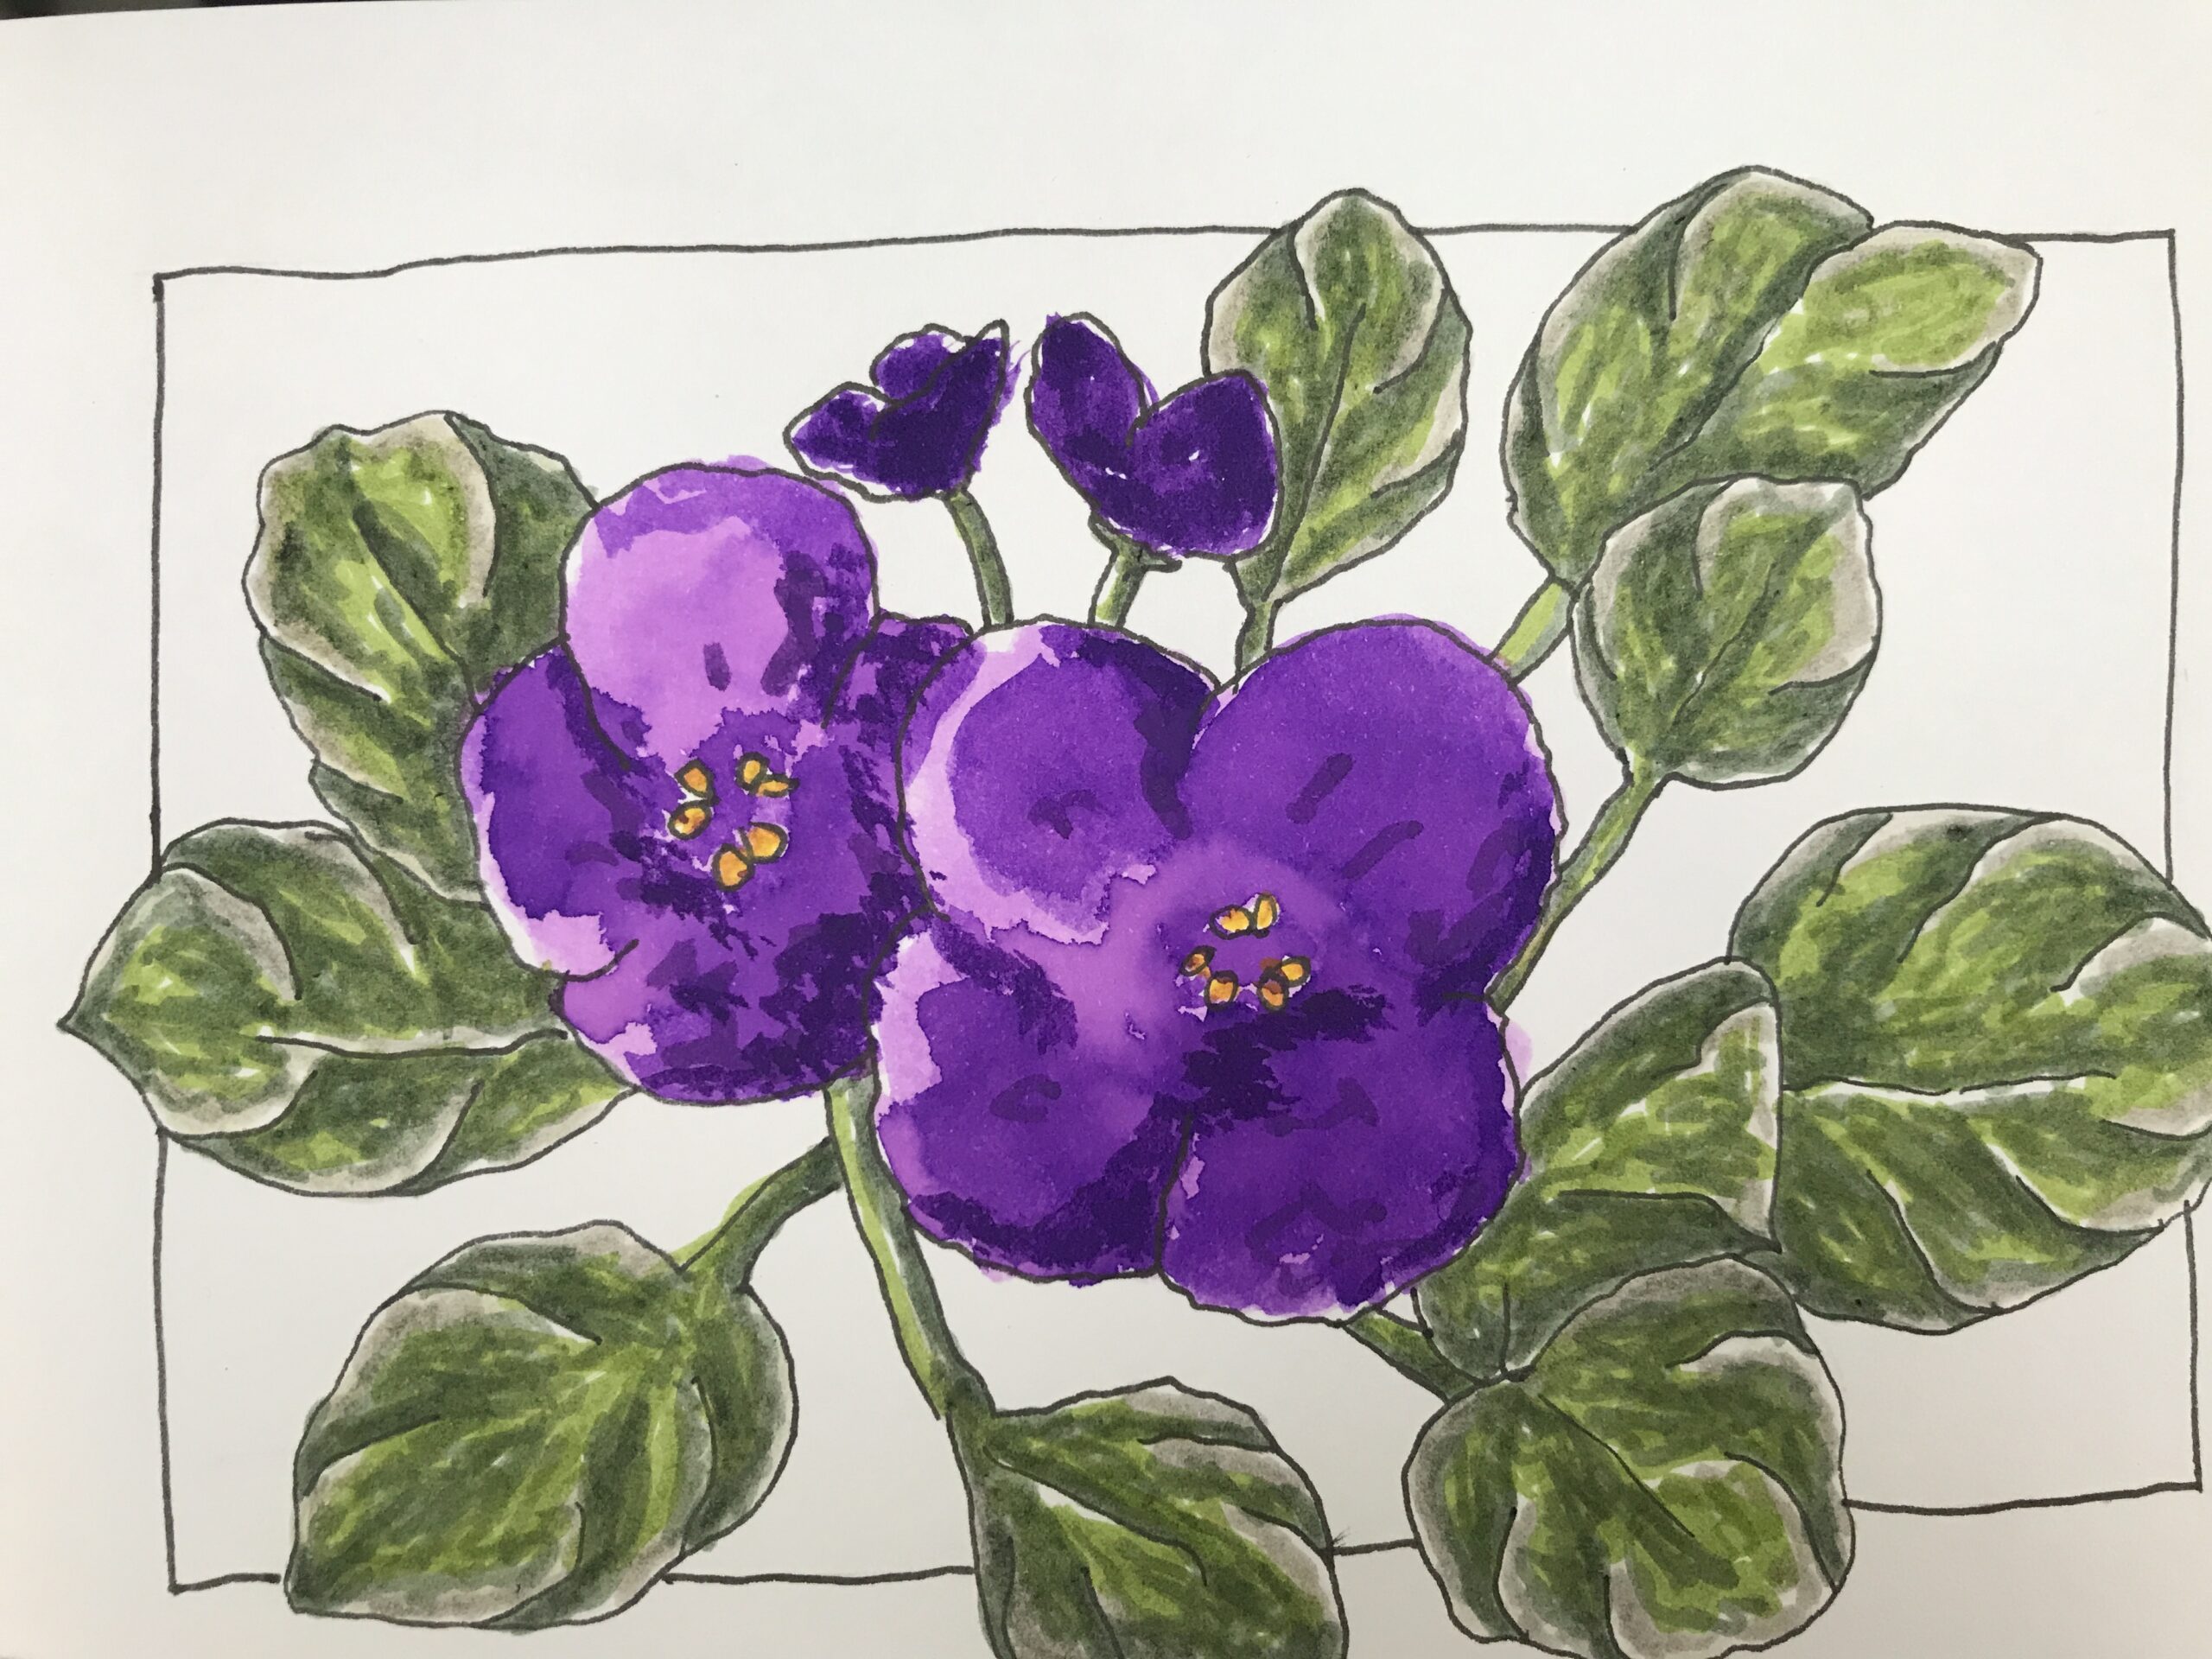
African Violet

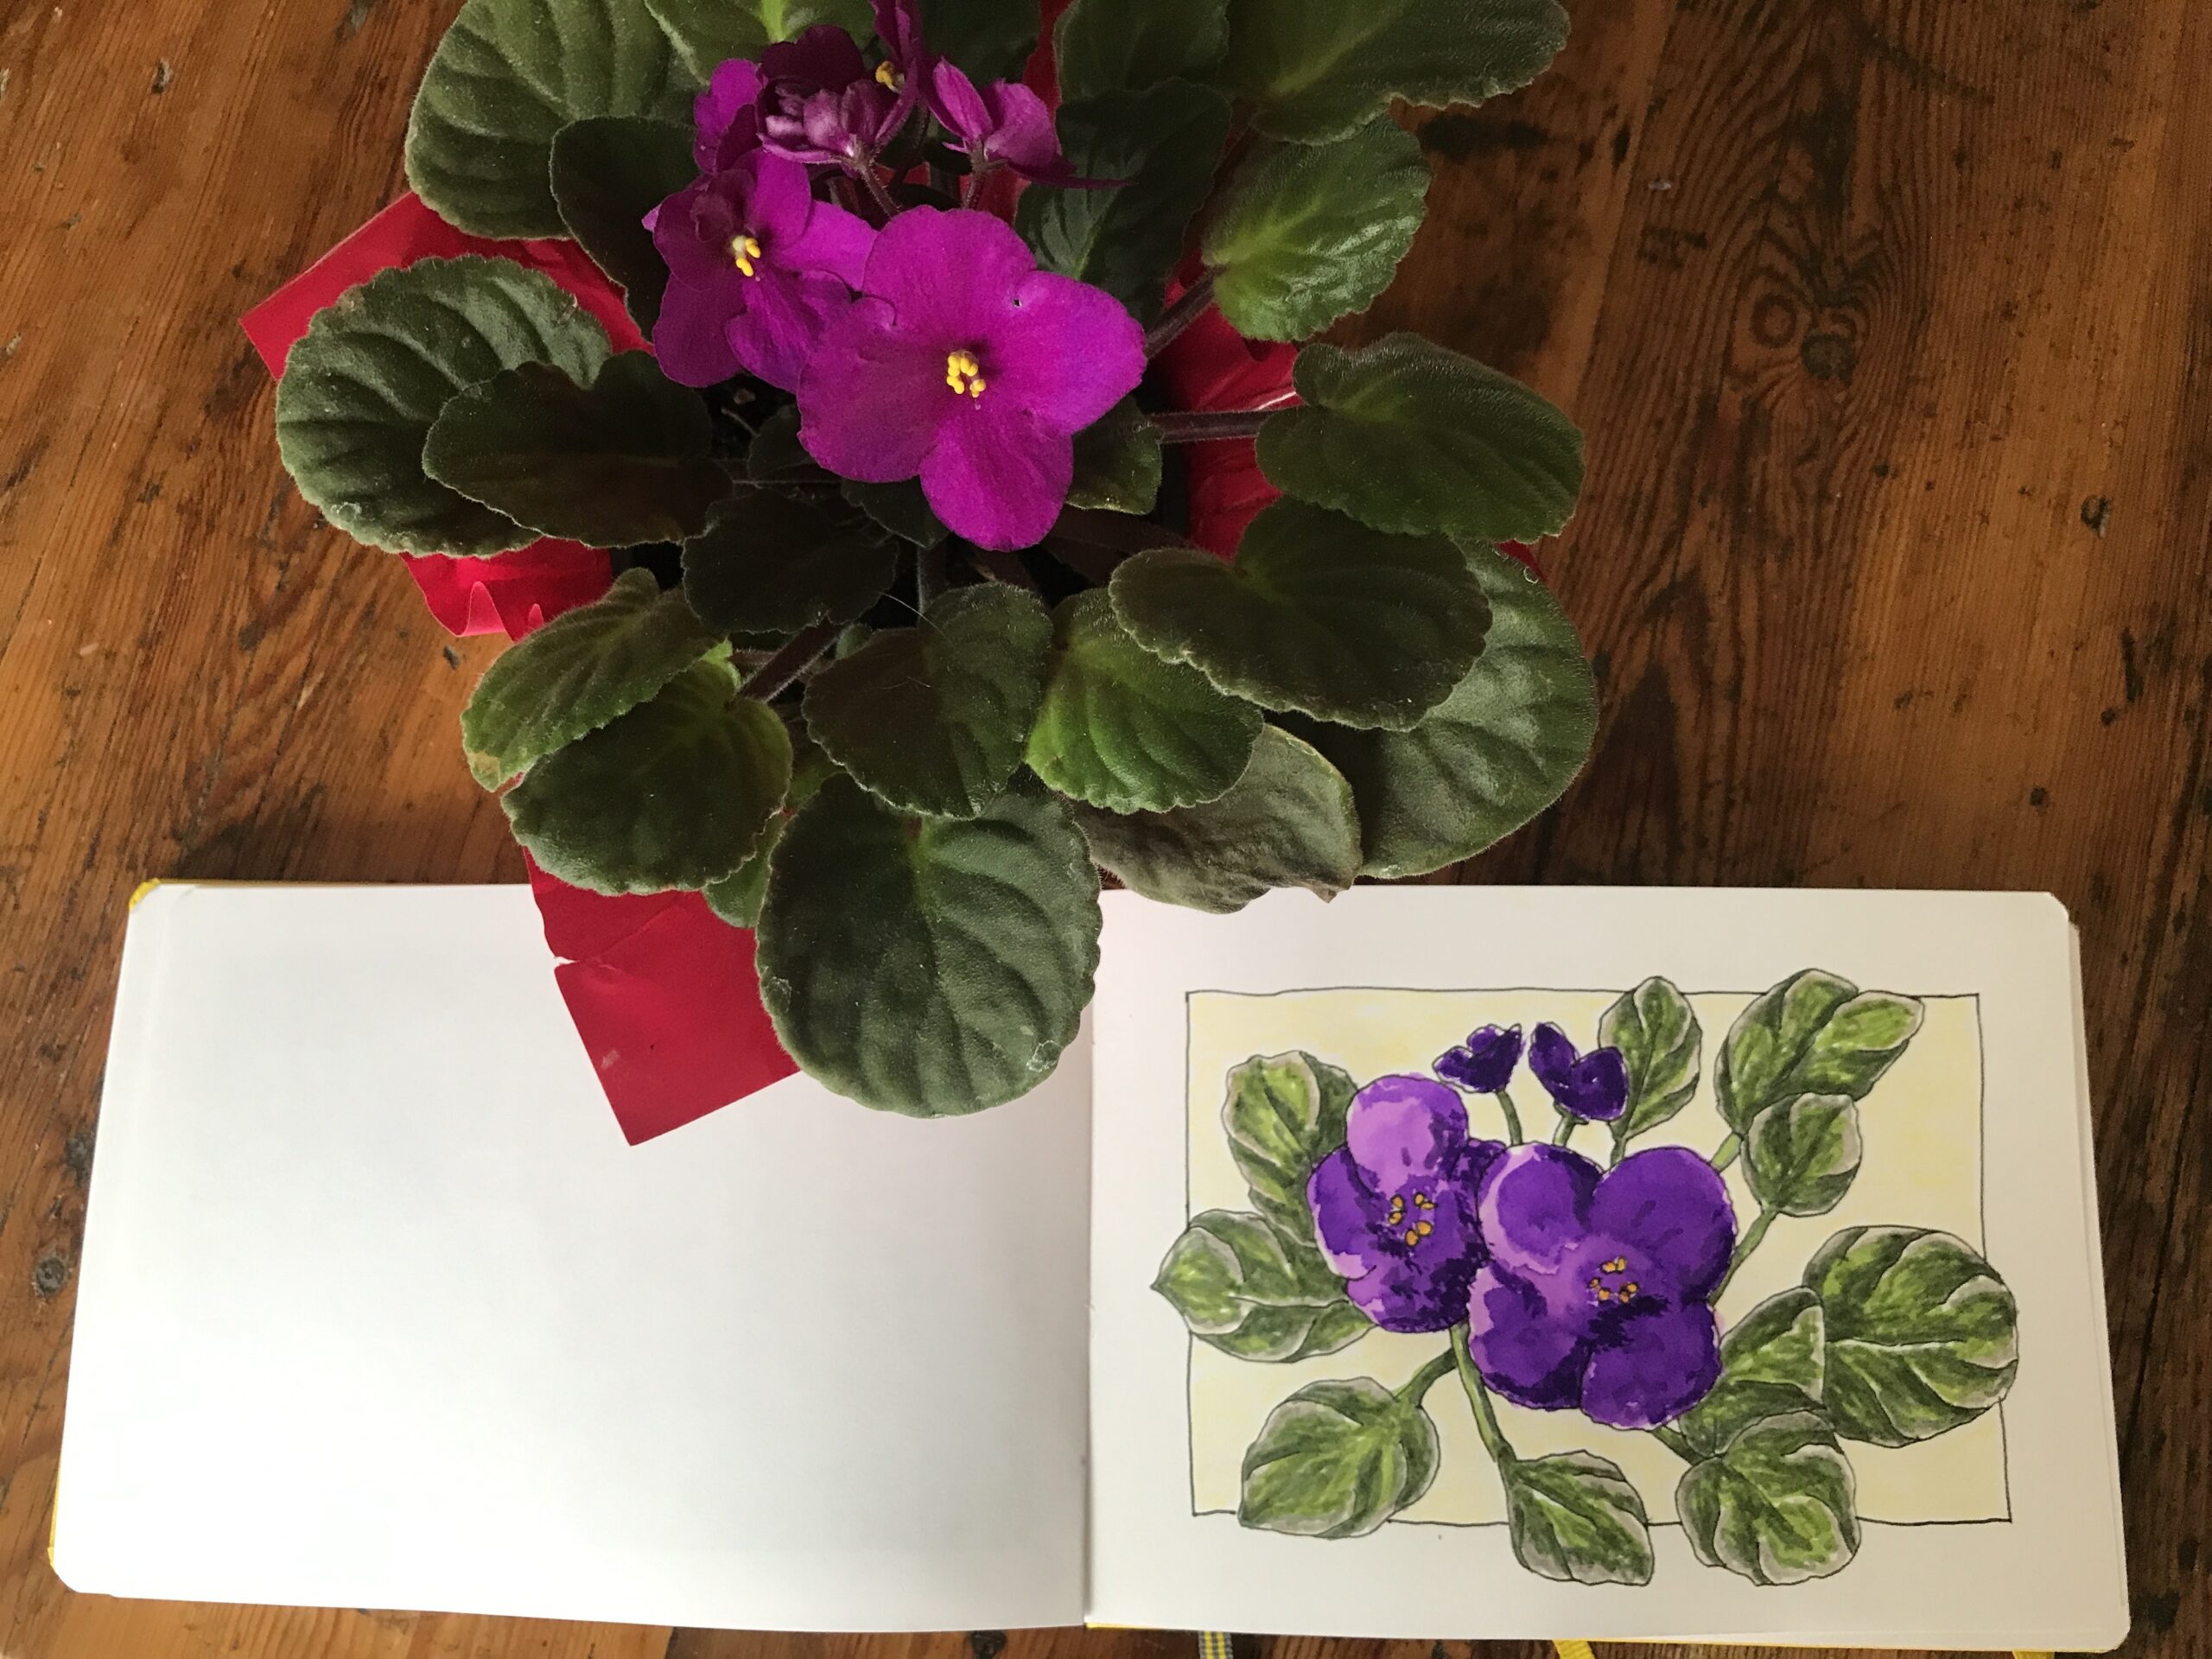
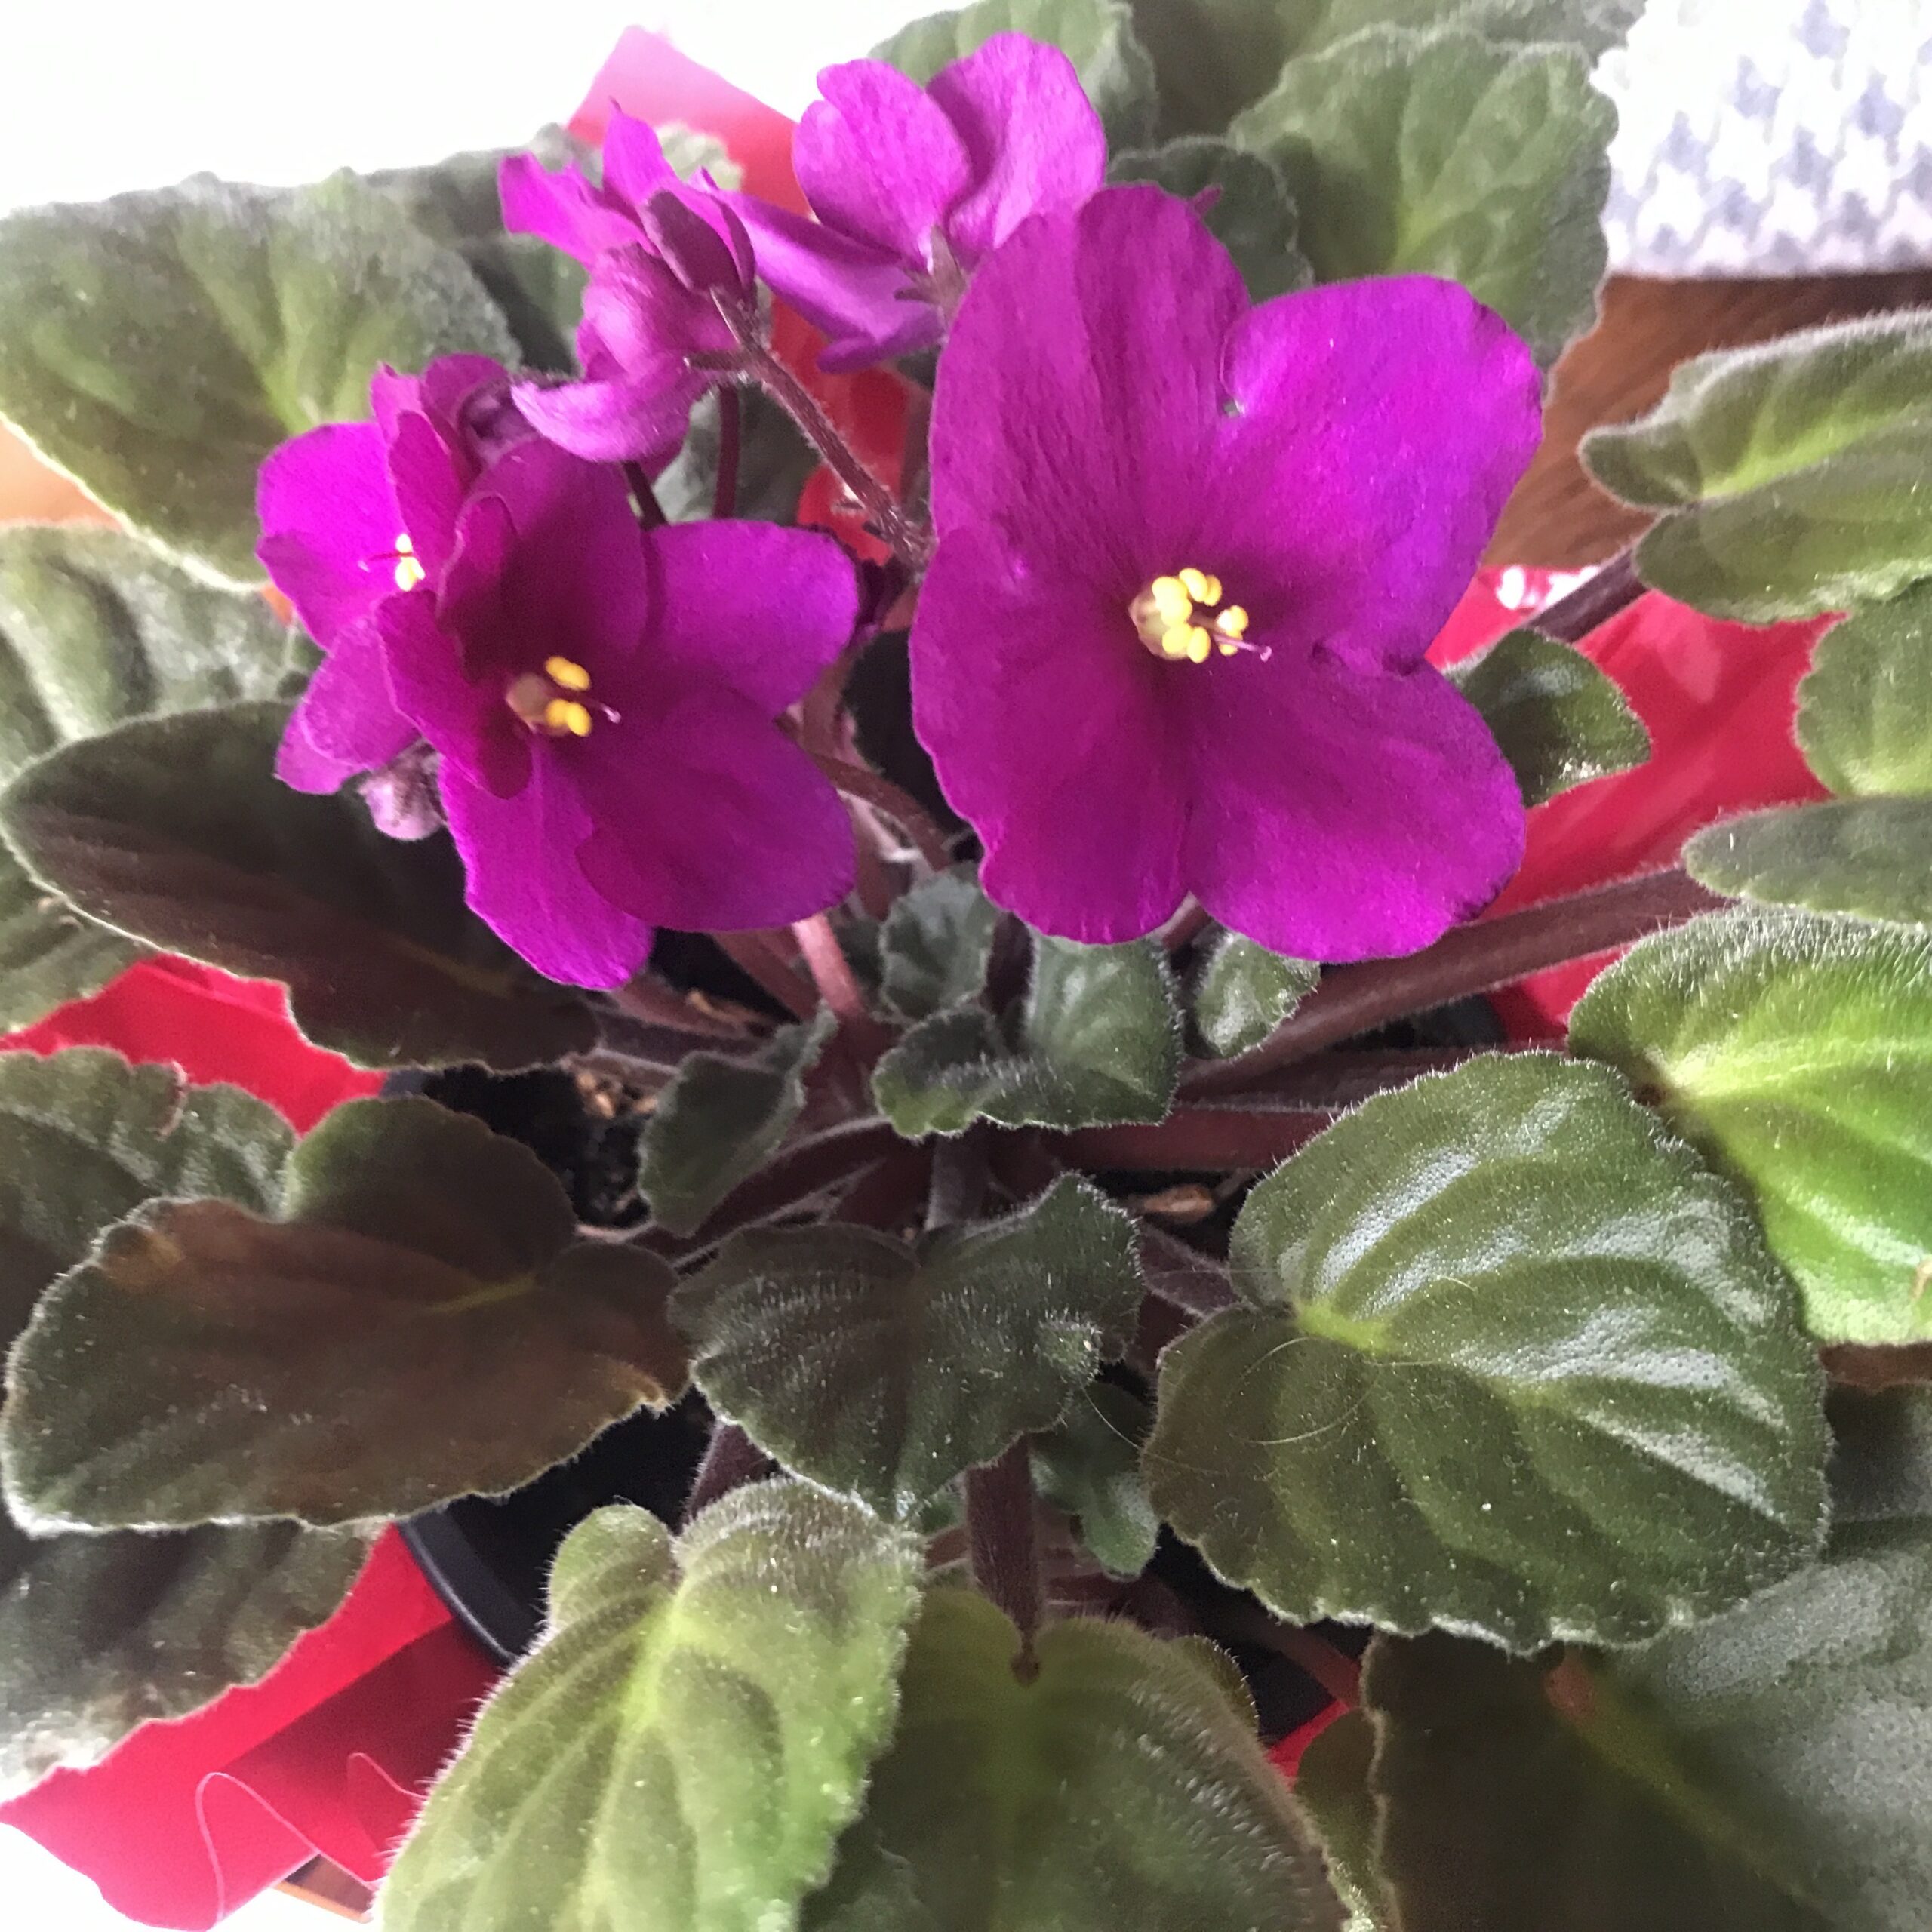
I have a little African Violet plant that I received around Christmas when it was first in bloom.

I’ve managed to keep this plant alive and even though the first flowers faded and went.

Now five months later in May I finally have the second bloom of glorious violet flowers.

The houseplant is quite a bit bigger now and the petals are larger and more prolific.

I decided that this little plant would be my nature sketch for today which I will do at home in my creator studio.

Not being able to visit the beach to do some sketching this weekend home sketching is the compromise.

Border

In my Leuchtturm A5 sketchbook, I start with a border on my page, even if I don’t stick to it, because it does help to align the image.

Pencil Sketch

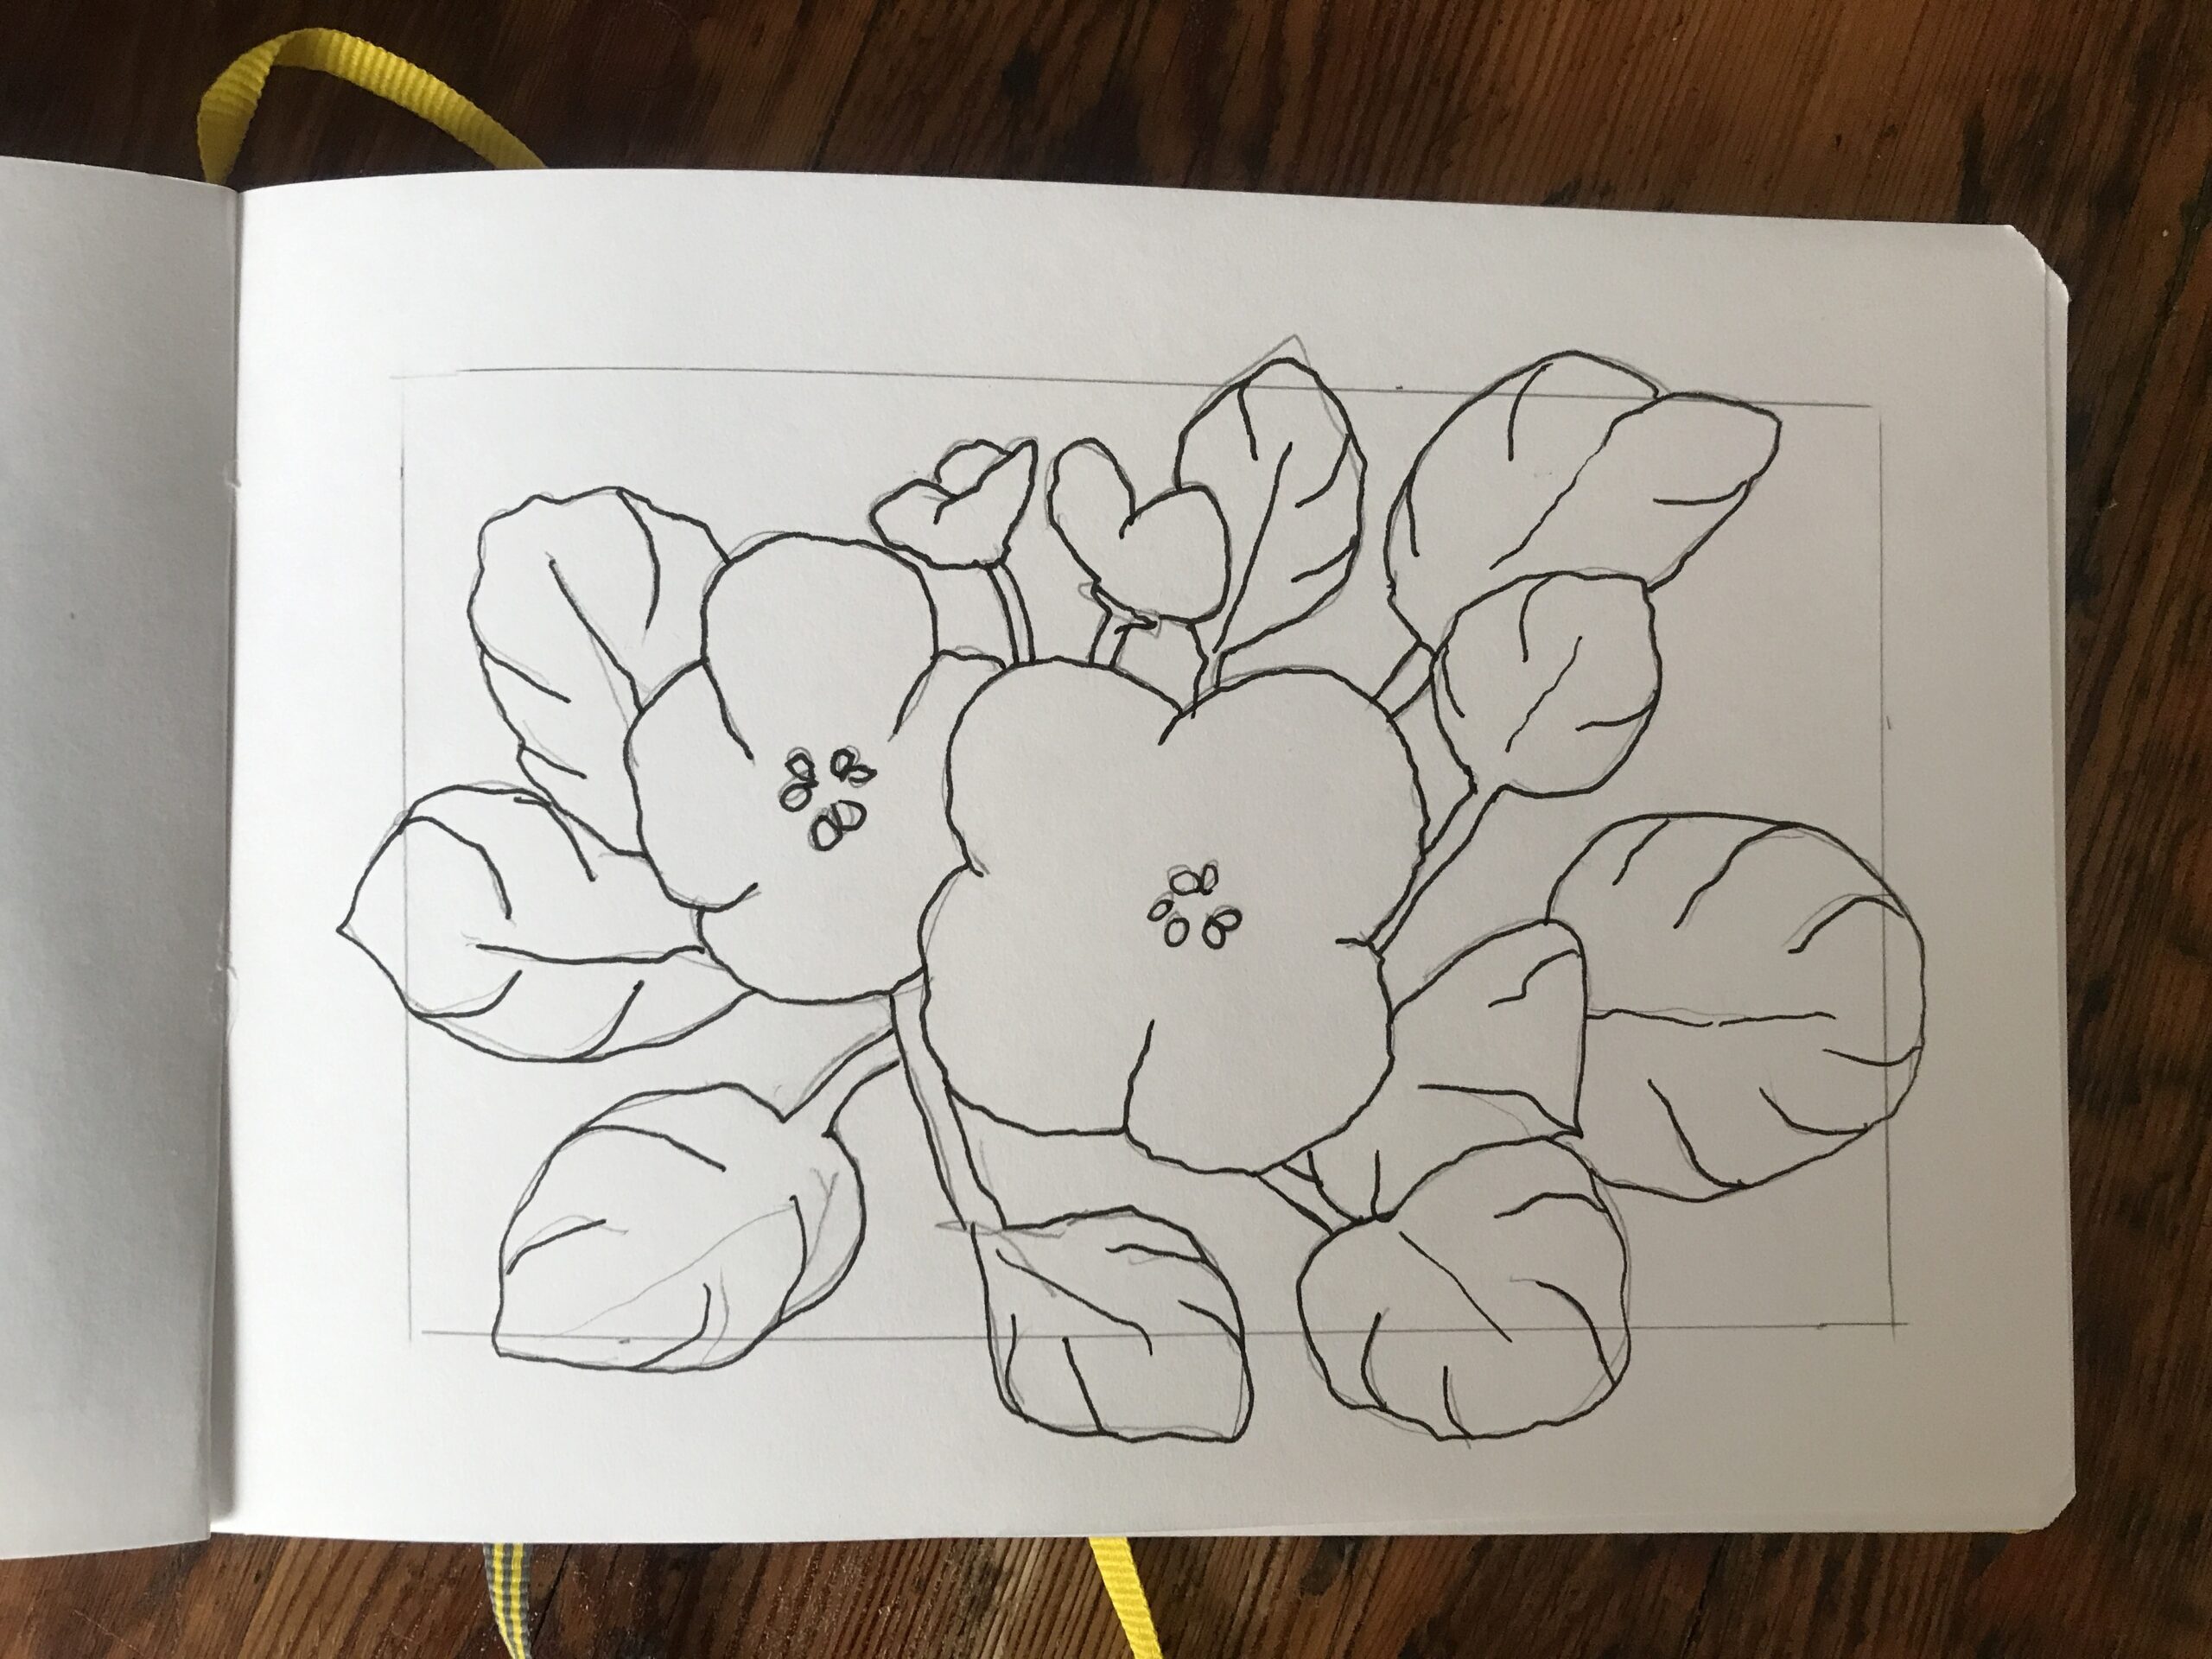
Using a 2H pencil I sketched lightly to layout the subject and ensure that the main petals were slightly off center in my composition.

I added a few of the leaves for balance and drew some of them over the border which I thought would be an interesting thing to do.

Black Pen

I went over the sketch with a Faber Castell Artist Pitt 0.3mm pen in black and firmed up the shapes and main details of the plant.

Although the petals are smooth and don’t have much texture the leaves themselves are quite deeply veined.

Upon close inspection I realized how the curves were happening on these leaves even though they are quite furry leaves, they are still somewhat raised and pillow-like where the veins run.

I drew many of the veins on the leaves with the pen.

I could have drawn more leaves, but it seemed overwhelming and as there are plenty of leaves on the plant than there are flowers.

I didn’t want the greenery to overshadow the lovely purple blooms which are the main reason for the drawing in the first place.

Ink Wash

I had recently been watching a YouTube channel by Alex at The Daily Nature Journal about using botanical inks in his drawings and this inspired me to dig out some of my inks.

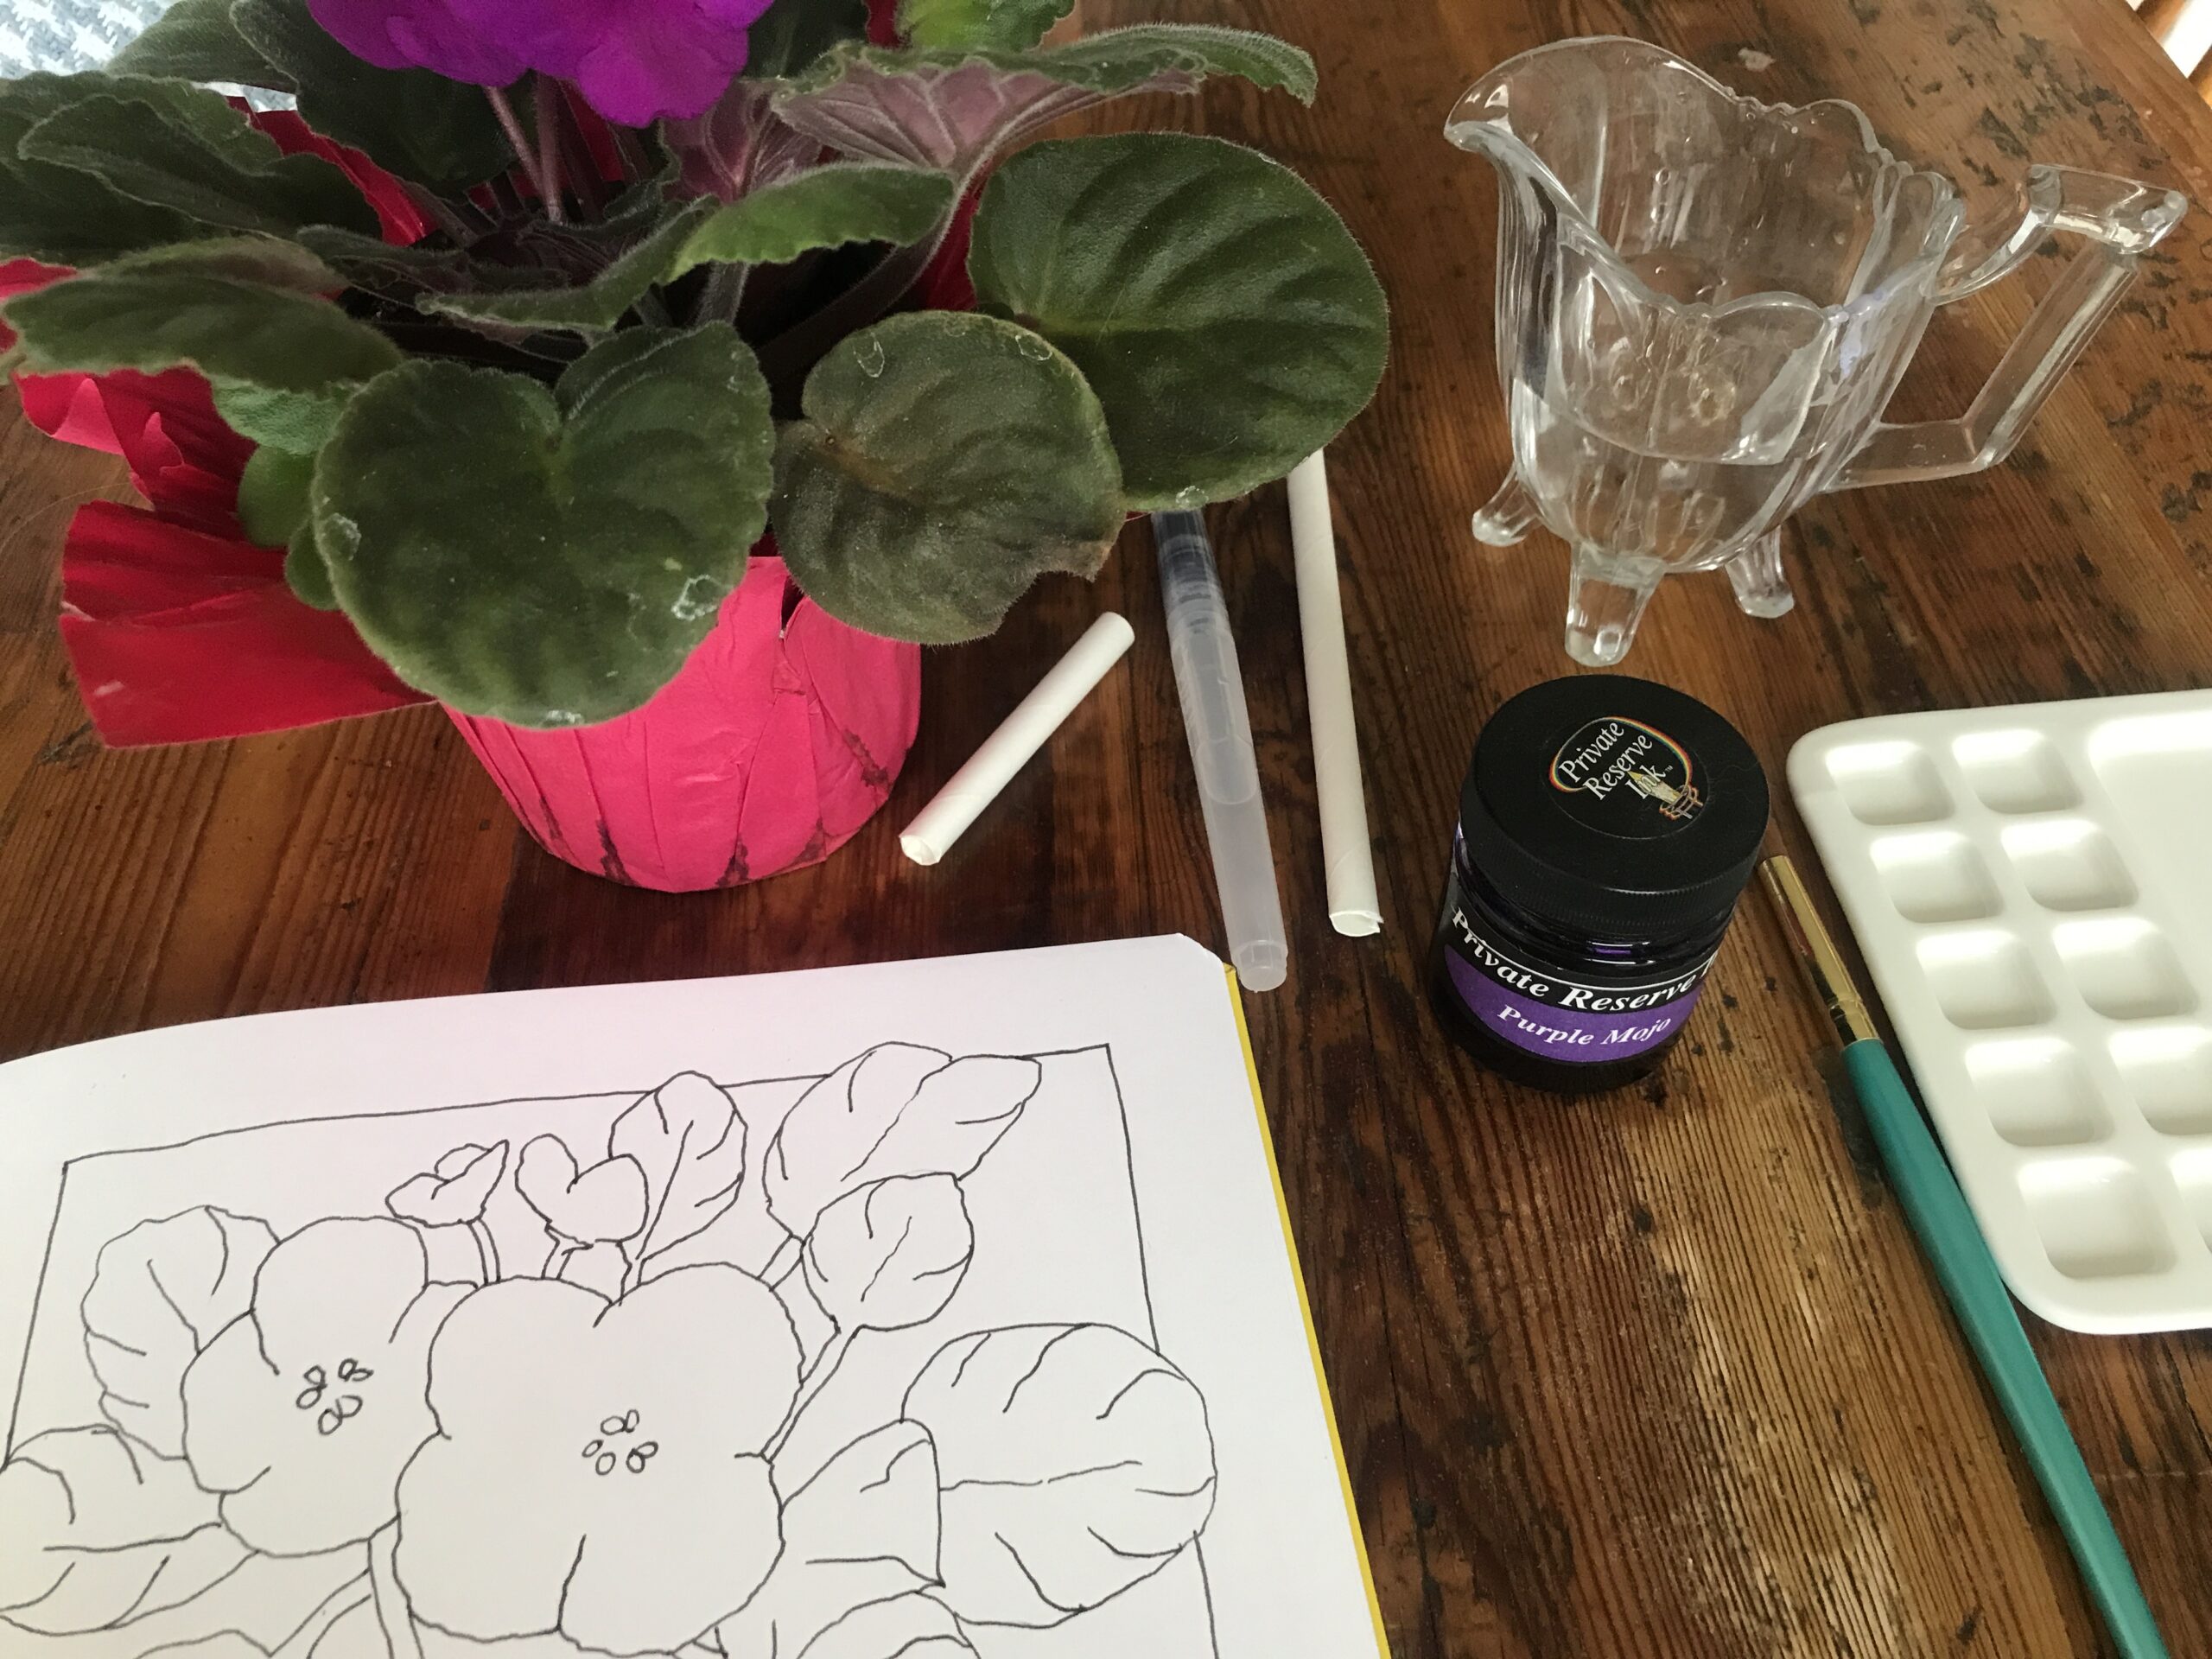
Not that I have botanical inks (not yet), I have normal inks, but I did have one bottle of Purple Mojo ink from Private Reserve ink company which I’ve had for years.

I dug out this old inkpot, shook it up and got out my palette.

I took a regular paint brush and dipped it in water first and put some water on my palette just a few drops because I was going to dilute the ink down.

It was serendipitous that I happened to have purple ink and I was drawing an African Violet. How convenient is that?

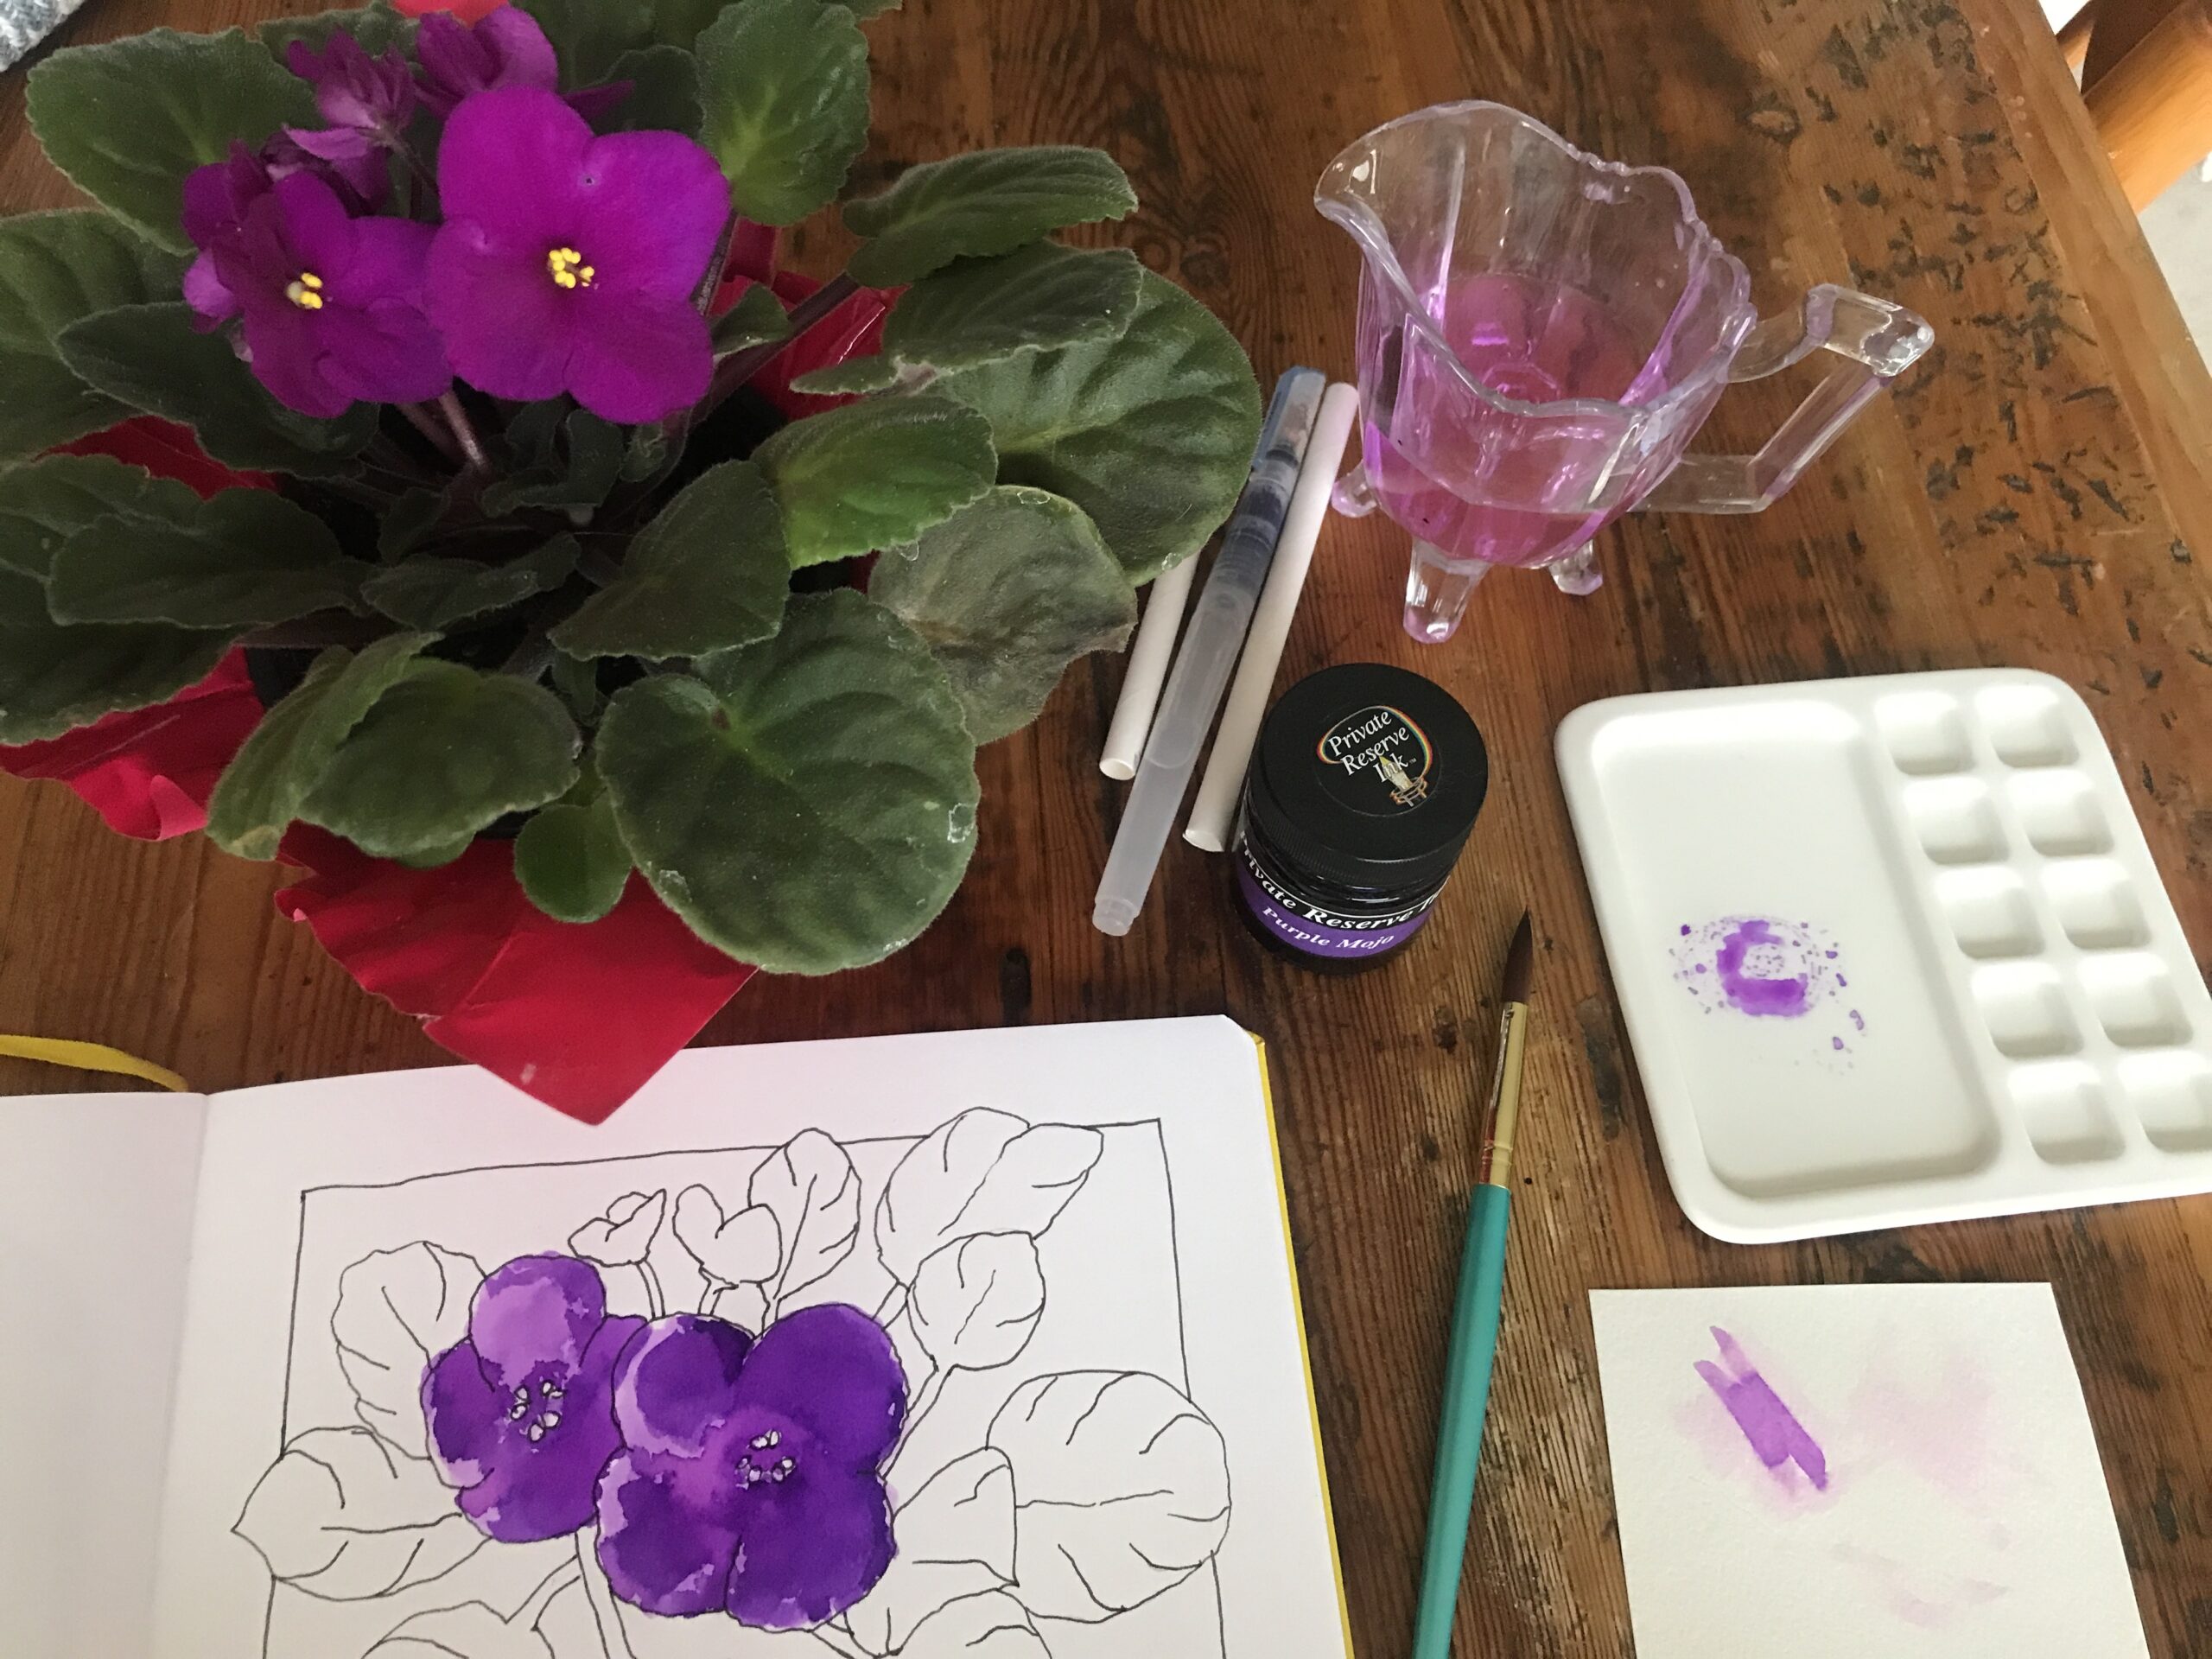
With a wet paintbrush I dipped into the ink and strained quite a bit of it off against the top of the bottle and then ran the ink into the water pool on my palette.

I mixed up the water and ink which dissolves immediately. The water thinned the ink down which is what I was going for.

Ink is not like paint where you must work the pigment, inks dilute rapidly.

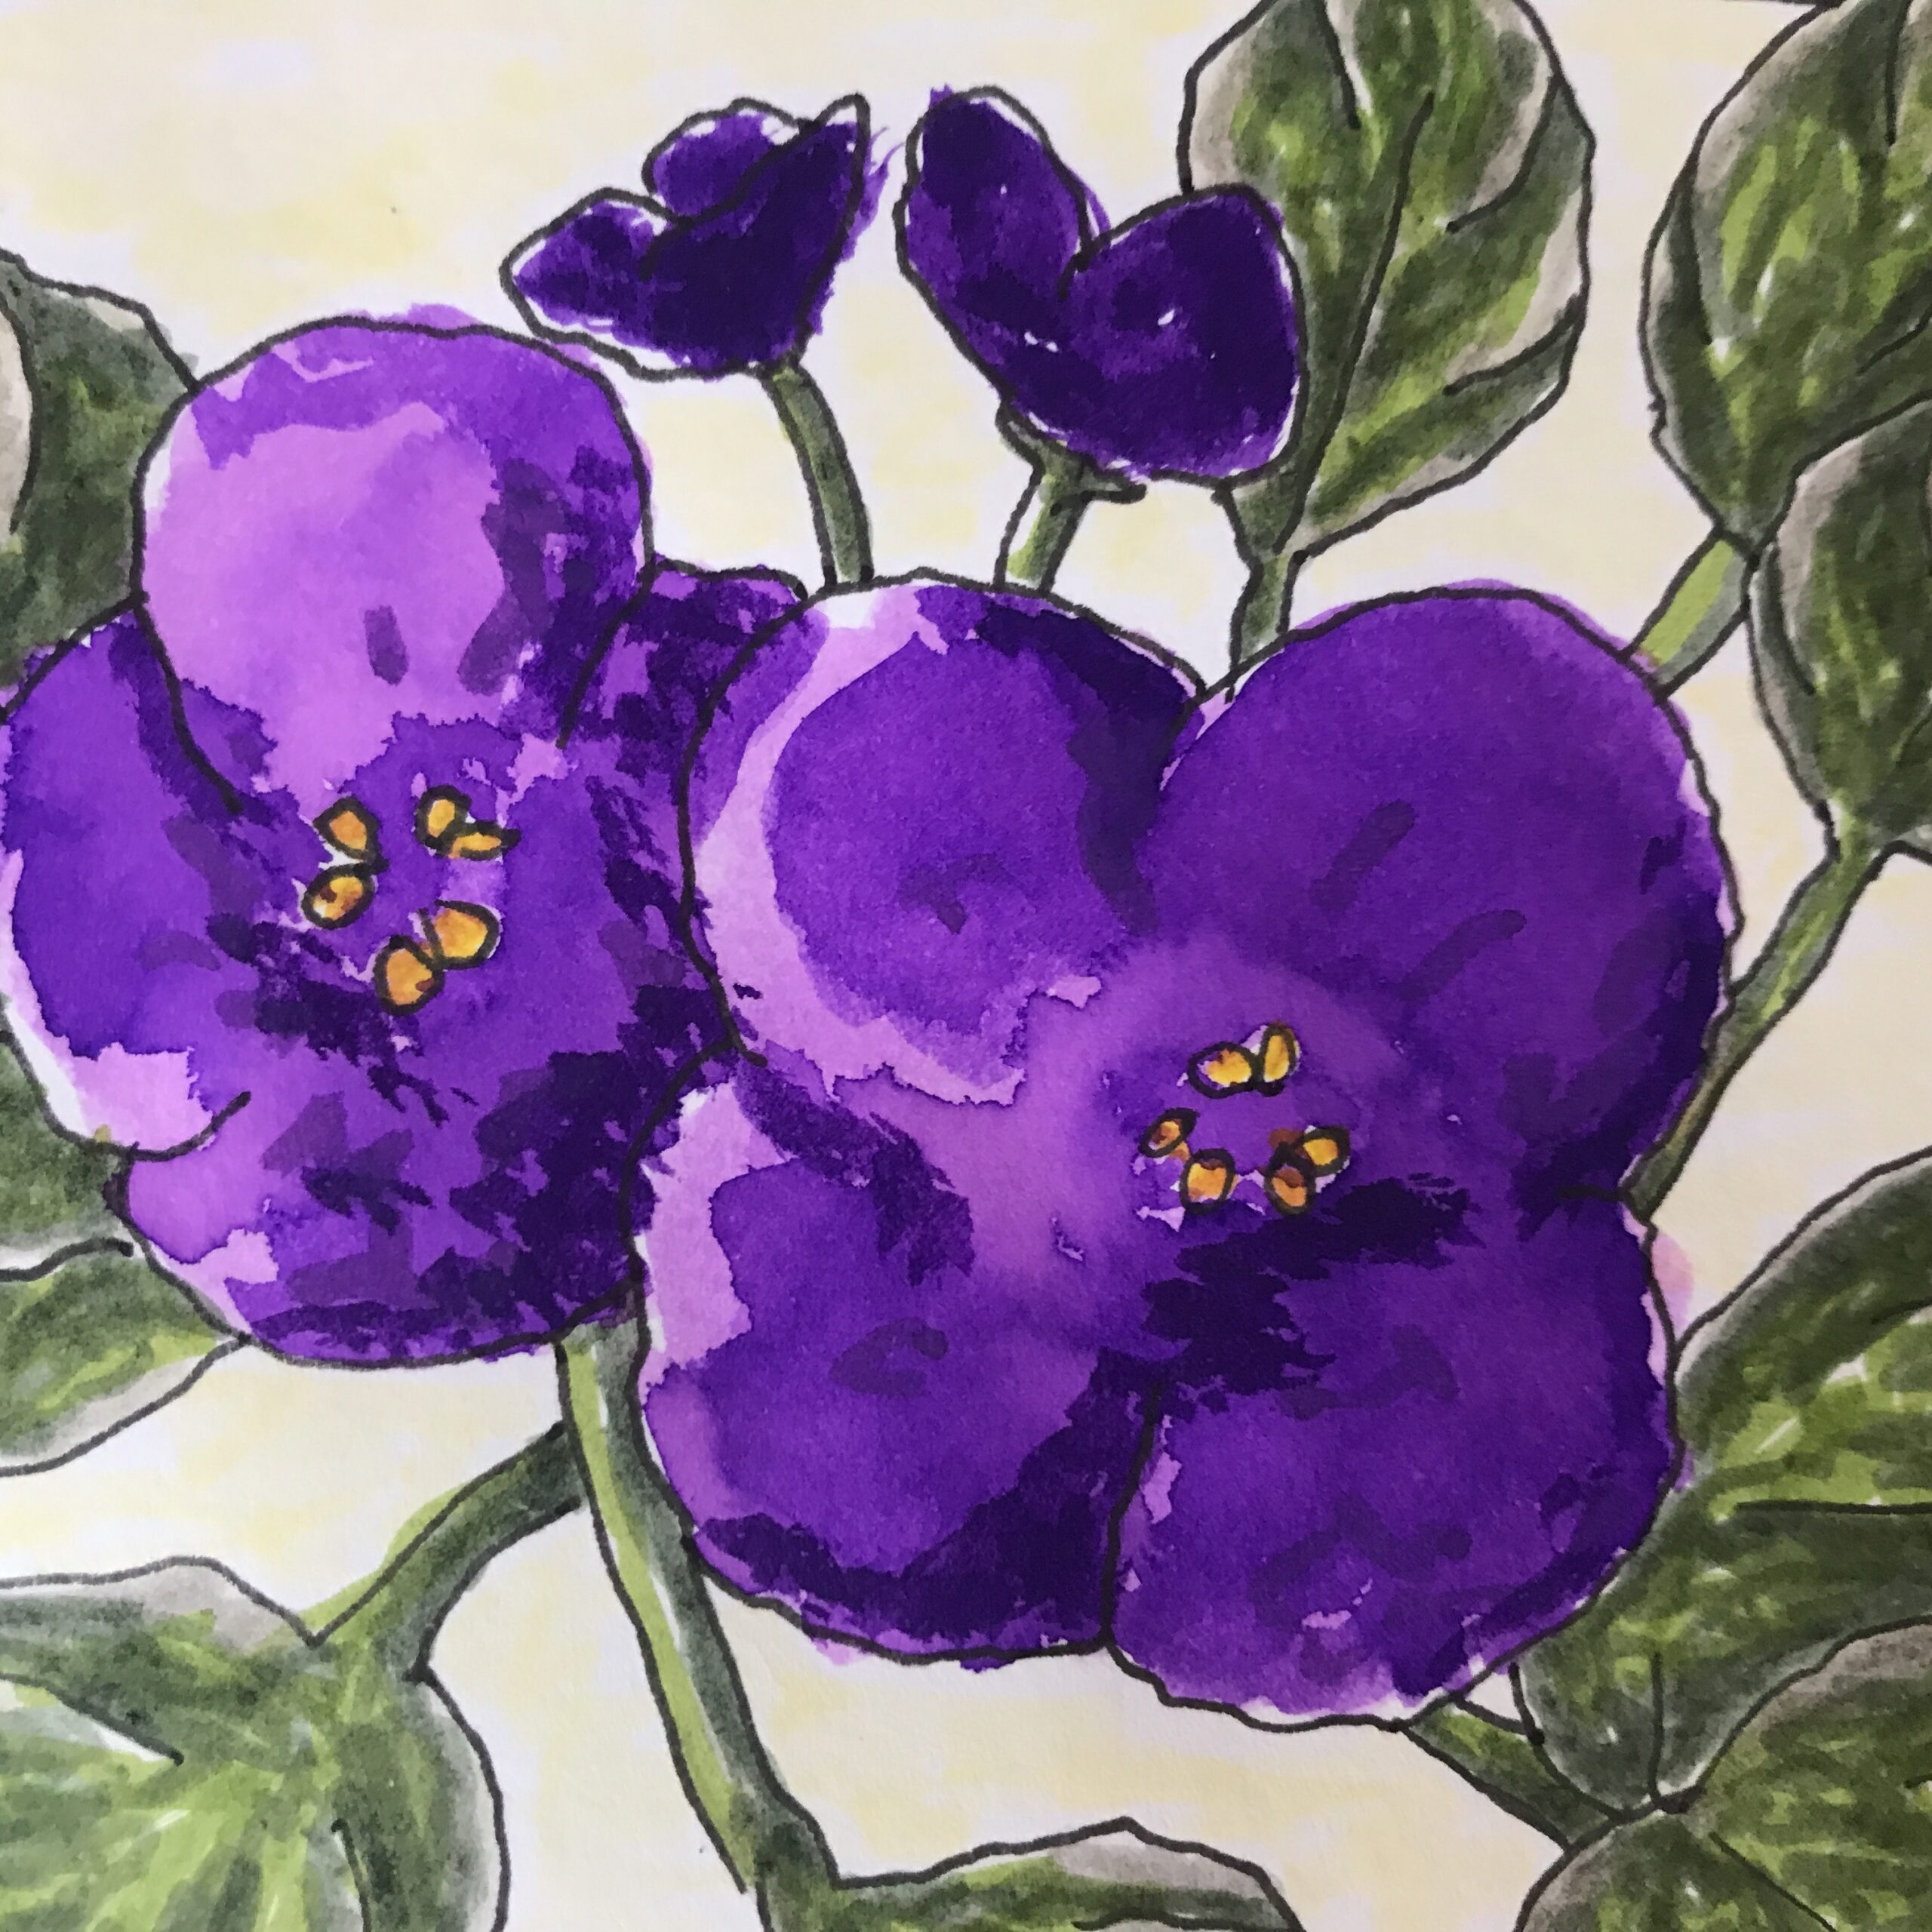
To dry paper, I washed the purple ink onto my violet petals. I did end up with quite a few hard edges and thought that I perhaps could have wet the paper beforehand, but I kept going.

I painted a first light coat on all the petals and let it dry a little bit.

I applied a second coat of the same consistency of ink wash over the petals as well.

I let the second coat dry.

Finally, I came back with some stronger ink, straight out of the inkpot, and added a few dimensional shadows to the petals for interest.

I let the ink thoroughly dry before I moved on, but I have to say that with working with ink gets on all your fingers. It stains everywhere and I had to stop and do some washing up of my hands and the palette and brush before I went any further.

Markers

Ideally, I would have done the leaves in green ink, if I had any, but I didn’t, so I turned to my Faber Castell Pitt Artist Brush Pens.

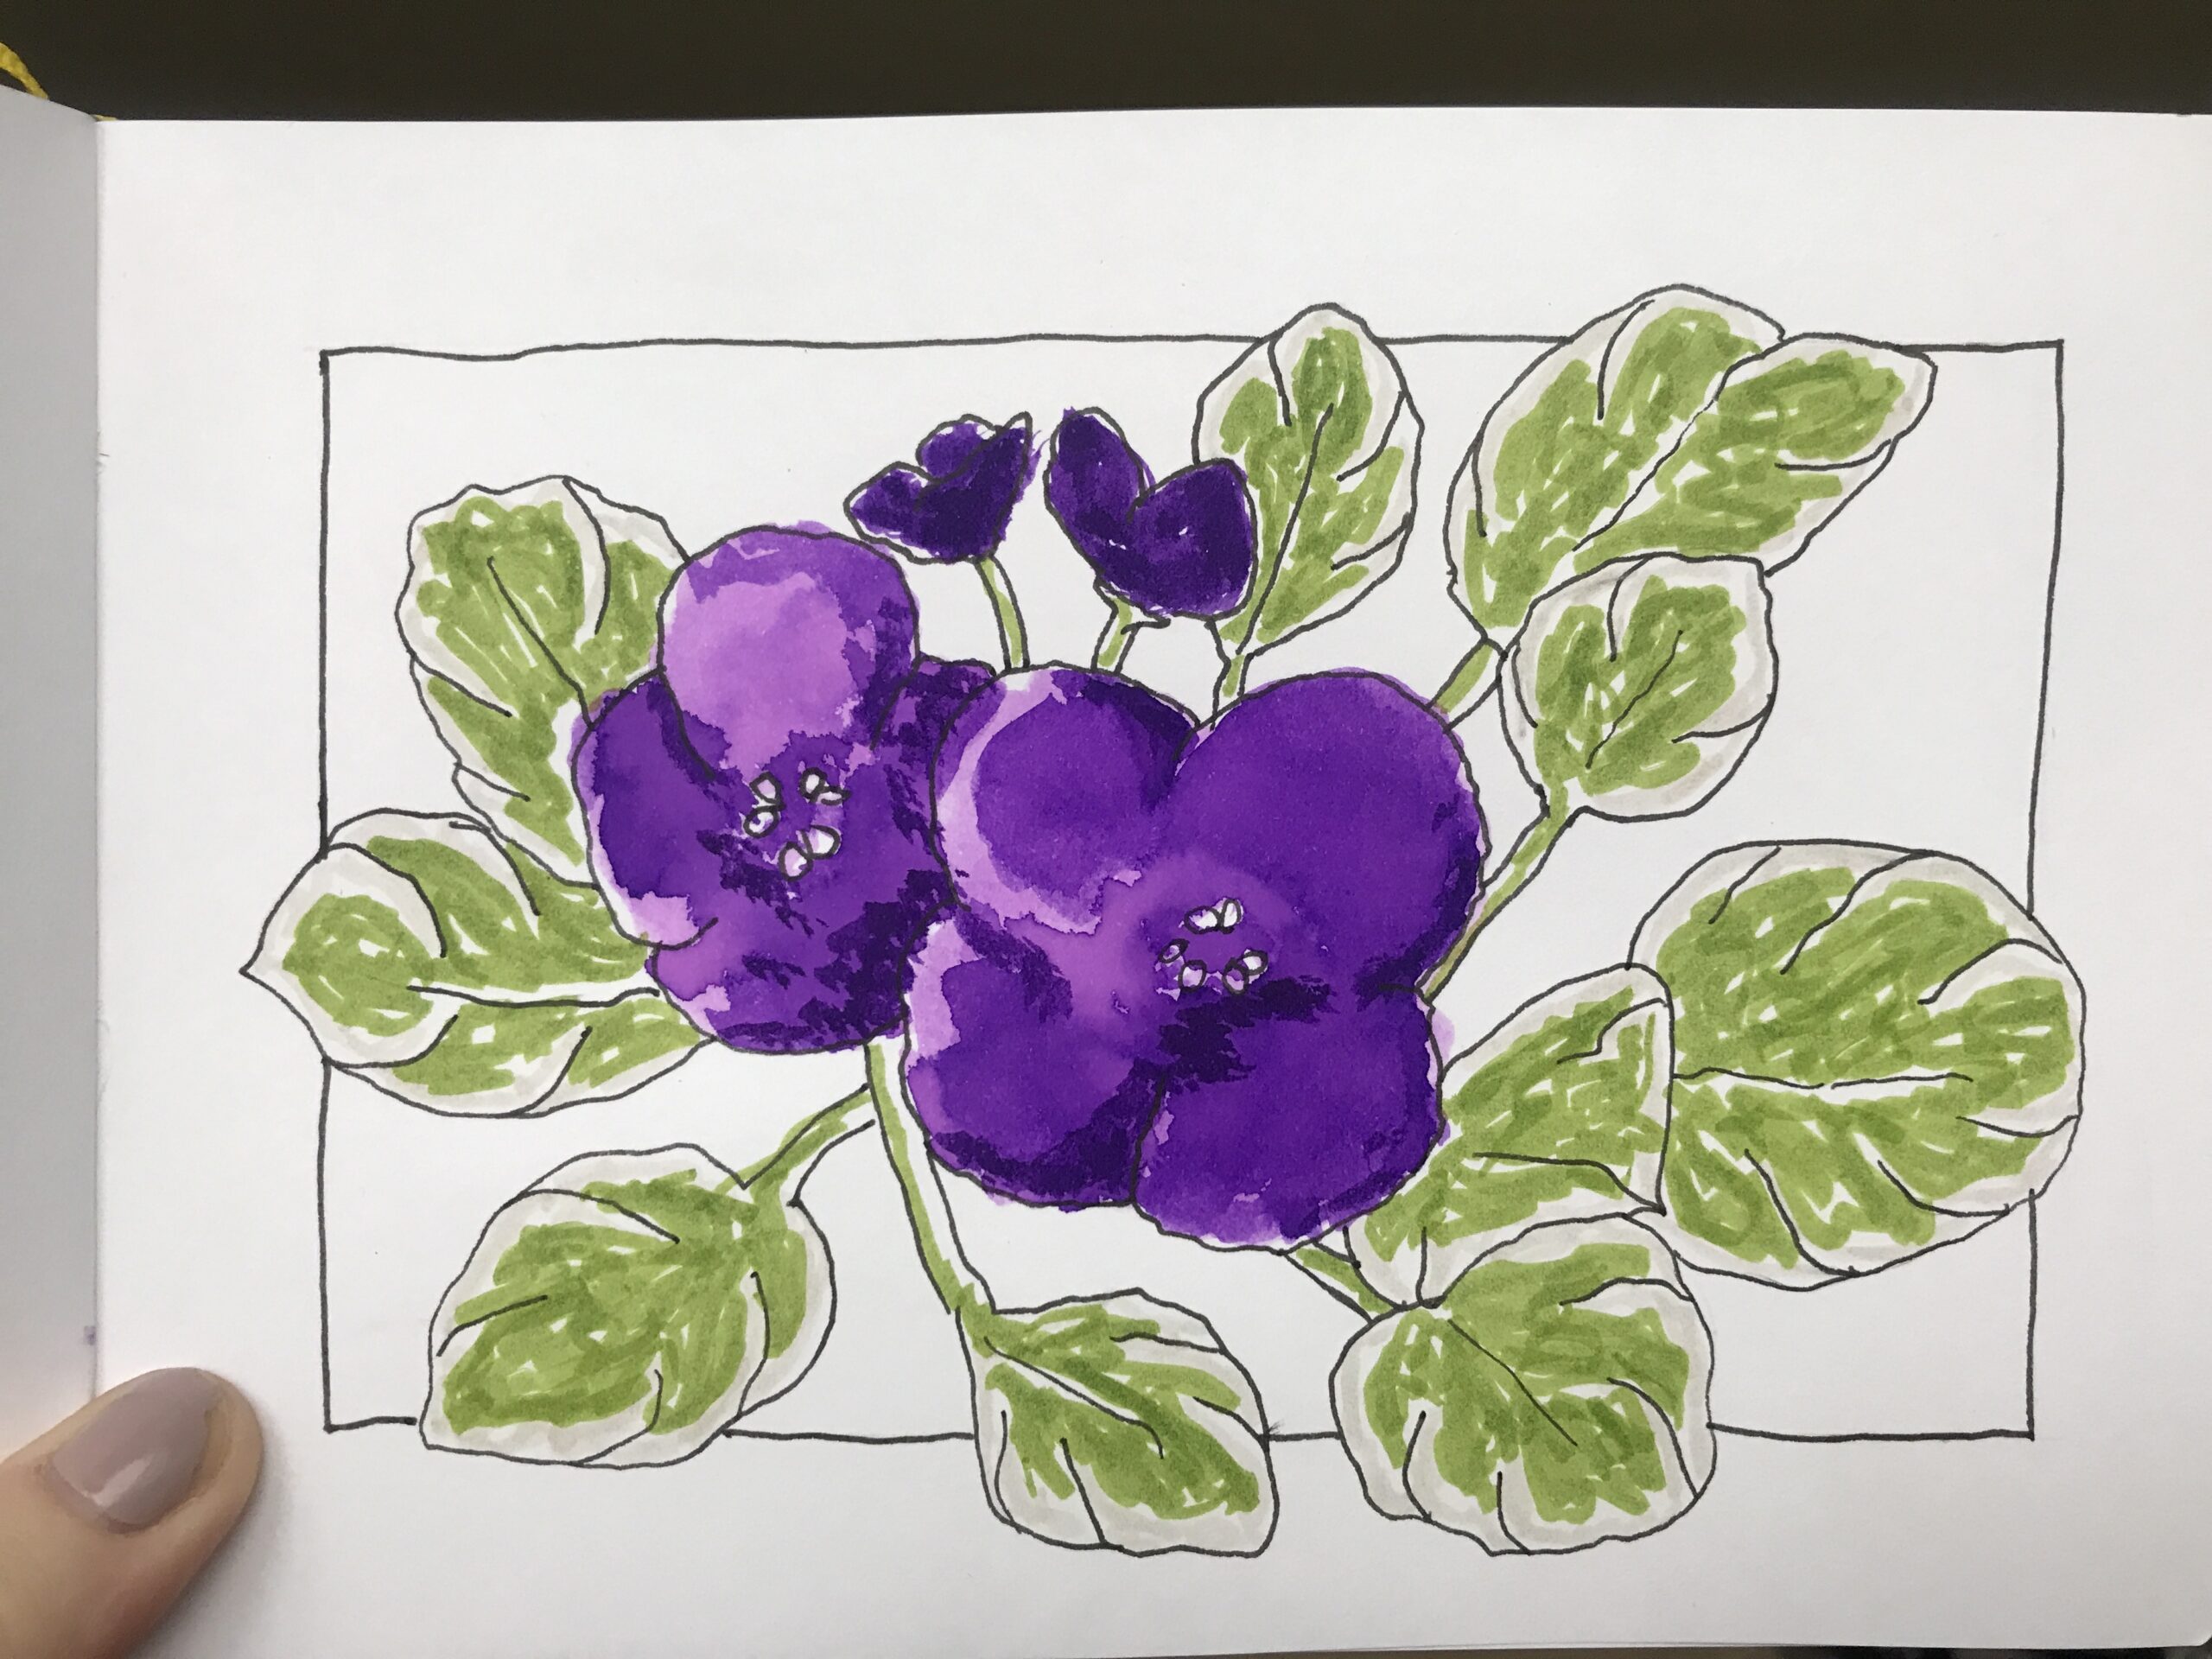
I started running the Warm Grey I around the edges of the leaves because they are much lighter at the edges and I did that for all the leaves.

Next, I took my May Green 170 and colored in some of the main bodies of the leaves.

It’s quite a bright green, so I was a little scared of that, but it turned out well in the end.

The second green I used was called Earth Green 172 and with this I brought more shadows and was running along the edges of the veins and enhancing the puffiness of these leaves.

I tried to work quickly with these Faber Castell Artist Brush Pens because the longer you leave them on the page the darker the color will become.

I went round all the leaves adding the darker shadows to them.

The fourth colour I added to the leaves with a light Warm Grey I 270.

I used it to blend the edges which had the light cream out into the mid green.

I just softened the color down a bit as the leaves seemed a little bit like a hedera helix leaf which has lighter edges and African Violet leaves are really not white at all on the edges, they are just lighter.

I continued a little bit further with the Earth Green just adding finer points along the ridges of the veins on the leaves until I felt I was happy with the work.

The little middle parts of the flowers which are super bright yellow I just added a few dots of Cadmium Yellow 107 in there.

I could have left those areas slightly larger as they did seem to be overwhelmed and crowded out by the purple ink

Background

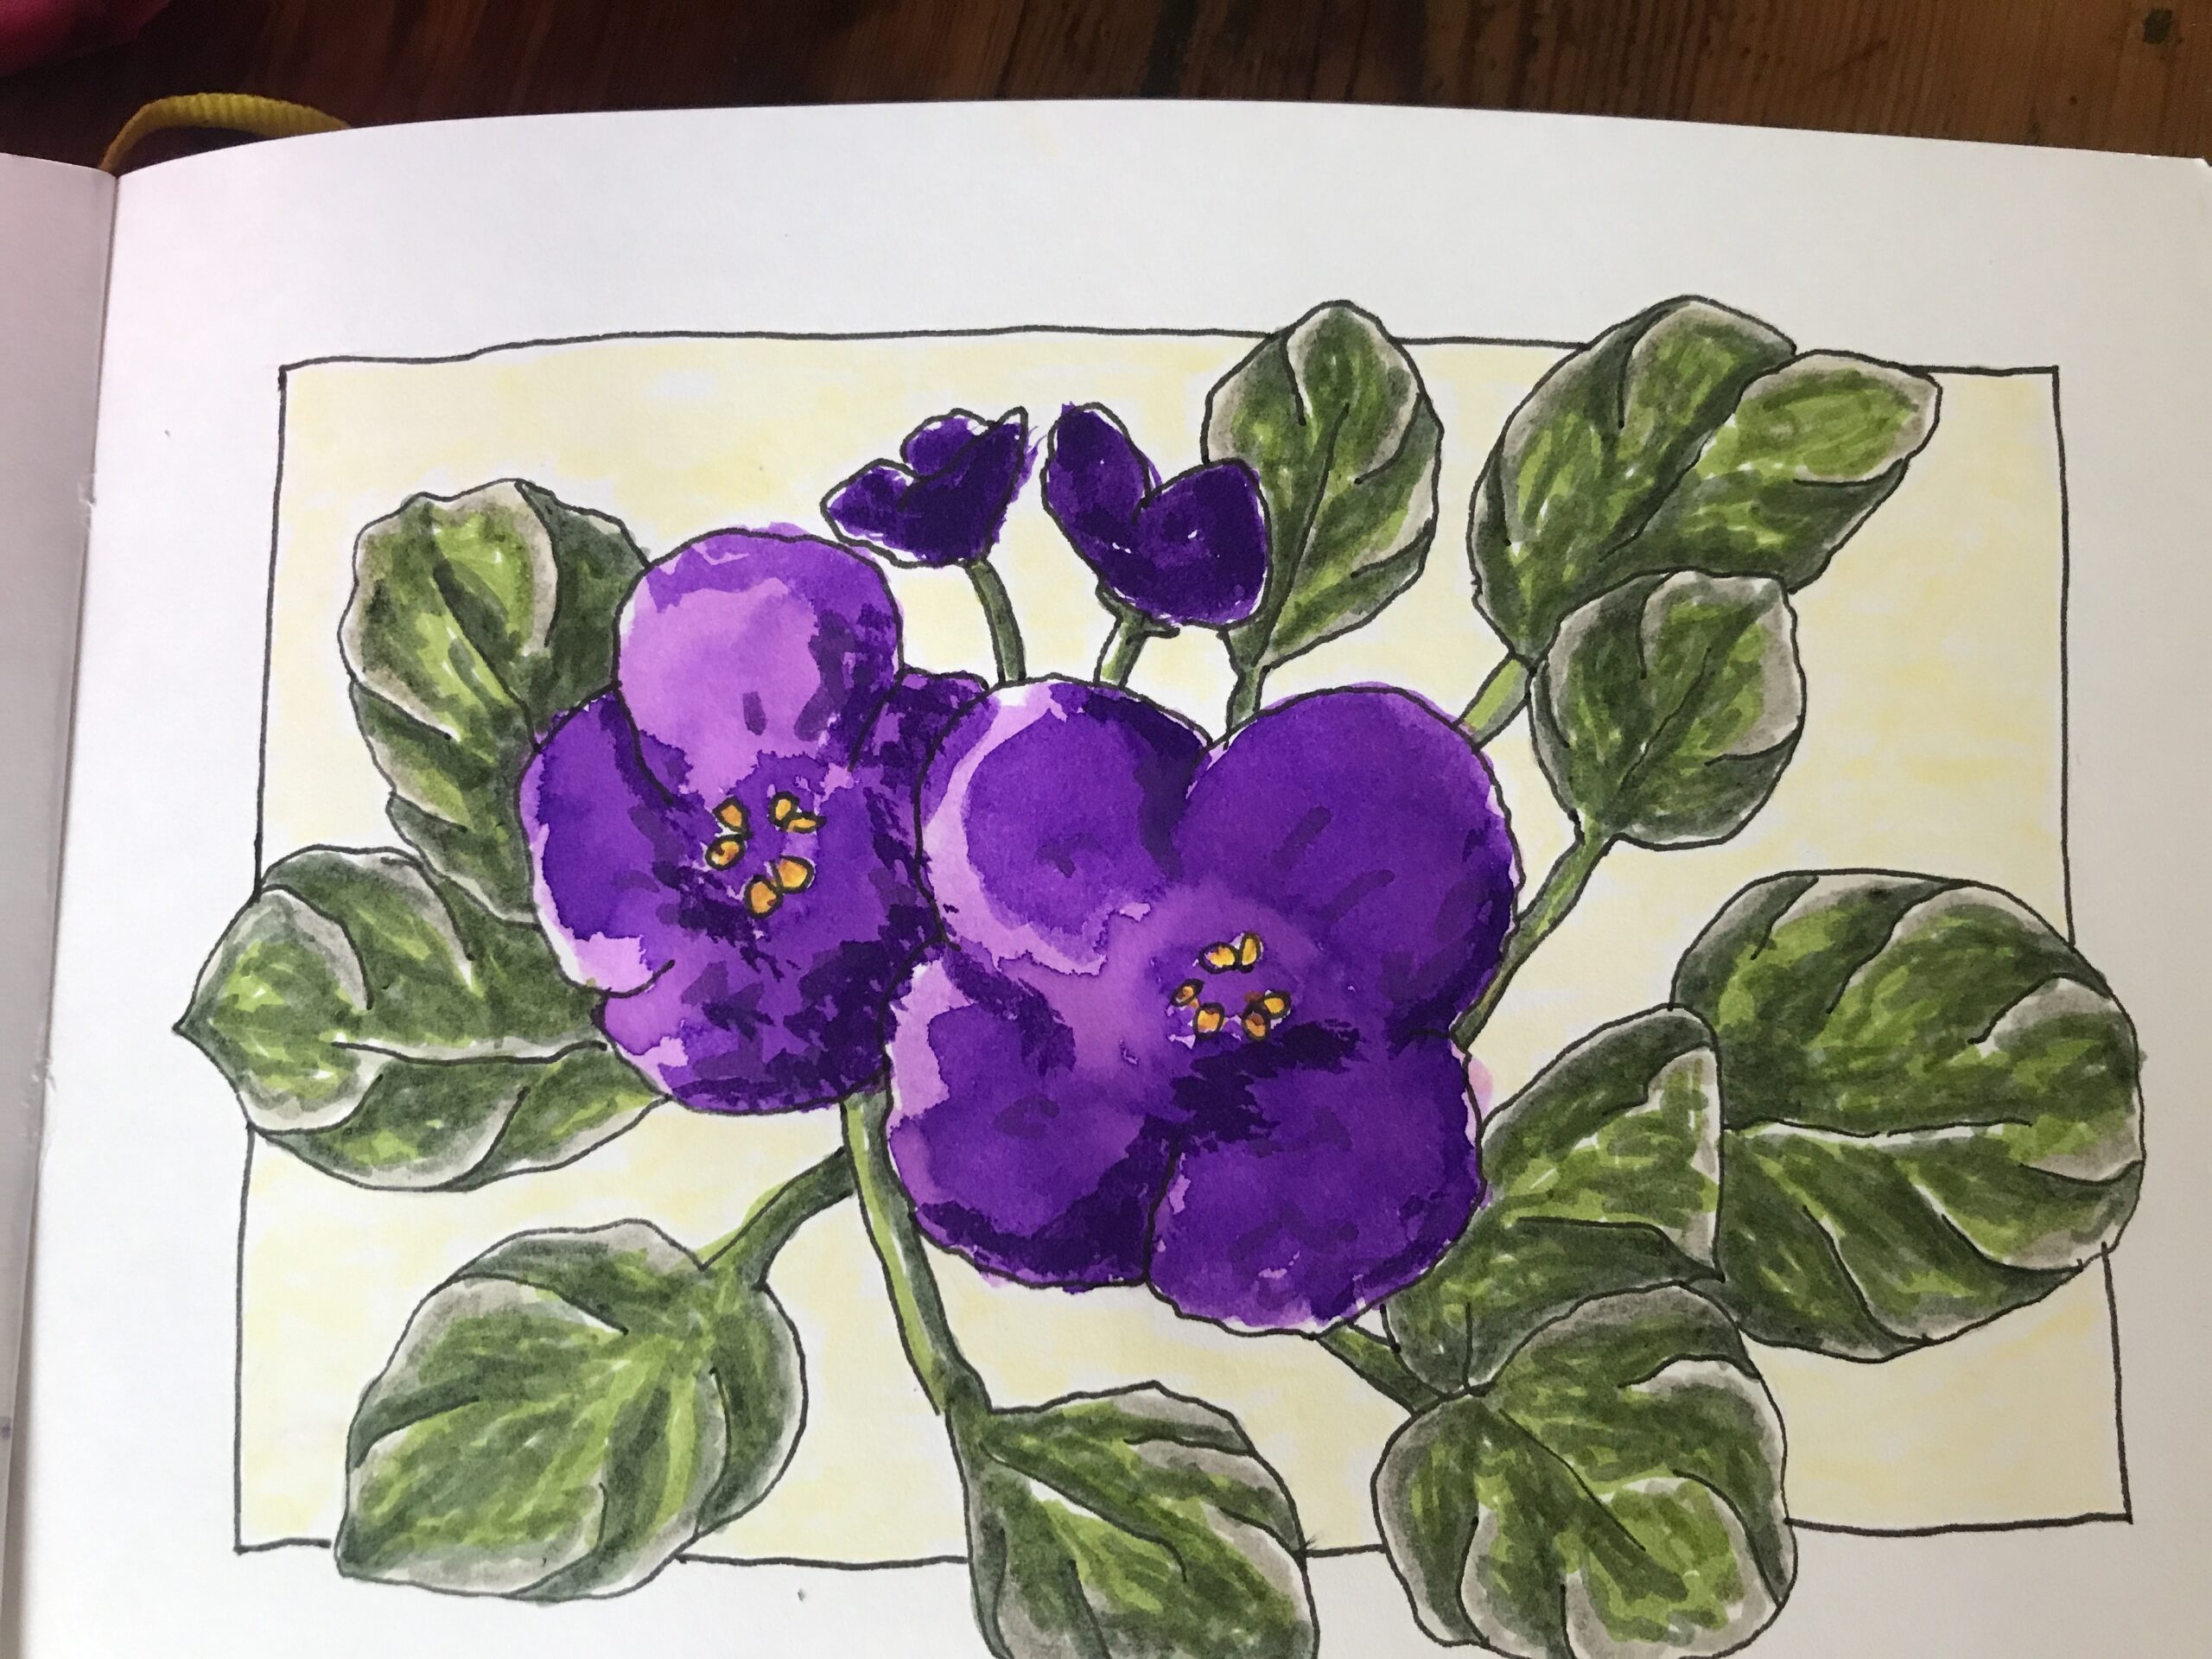
Finally, I added a light Ivory 103 into the main background of the drawing excluding the border.

I felt this soft color lifted the image slightly without overpowering the plant itself.

I had considered creating the background in yellow to highlight the golden bits in the middle of the petals, but I felt it would be too harsh on such a delicate drawing.

Conclusion

I’m quite pleased with how this sketch turned out.

It was a challenge to work with the ink because you really must work swiftly.

In future drawings I will probably consider combining perhaps a purple and a blue ink to get different colours or something like that.

I do have other inks but they are metallics like silver and gold.

I do not have a red, green or yellow ink which I think I might need to purchase soon.

So, does that signal another trip to my local art store? Yaay!

Have a creative day.

Love,

Alison

Aspiring Artist Activity

  • Create a simple sketch of a flower that you have in your home or garden.
  • Practice using inks and thin them down.
  • Try to use one or more colored inks on your drawing.
  • You may use markers, colored pencils or even watercolor for the rest.
  • Get creative.

Share

Show your work on social with the hashtag #AHAinkviolets, so we can see what you create.

How to Draw the Face of Jesus

How to Draw the Face of Jesus

Author: Alison Hazel   -   Published: February 2024 Reference and Acknowledgement Today I'm going to show you how I draw the face of Jesus as an icon. This is not my original idea as I am following along and referencing the work of Mikhail Fadi at UK Coptic Icons and...

How to Draw the Face of Jesus

How to Draw the Face of Jesus

Author: Alison Hazel   -   Published: February 2024 Reference and Acknowledgement Today I'm going to show you how I draw the face of Jesus as an icon. This is not my original idea as I am following along and referencing the work of Mikhail Fadi at UK Coptic Icons and...

Limited Palette Sketchbook Tour

Limited Palette Sketchbook Tour

Limited Palette Sketchbook Tour

Field Sketchbook

Last month I bought a field Peters Pauper Press field sketch book from my local bookshop.

This sketchbook is quite dinky and measures around 10cm x 14cm, A6 or 4 1/8 inches by 5 3/4 inches.

I thought it would be a good idea to have a sketchbook that I could take with me everywhere I went.

At first, I had no idea what I would draw in my shiny new sketchbook, but I had high hopes.


Evening Art

I sat down in front of the TV that evening and drew the cover page, and admittedly, this has color.

The next evening, as I had left the little sketch book on the coffee table in the living room, when I sat down again after dinner, I picked it up.


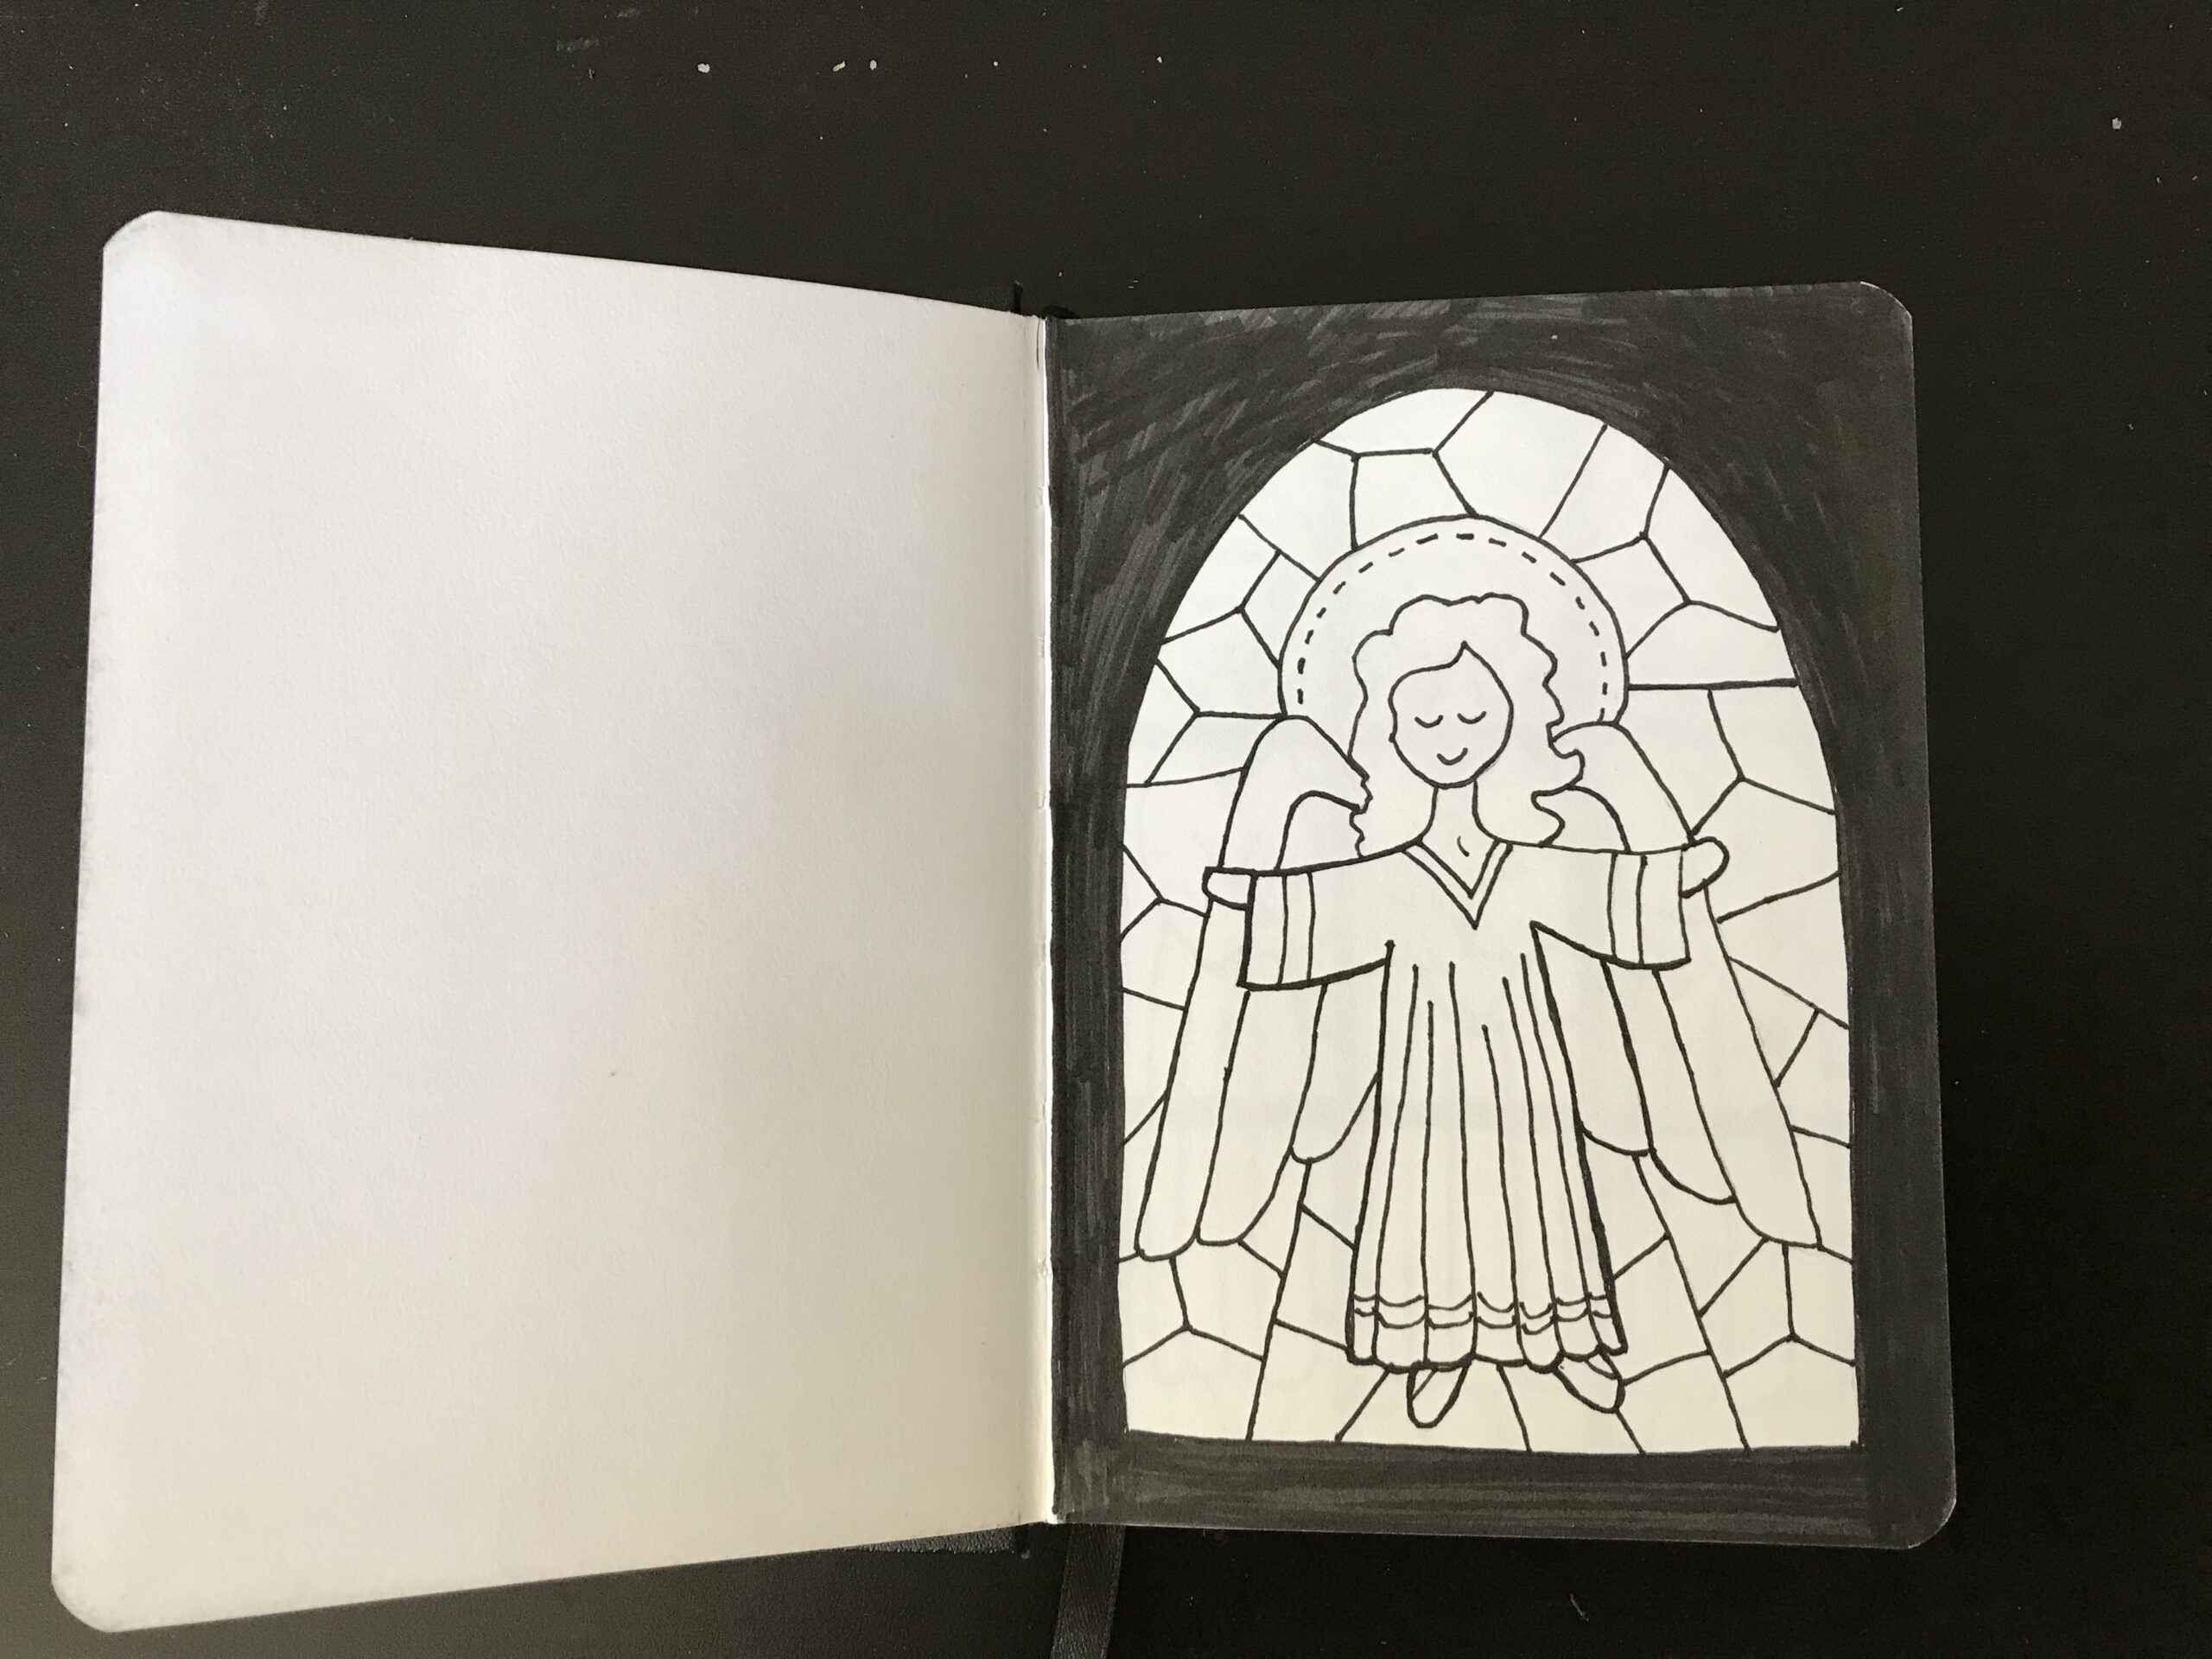
Angel Drawing

I drew a little Angel which I had done often in the past.

I thought I would colour it in like a stained glass window, but by the time I went to bed I’d only done the black outline.

The next night I drew another stained glass window with three angels.

At this time, I was still planning to add vibrant colour, but it was not to be.

Limited Palette

I began to enjoy how the pages were simply inked in black and white.

I realized that this is the ultimate limited palette, actually one color really, the black, as the white was the paper after all.

And so, it went on.

Each evening I picked up my little sketchbook and created a drawing of something in simple black and white.

Supplies Tray

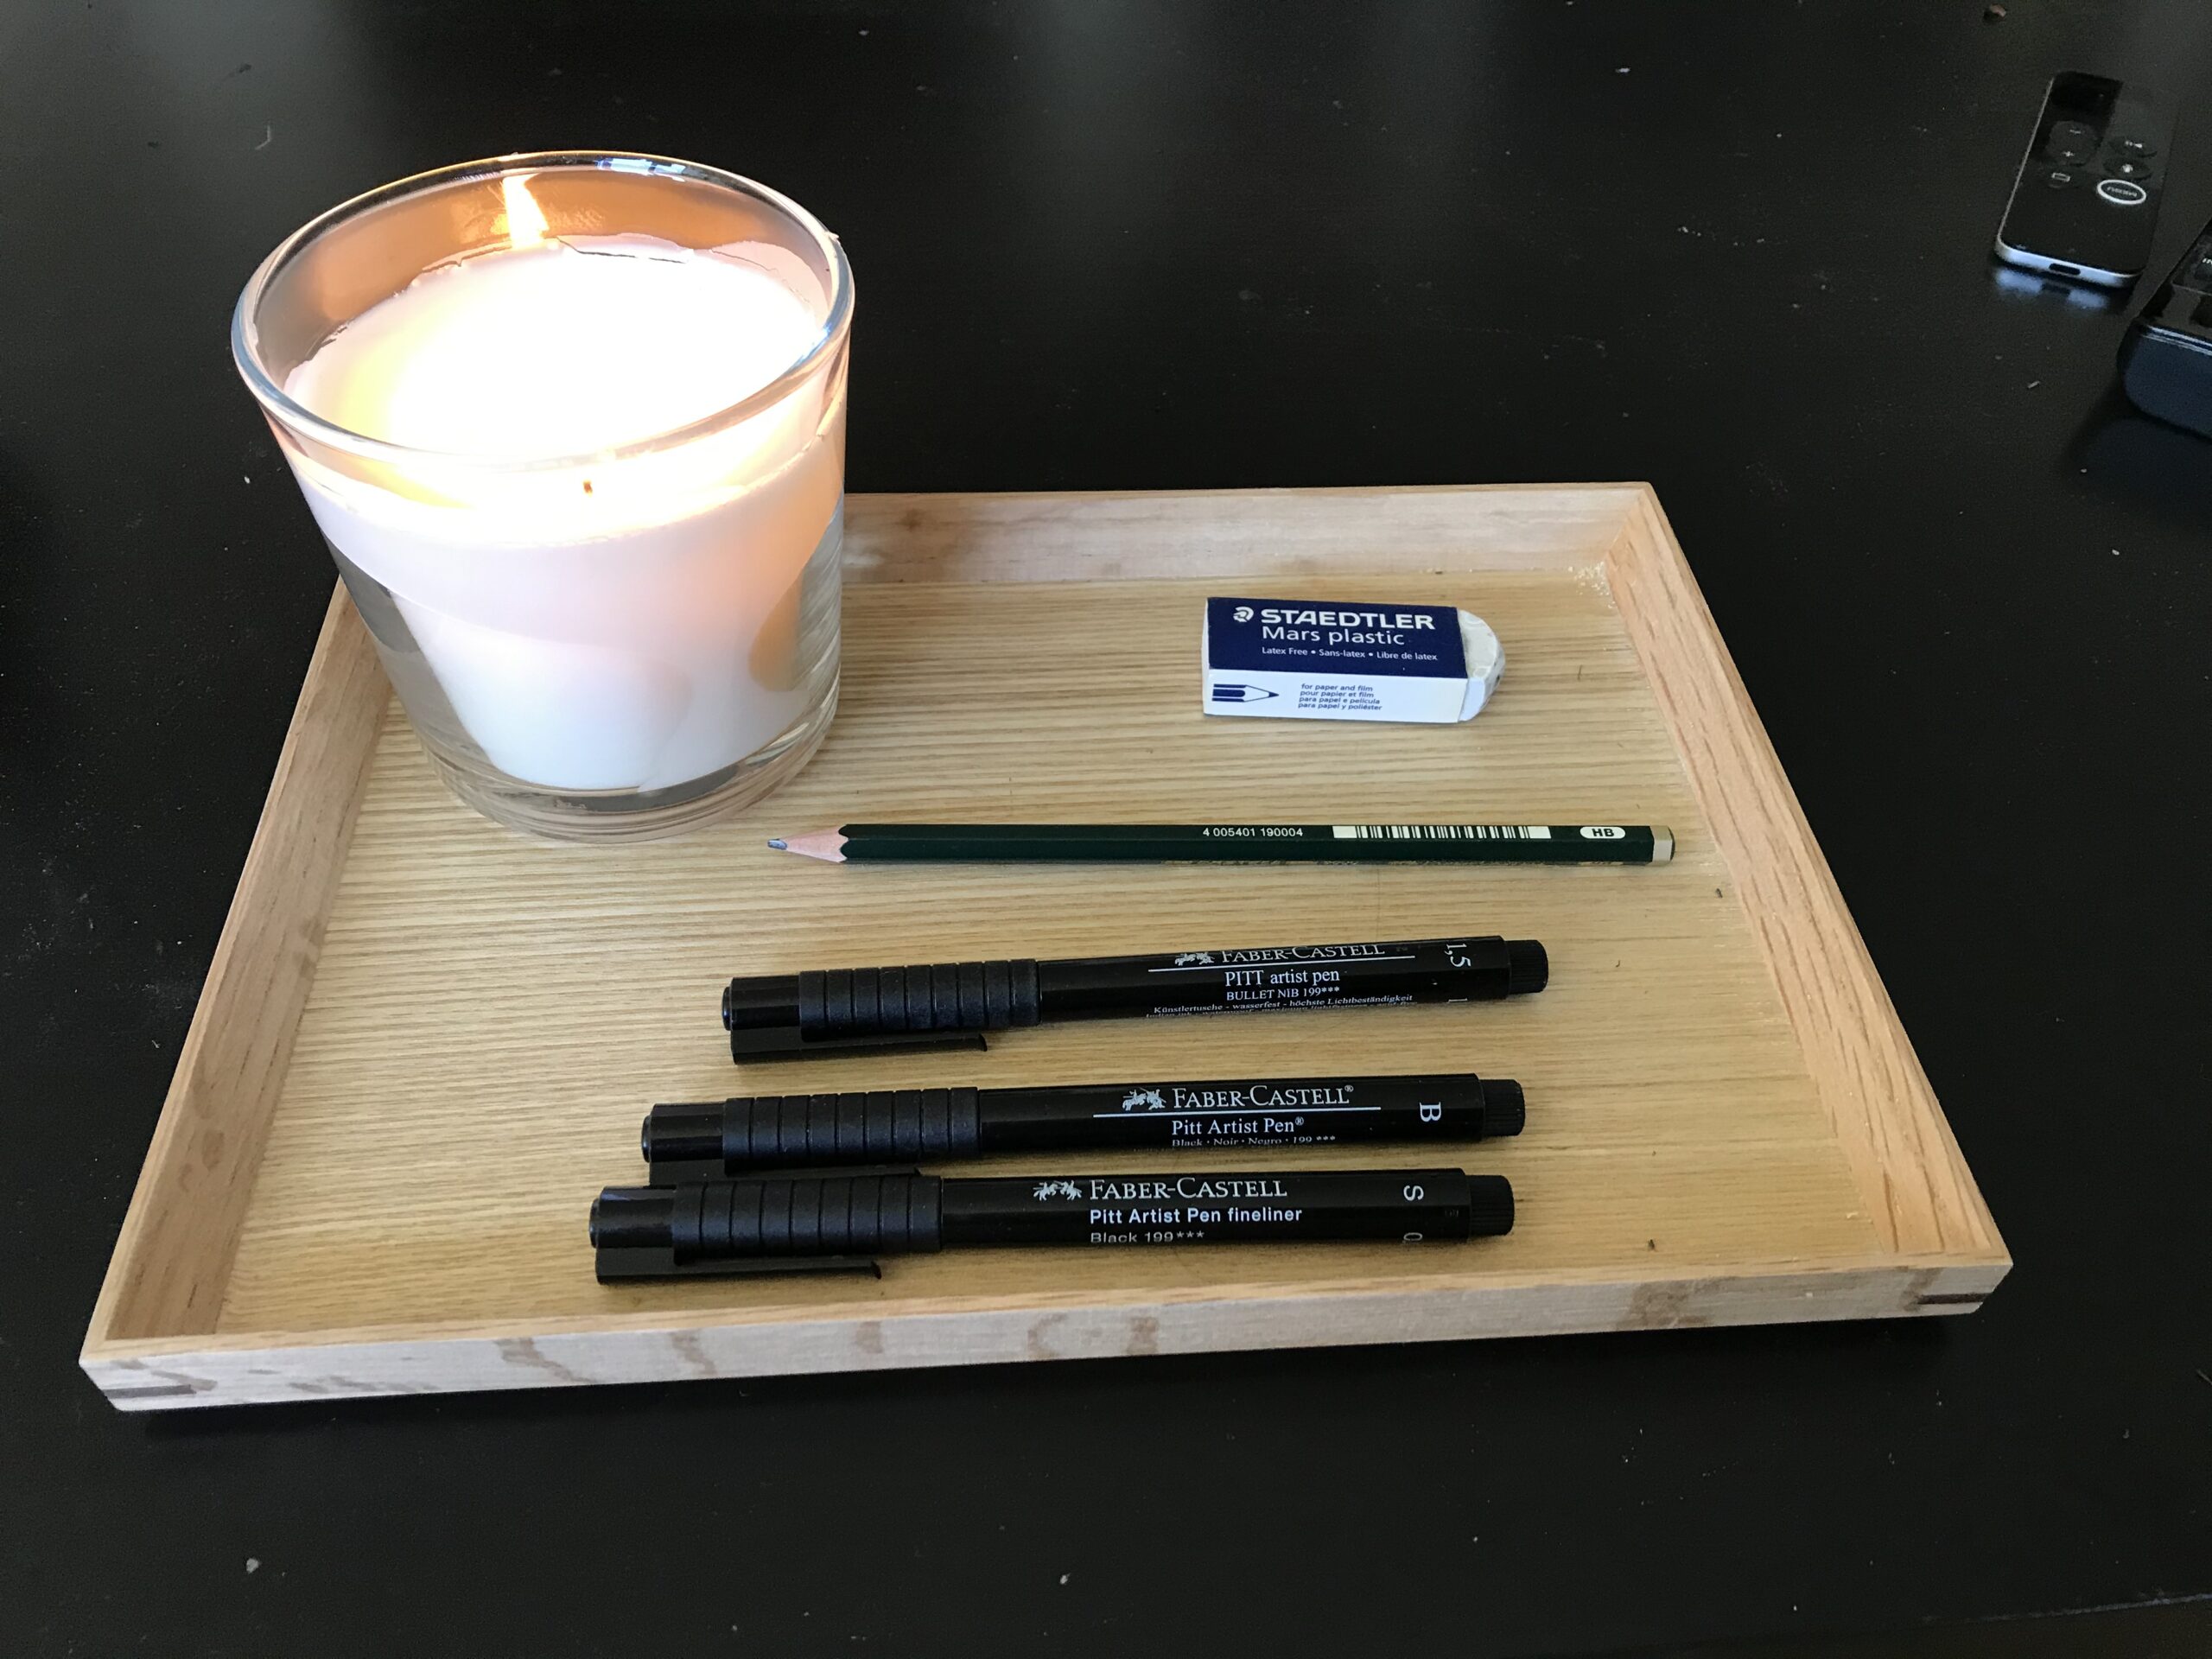
After a few days, I set up a wooden tray on my coffee table with three different thicknesses of black pen that I would use in the drawings.

I had 0.3mm, 0.5mm and 0.7mm black pens.

I started each artwork with a pencil sketch and then added ink, so I added my pencil and an eraser to the now officially called, “Art Tray.”

Right Hand Page

When I work in sketchbooks, I only like to draw on the right hand page.

I am right handed, and it is more natural to work this way.

I really never draw on the left hand page as that is the back of the page before’s drawing.

I live in the hope that some of my art will be good enough to frame, so I don’t want artworks on both the back and front of the paper.

Also, it stops the ink bleeding from the first image through the paper to the second drawing on the other side.


Daily Drawing Practice

I pushed on, drawing every night for about six weeks and still the sketchbook is not yet full.

When I’m finished all the pages, I’m going to flip through it so you can see what I created.

I hope this inspires you to start another field, or mini sketchbook, for yourself.

I may do something else in the next one, or I might make it another theme, perhaps with black, red and white like the color palette that cave painters had.

Using a limited palette is a fun way to make simple art.

Benefits of Sketchbook Art

The benefits I received by doing this daily art practice are immense.

  • I feel more creative in general.
  • I am now a productive artist.
  • I have stretched what can be drawn in under an hour.
  • I have really got to grips with pens and their thicknesses.

Sketchbook Themes

My subjects have been quite varied, although there are a few definite themes that developed in the completion of this sketchbook.

The main themes that emerged during this sketchbook practice are:

  • Angels
  • Shells
  • Leaves (flowers, plants and botanicals)
  • Portals (doors, stairs and windows)

My Art Supplies

The art supplies I used for this sketchbook project are listed here and include an Amazon link for each one if you want to purchase them yourself.


Here is the full list of my art supplies in my creator studio..

Aspiring Artist Activity: Limited Palette Sketchbook

In your creator studio, do the following:

  • Get a fresh sketchbook and create the front page to be your limited palette sketchbook.
  • Consider which three things (people, objects or places) inspire your daily art practice.
  • As you create artworks in your sketchbook note which themes emerge naturally.


Sketch Journaling For Beginner Artists

Sketch Journaling For Beginner Artists

Journaling

Journaling is a popular way to document your life-journey.

There are several ways to create your own journals.

Let’s have a quick look at some types of journaling.

1 Bullet Journaling

Bullet journals typically have bulleted points and lists of things to do.

You can track what you did with mood trackers and habit trackers.

Bullet journals can be done simply with a pen.

I started my excursion into journaling with a bullet journal a few years ago.

2 Art Journaling

Art journaling is really when you paint a picture in a journal.

Art journals can have collage elements that embellish the pages as well.

For art journaling I prefer to use a watercolor book.

With the better paper, you can paint what you see as you visit places like the beach or a new part of the city.

Art journals really are an extension of a sketchbook.

I began art journaling when I joined my city “Urban Sketchers” group that used to meet once a month to draw specific building, bridges or public artworks.

Groups like this offer you an abundant community of like-minded artists.

3 Sketch Journaling

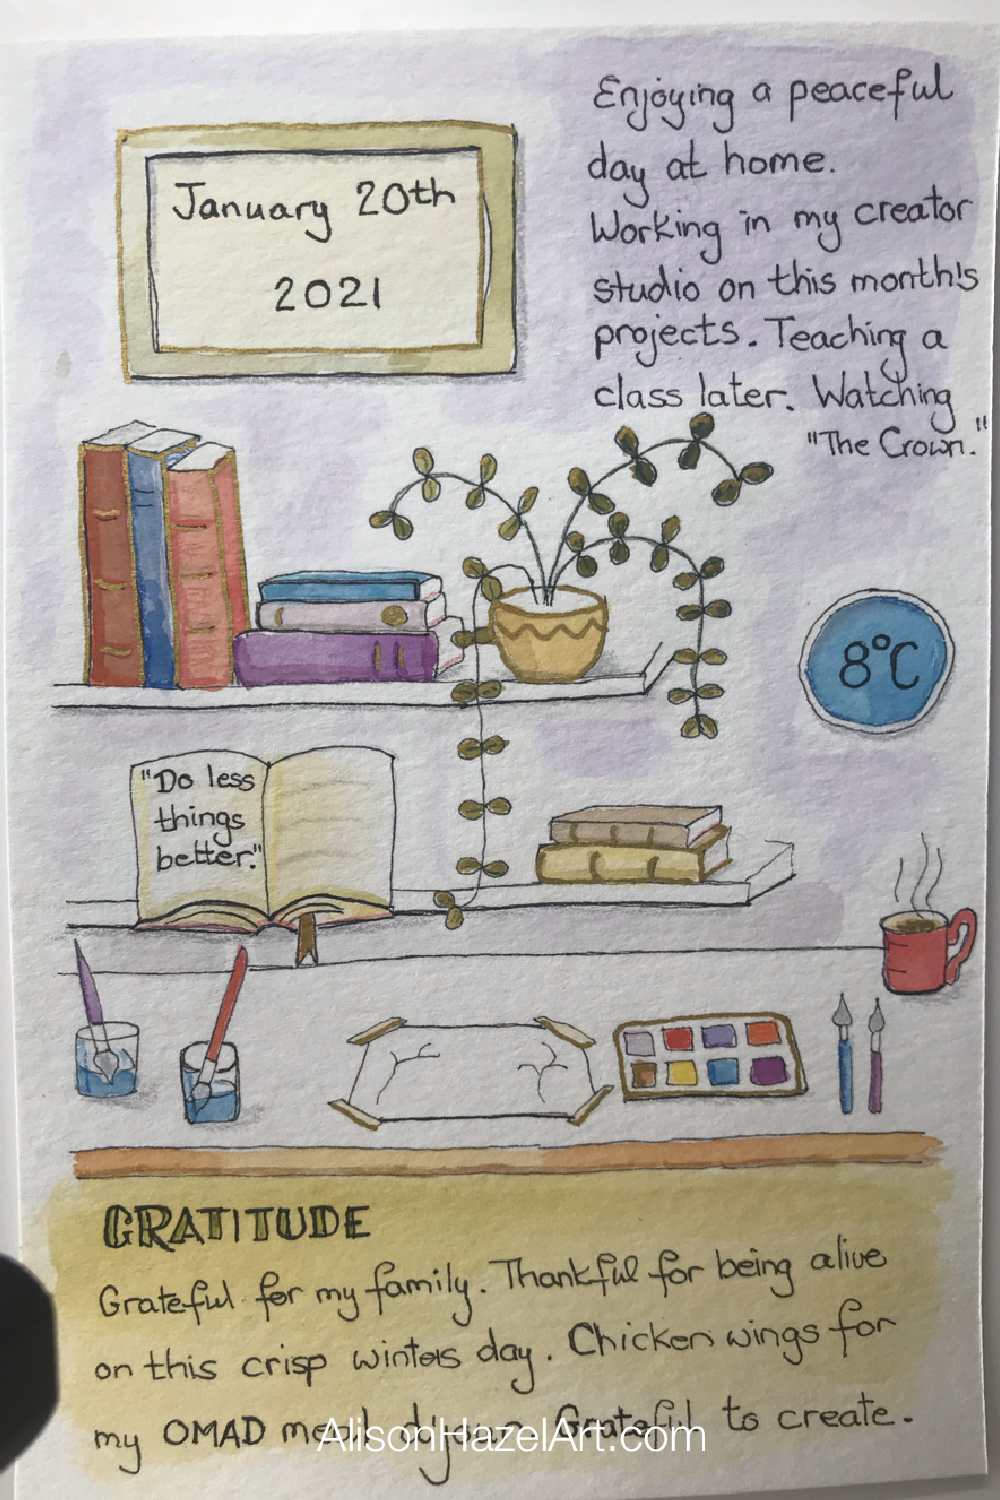
Sketch journaling is more about the pen and ink sketch that can be painted or colored with pencil or markers and generally chronicles your day.

With sketch journaling each page is for a specific day or trip to somewhere like a city, sports event or restaurant that was memorable.

Sketch journaling usually features the date almost like a diary entry.

You can look back and see what you were doing on a specific day.

Sketch journaling is typically not done for every day of the year, but perhaps twice a week or twice a month for hey days and holidays.


Sketch Journal Challenges

Some dedicated sketch journalists will take up the challenge to sketch journal every day for a month or something like that.

These challenges are good to get you in the habit of sketch journaling.

We are organizing a “Seasonal Self-care Sketch Journal Challenge” later this year the details of which will be posted soon.

Sketch Journaling

Page Design Elements

Your journal page needs to have a few spaces to write your insights, quotes, notes and remarks.

These comments can be around what happened that day, who you met, where you went, what you did and how you felt.

You can also add the date, the temperature and weather conditions, day-in-the-life observations, meals shared and the food you enjoyed preparing.

Sketch Journal Page Process

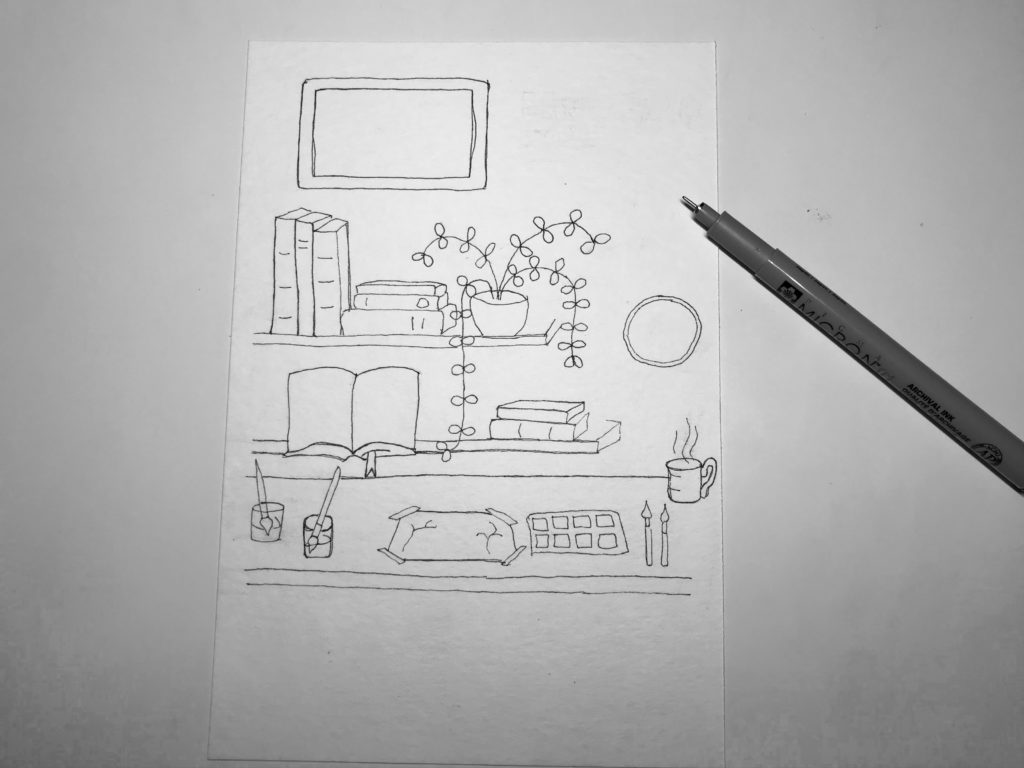
Pencil Sketch

Start with a light pencil sketch to give the bones of the drawing.

Make three spaces for writing some comments.

You will add these notes and observations later as the day unfolds.

You will erase the pencil lines after you have completed the pen and ink overlay.


 Pen and Ink Overlay

When you are happy with your pencil sketch, draw over the lines with a black pen.

Start with the finest pen you have. I typically use a 0.1mm nib for the first ink overlay. The thin ink lines are used as a guide for the watercolor wash.

I may go back in after the watercolor with a thicker nib pen like a 0.3mm or a 0.5mm pen to add definition only to certain areas of the drawing, but I won’t know this until later.

When the ink is completely dry, gently erase the pencil lines with a white plastic eraser and brush the dirt from the page.

Avoid using a sweaty hand to wipe off the erasing’s as this can add smears to the page. With a soft brush, sweep all erasing grime onto the floor and not onto your desk workspace.


Watercolor Wash

Add a light, very light watercolour wash to a few areas of the drawing.

I like to use only two complementary color washes like yellow and lilac, blue and light orange (beige) or pink and green.

When you use a limited palette, it produces a more sophisticated finished artwork.

Keep all the colors light for the first pass.

You can wash the notes areas as well.

Let the paint dry.

Now go back in with a smaller brush to color some highlighted parts of the drawing like the books on the shelf, coffee cup or plants.

Always work wet-on-dry and avoid painting two different colors right next to each other when the medium is still wet to avoid unintentionally blending the color.

You can repeat this step again for as many times you need to build up the color and to enhance the image.

Crayon and Colored Pencil

Allow the paint wash to dry.

It can take until the next day for watercolor paint to dry completely.

Go in with some sharp colored pencils in the same color palette you chose before, to add definition to the features in the drawing.

Don’t overdo it and avoid the washed notes areas.

Gold Trim

Add some gold trim as a highlight.

Take a gold gel pen or gold watercolor or gouache paint with a fine brush (perhaps a size 2) and add a few highlights to the important things in the painting.

As tempting as in may be, do not overdo the gold.

Allow your artwork to dry fully.


Comments and Notes

When all is dry, you can add some notes about the day.

Perhaps write what happened, a book you read, who you had lunch with and how you felt.

Add a gratitude part as well for self-care. Here write a couple of things for which you are thankful.

You can add quotes that mean something to you or a line from a song lyric that resonates with you on this day.

This is your sketch journal, and you can write exactly what you want.

Your sketch journal may become a memory of your life. It can be shared with your children when they are bigger. That is up to you.

Back in the Day

In centuries past, women would embroider needlework samplers each year to show what they were working on and the stiches they had learned or perhaps a recipe they had mastered that year.

Needlepoint Sampler

These highly treasured and richly embellished fabrics are like the art and sketch journals of today, which many people are quietly creating at their kitchen tables and in their creator studios all over the world.

Self-care for This Year

You may be doing a bullet journal, art journal or sketch journal or perhaps a combination of all three types of journal rolled up in one.

What really matters is the joy and peace you can achieve for yourself, and therefore those around you, through paying attention to your self-care needs and mental health as you work with color and create art. 

Art Supplies

Gather Your Stuff

I belive that as artists or aspiring artists yoru probably have all the supplies you need.

Reach for what you have and don’t let not having something specific stop you from creating something wonderful.

My Art Supplies

For clarity I have listed links to the exact art supplies I used to create this sketch journal page below.

Alison Hazel

Author Bio

Alison Hazel shares her ongoing journey about becoming an artist later in life. She creates simple art that anyone can make. She hopes to inspire you to reach your creative potential in the area that suits you.

Go here to read more about Alison’s story.

If you want to send Alison a quick message go here.

More Articles

If you enjoyed this post you may like some more of our other content.

Acrylic Overpainting: Ikea Artwork

Acrylic Overpainting: Ikea Artwork

Author: Alison Hazel   -   Published: January 2024 Overpainting Last month I decided to paint over, or overpaint, a large Ikea artwork I had in my living room. Over painting is a technique used by many of the great artists when supplies were short and canvasses hard...

error: Content is protected !!