How to draw the Vancouver Inukshuk with black and grey scale drawing inks. Nature Journal. Hobby Artist
Sigils as Art
Author: Alison Hazel – Updated: May 2025
As a hobby artist, adding SIGILS is a creative way to begin weaving words and meaning into your artwork without using traditional text.
Sigils as Art
The History of Sigils
Ancient Beginnings
Sigils are symbolic representations used to focus intention, store meaning or convey secret messages. The word sigil comes from the Latin sigillum, meaning seal. These mystical markings have evolved over time, weaving through ancient magic, religion, art and modern spirituality.
The Roots of Sigils
The roots of sigils can be traced back to the earliest human civilizations. Ancient peoples used symbols and marks to represent divine beings, magical forces and protective energies. Throughout earliest civilizations, people created symbolic languages to represent the unseen forces that shaped their world.
Though not called “sigils” at the time, these symbols functioned in similar ways to convey power, protection, identity and spiritual meaning. I’m just going to take a closer look at three influential sources.
Mesopotamian Cylinder Seals
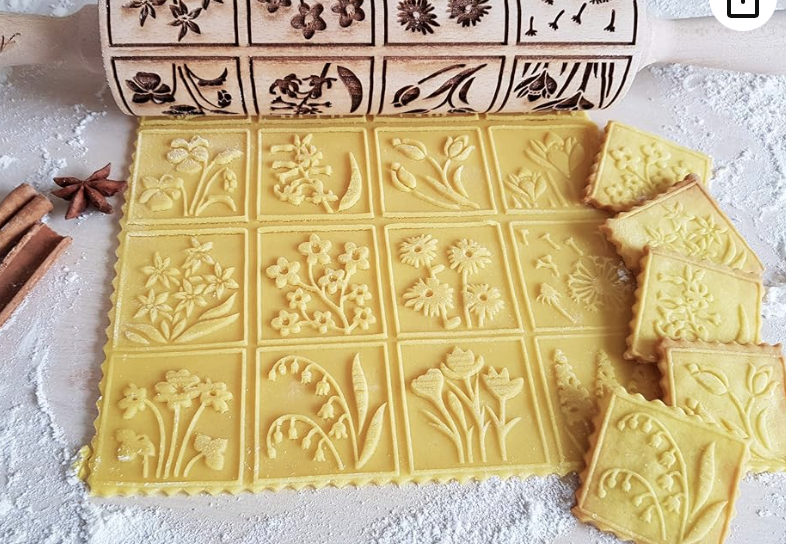
In ancient Mesopotamia (circa 3500 BCE), artisans carved intricate designs into small cylindrical stones. These cylinder seals were then rolled across soft clay to stamp a unique imprint, often used to sign documents or secure goods. These cylinder seals are much like those fancy embossed rolling pins used for shortbread at Christmas to add thistles and other simple designs.
Each seal was personal, symbolic and sometimes featured deities, mythical creatures, or scenes of high ritual significance. They functioned both practically, as legal signatures and magically, believed to invoke divine protection or authority.
The repeated use of these symbols did create a kind of ritualistic magic to embed intention and identity in the daily act of sealing (or baking). These seals are some of the earliest known examples of humans using symbolic designs for both earthly and spiritual purposes.
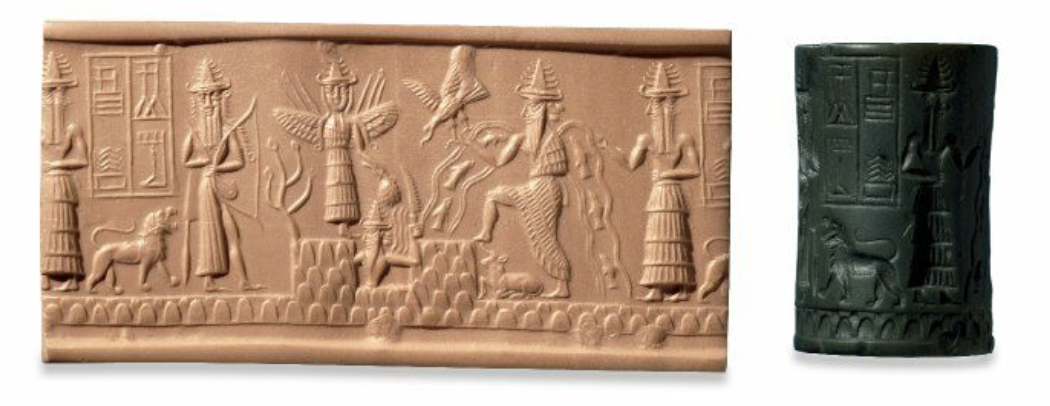
Photo credit: Armstrong Institute of Biblical Archaeology
Egyptian Hieroglyphs
The ancient Egyptians developed one of the most sophisticated symbolic languages in history which are the hieroglyphs. Hieroglyphs were used from around 3100 BCE and each hieroglyphic character held multiple layers of meaning: literal (a sound or word), symbolic (a concept) and spiritual (an energy or deity). These symbols were often used in tombs, temples and amulets to invoke blessings, guidance, or protection in the afterlife and they were encased in cartouches for people’s names.
See Cleopatra’s cartouche below.
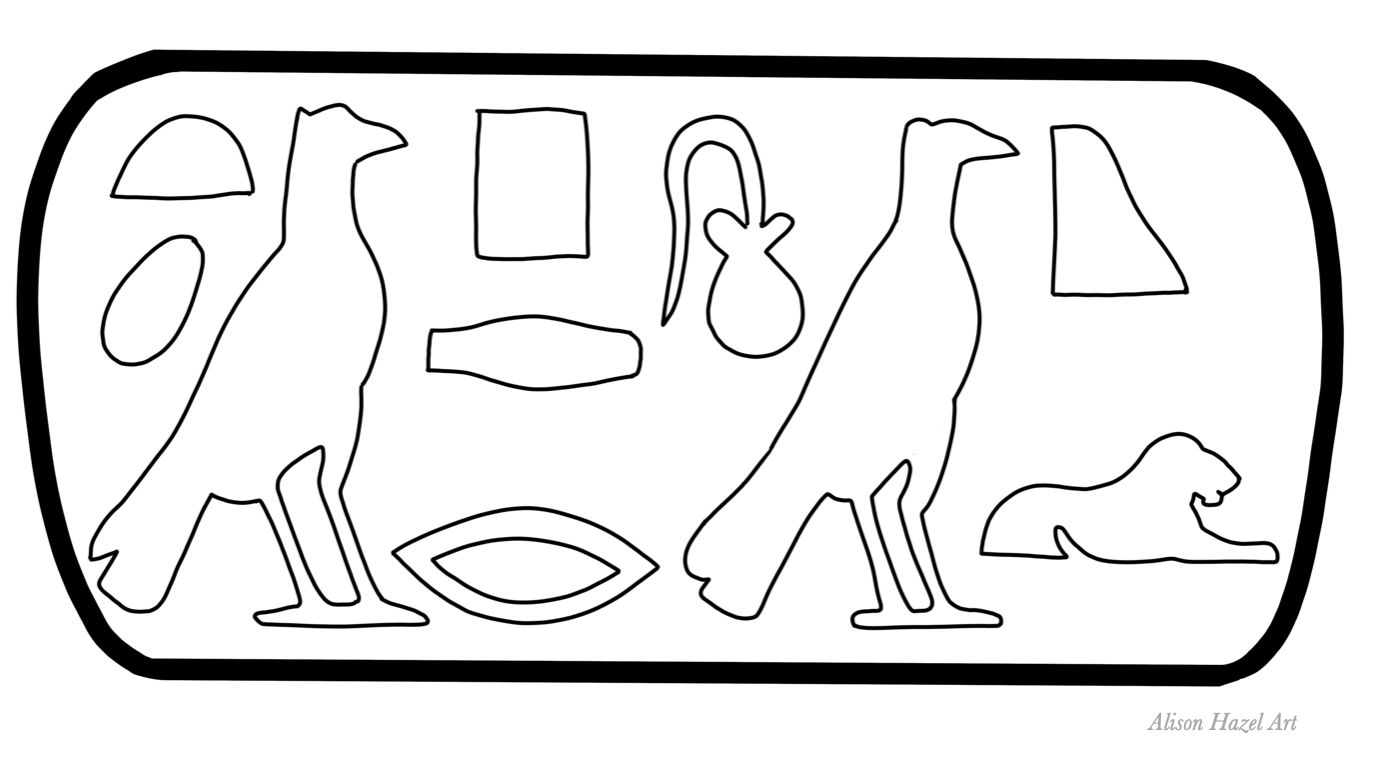
Hieroglyphs weren’t just writing as they were seen as living symbols, infused with the creative power of the gods, particularly Thoth, the god of writing and magic. Certain hieroglyphic combinations were crafted as protective spells or powerful names, acting much like modern sigils in their intent and energy.
Norse Runes
The runic alphabet used by Germanic and Norse peoples from around 150 CE consisted of characters called runes, each representing both a sound and a spiritual concept. Runes were carved into wood, stone, bone and metal for use in divination, magical protection and sacred communication. Each rune was more than just a letter.
For example, Fehu (ᚠ) stood for “wealth” but also symbolized abundance, success and fertility.
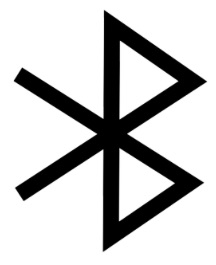
Bluetooth
A rune you probably know is the one for Bluetooth which began as a code name for the actual software but the name stuck.
Runes were often arranged into bindrunes which are two or more runes combined into a single symbol, much like modern sigils, to concentrate and amplify their power. Runes were used in rituals, worn as amulets and etched onto weapons or tools, imbuing everyday life with mystical significance and divine intention.
Common Threads
Though these ancient systems that I’m mentioning emerged in different cultures and continents, they share a deep, intuitive understanding with three highlights:
- Symbols have power.
- Shape and form can carry intention.
- Designs can act as a bridge between the seen and unseen worlds.
These early symbolic languages laid the foundation for sigil-making as we know it today. Sigils is a way to transform ordinary letters or images into sacred signs which carry energy, will and wonder. These early symbols were often used in ceremonies, rituals and written charms to invoke protection, prosperity or guidance.
Medieval Magic
The Occult
In the Middle Ages, sigils took on a more formal role in some Western occult traditions. They were sometimes used by magicians and alchemists to represent angels, demons, or spiritual entities. Grimoires (magical textbooks), like the Lesser Key of Solomon, included elaborate sigils to summon and control spirits used sigils. Herbalists and astrologers use sigils to encode rituals, names of power and cosmic forces. These sigils were often believed to shrink divine or magical energy into a visible form.
The Chaos Magic Movement
Statement of Intent
In the 20th century, sigils were revived and reimagined by modern occultists especially in the movement known as Chaos Magic. Pioneered by practitioners like Austin Osman Spare, this new approach simplified sigil creation. Spare taught that a sigil could be made by writing a statement of intent (like “I am confident”).
Repeating Letters
Another way is to remove the vowels and repeating letters, so Johanna becomes JHN and Alison becomes LSN.
Abstract Design
Additionally, you can rearrange the remaining letters into an abstract design. At this point you can see the reflection in many business logos as well. This design (the sigil) was then charged with energy through meditation, ritual, or focused visualization and left to work on the subconscious mind. This method focused on personal intention and creative expression.
Modern Use
Artful Expression
Today, sigils are experiencing a renaissance but not just in magical practices but also in art, design, tattoo culture and personal growth.
People create sigils to:
- Set intentions or goals.
- Represent their name or identity.
- Focus meditation or mindfulness.
- Add mystery and symbolism to artwork.
I like to use techniques like sigil maps to blend order (like the alphabet) with creativity and perhaps spiritual meaning.
Sigil Maps
Turning Words into Symbols
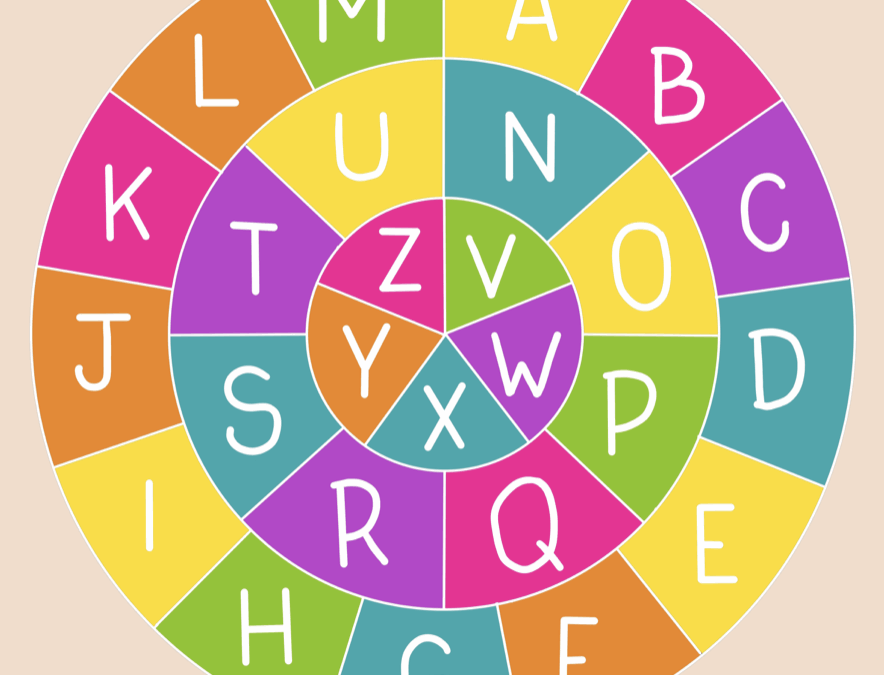
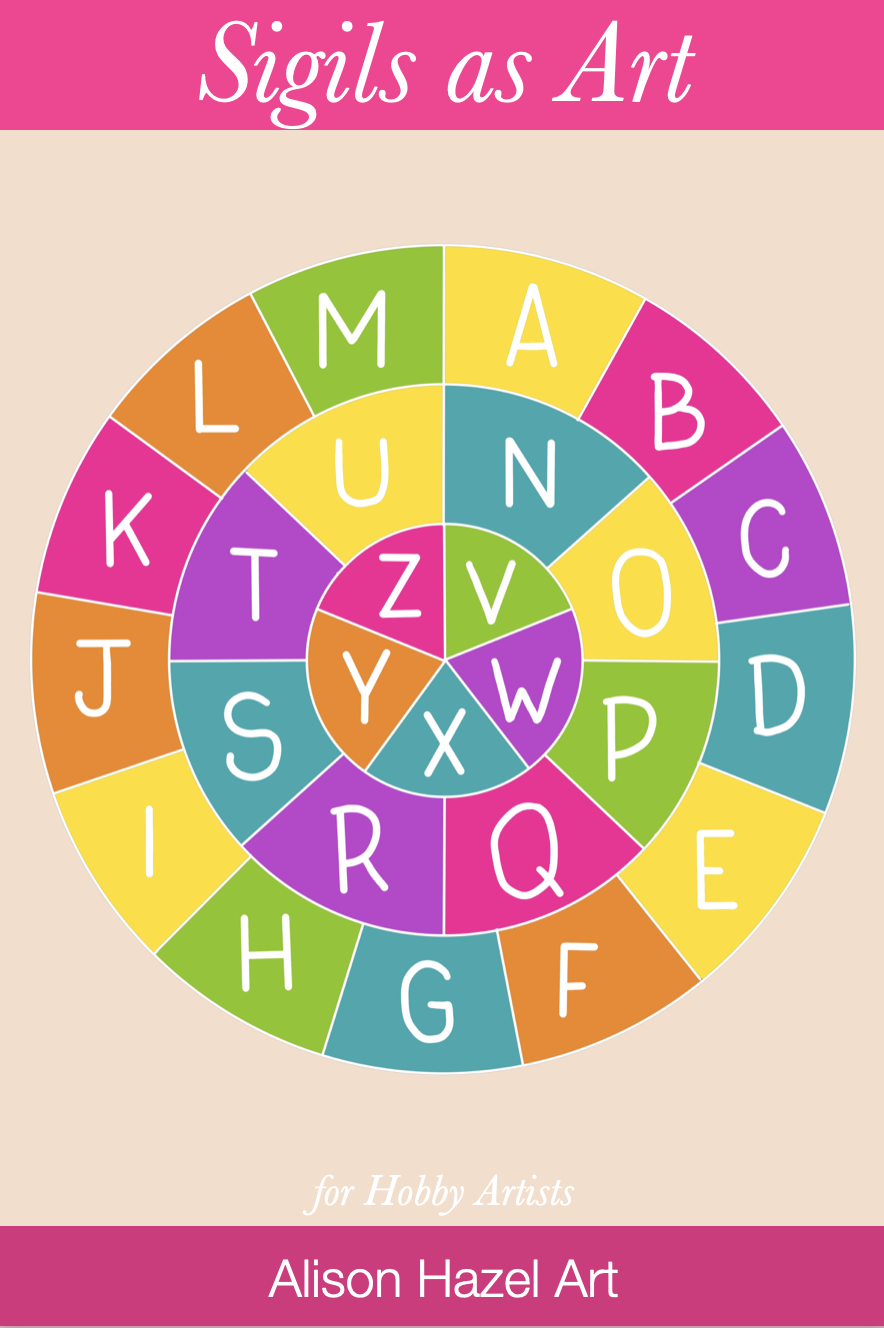
A sigil map is a creative tool that transforms words into unique symbols by mapping letters onto a series of circles. It’s a simple yet magical system like a visual code where each letter of the alphabet has its own place, allowing you to draw a sigil (a symbolic design) that represents a word or phrase.
The Structure
Three Concentric Circles
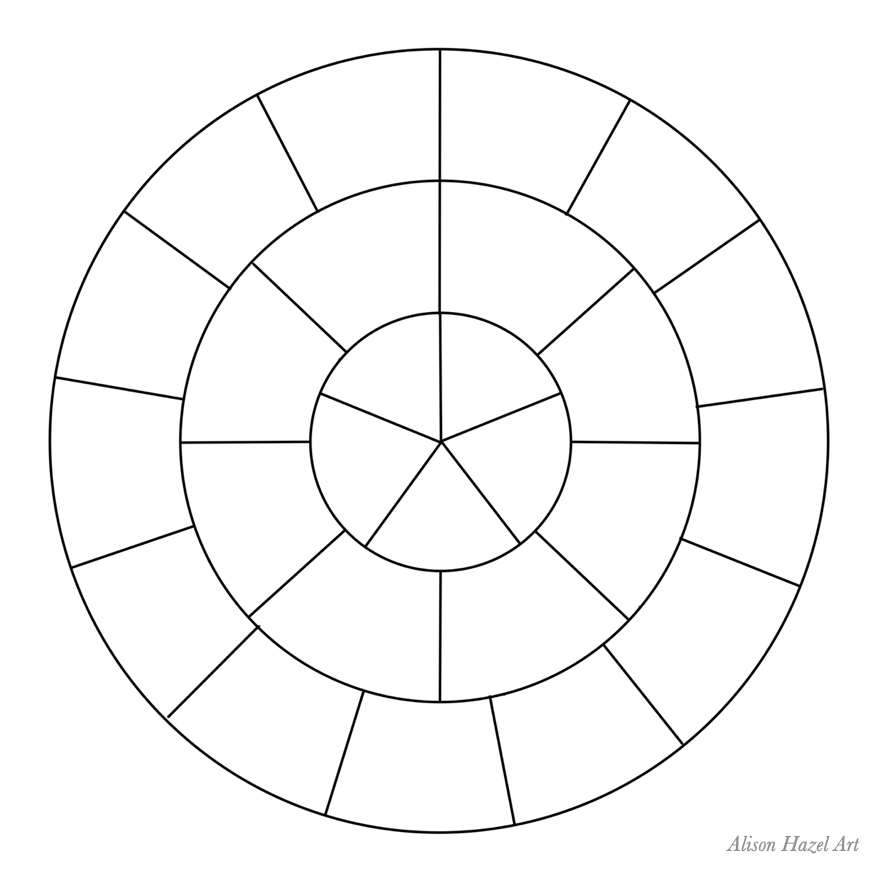
To start, draw three concentric circles, one inside the other, like a ripple in a pond.
- Outer Circle: Divide this circle into 13 equal segments (+/- 27.7°)
- Middle Circle: Divide into 8 equal segments (45°).
- Inner Circle: Divide into 5 equal parts (72°).
These numbers 13, 8 and 5 are part of the Fibonacci sequence which I’ve spoken about before and is a pattern found throughout nature, from flower petals to pinecones. Using this natural sequence brings an organic and natural harmony component to your sigils.
Mapping the Alphabet
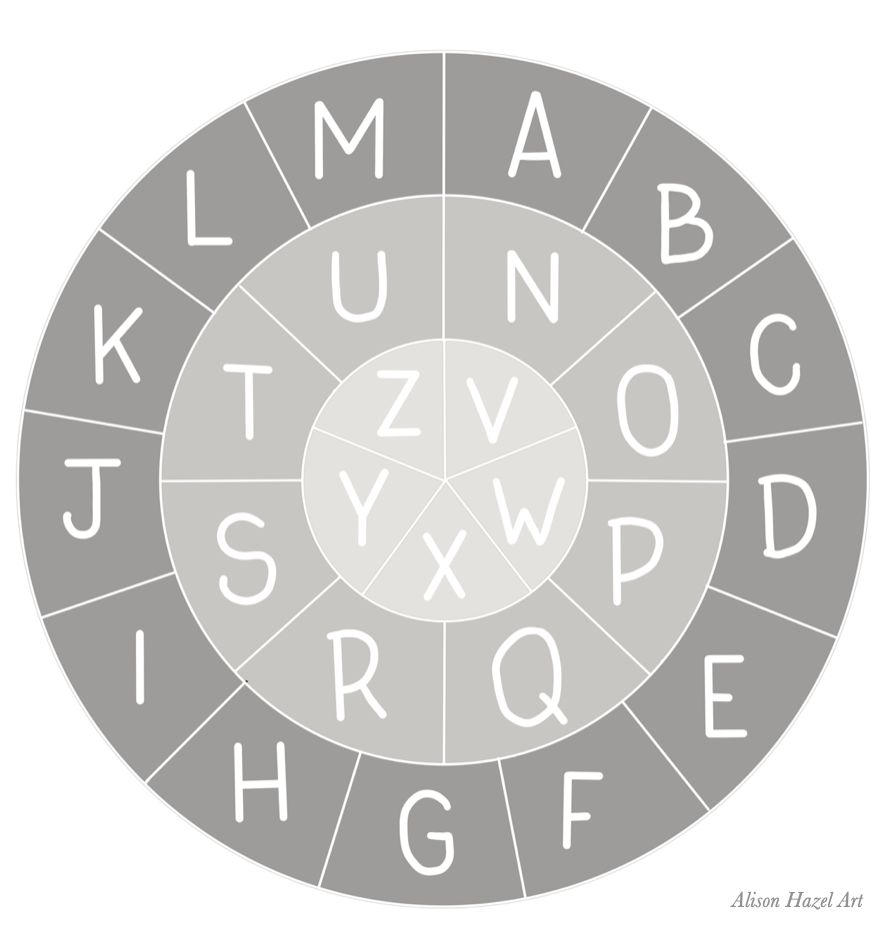
Now, assign the 26 letters of the English alphabet to these segments:
- Outer Circle: Start at the top right and move clockwise, placing the letters A to M (13 letters).
- Middle Circle: Continue from N to U (8 letters).
- Inner Circle: Complete the alphabet with V to Z (5 letters).
Each letter now has a unique place on the map. You can check your diagram against my sigil map.
Drawing a Sigil
From a Word
To create a sigil from a word:
- Lay a sheet of tracing paper over the sigil map.
- Plot the first letter of the word on the map and mark with an open dot (a circle).
- Draw a straight line from that letter to the next.
- Continue connecting each letter in the word until you reach the last letter, now mark with a short line or arrowhead.
- The resulting shape is your sigil which is a visual symbol of your word.
You can keep it simple with lines, or add curves, dots, or embellishments for a more artistic touch.
Intention or Meditation
Focus Points for Inner Work
Sigils are powerful additions to spiritual or meditative rituals. They can help you focus your intention and anchor your energy. In intention work, a sigil can be drawn on paper, carved into a candle, or written with herbs or water as part of a ritual. In meditation, you can gaze at the sigil to quiet your buzzing mind and tune in to the frequency of your intention. You might burn, bury, or release the sigil after the ritual by symbolically letting go and trusting the universe to carry your message.
Hidden Messages
Write in a Visual Code Just for You
Because sigils are abstract, they make excellent secret symbols. Maybe you can weave them into your life in subtle ways that others won’t recognize. Leave a sigil in a letter, a notebook margin, or even on a wall as you mark. Perhaps you could stitch one into your favorite clothing or write it in invisible ink. Possibly you can use sigils to encode affirmations, memories, or even your computer passwords in visual form. This is a beautiful way to embed meaning into the mundane, turning everyday life into a personal ritual.
One Word Sigil
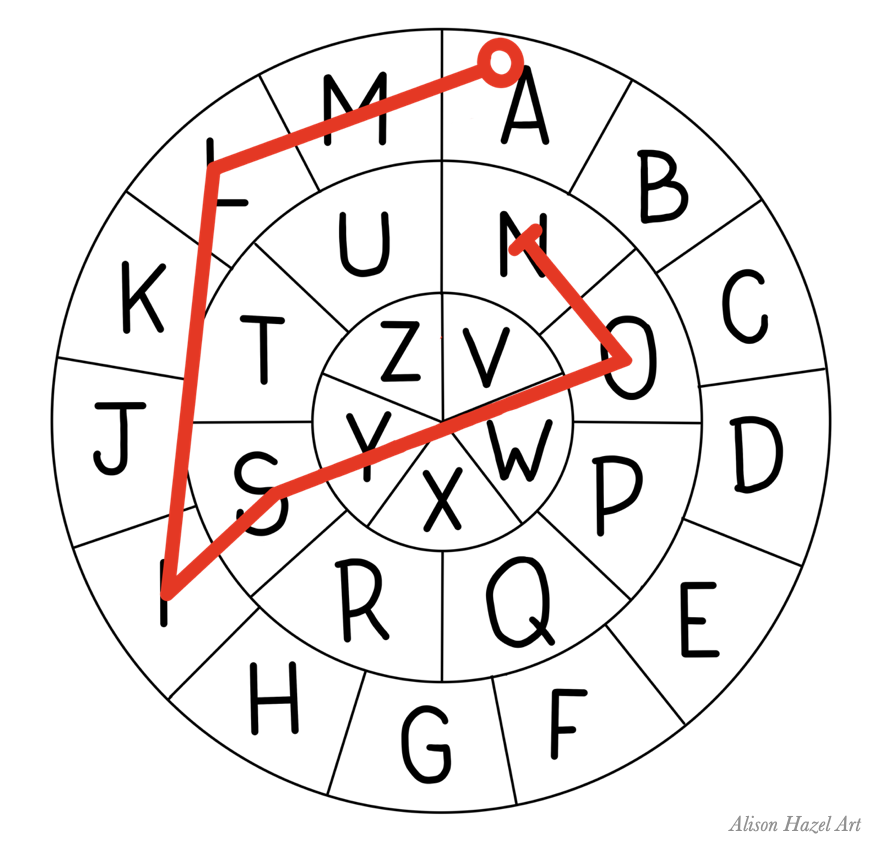
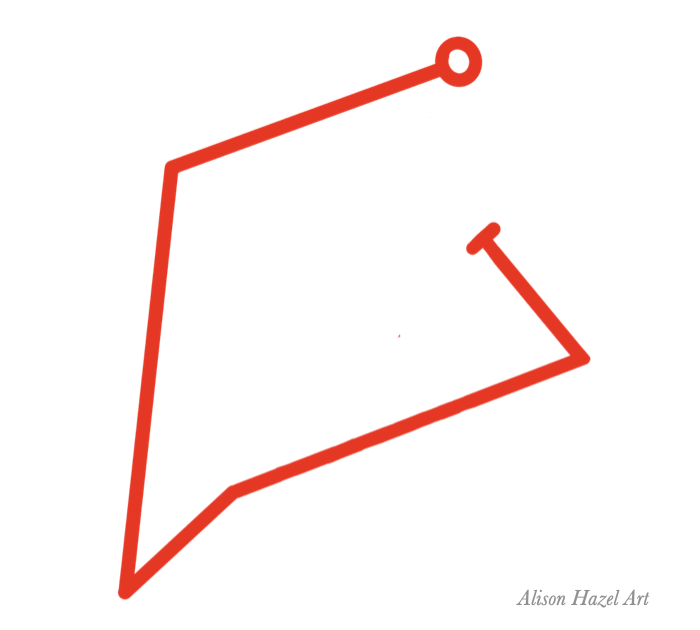
Alison
In general, you would do a one-word sigil perhaps of your name. So, here I’m showing you what my name, Alison, looks like as a sigil using this particular sigil map.
One Phrase Sigil
Motivational Phrases
You could do a motto or motivational phrase as a sigil. Sayings like, “no pain, no gain” or “fortune favors the brave” make good phrase when sigils. If you have a family or company motto you can do a sigil for that as well.
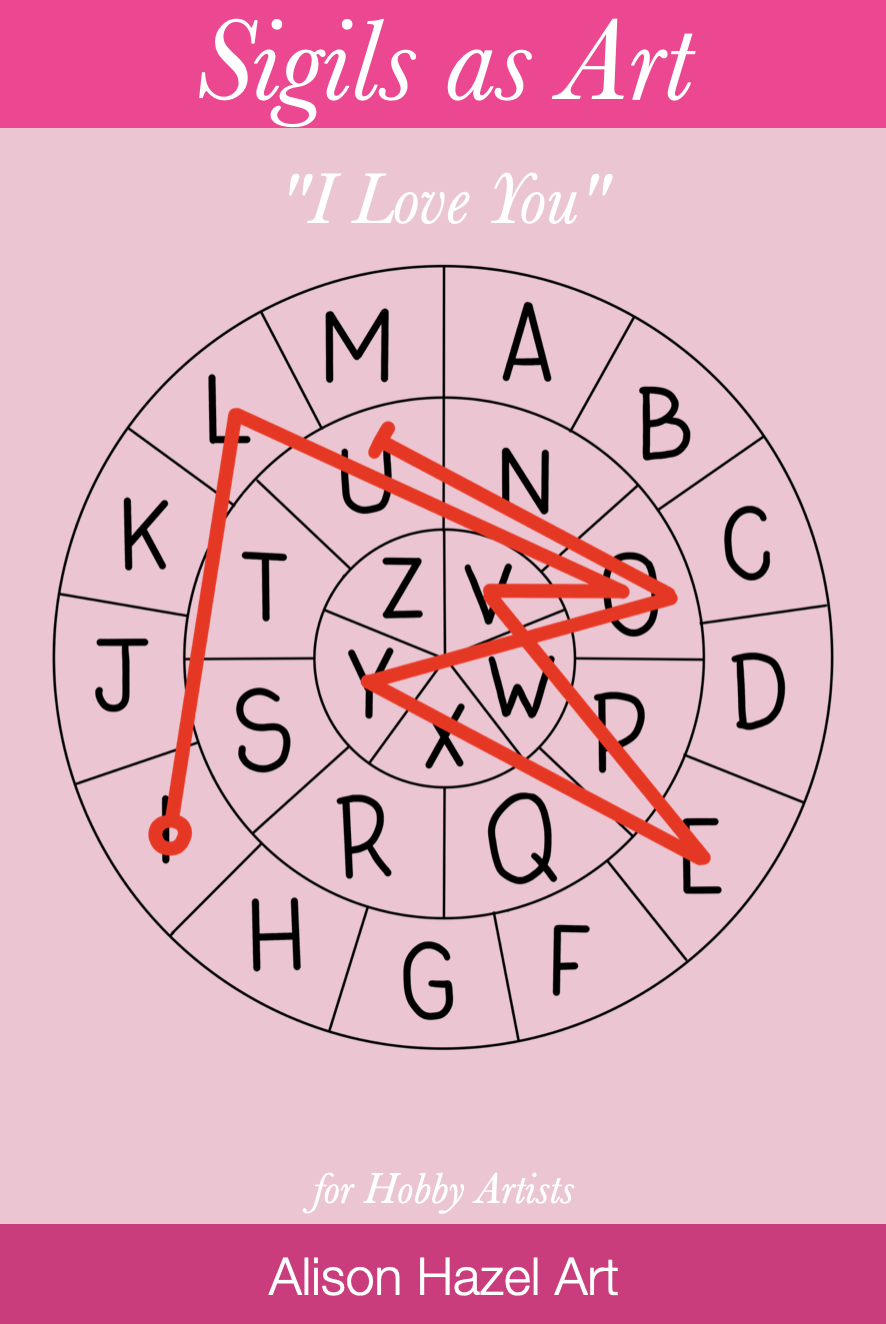
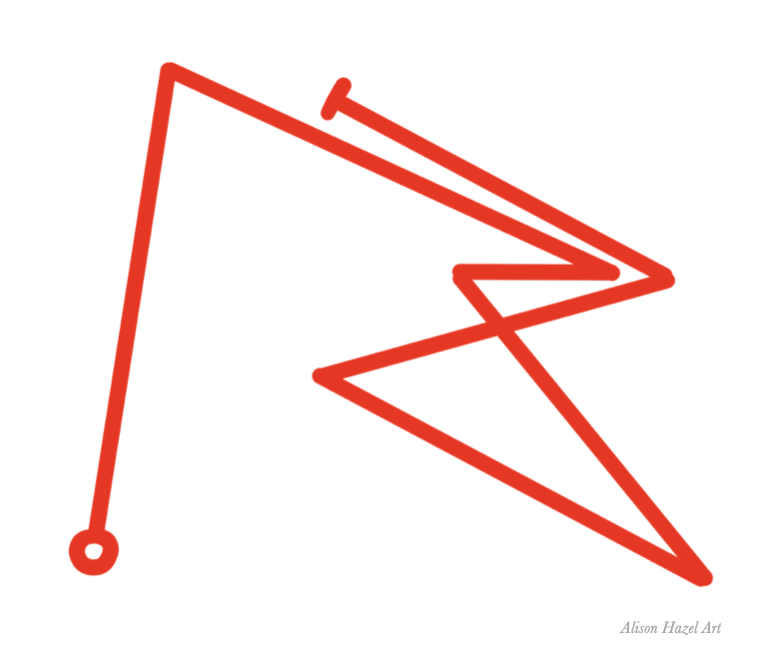
I Love You
How about trying a phrase like, “I love you” which will look like this?
Where to Use Sigils
Everyday Life and Spiritual Practice
Sigils are not just abstract symbols, but rather they are tools of intention, creative expression, and personal power. Once you’ve created a sigil, you can place it in meaningful spaces to amplify its purpose or keep it close as a quiet reminder of your inner magic. Here are some inspired ways to use your sigils:
Tattoos
A sigil tattoo can easily serve you as a permanent affirmation, a protective charm, or a hidden mantra that lives on your skin. Because sigils are abstract, only you (or those whom you choose) may know what they mean. You might ink a sigil tattoo for strength, self-love, healing, or a deeply personal word that’s transformed into art. Placing the sigil on a meaningful part of your body can enhance its symbolic value over the heart, the wrist, the spine, or anywhere that feels significant.
Art Signatures
Instead of signing your name in the usual way, you can use a sigil as your artistic monogram. This creates a unique identity for yourself and adds a layer of mystique to your work. It allows your energy or message to be embedded in your creations without revealing everything to the viewer. Whether on canvas, digital art, sculpture, or craftwork, a sigil-signature makes your work feel more intentional and sacred.
Journals and Sketchbooks
Use your sigils to decorate or mark your journal pages, sketchbooks, or planners. You can draw a sigil at the top of a page to set an intention for the day. Perhaps add one to an art journal entry to seal your thoughts, like an energetic lock. Include sigils in your vision boards or creative brainstorms to direct the energy you want to silently call in. This quiet, consistent practice adds can offer depth to your self-reflection and creative life.
Overarch
Why Sigils Endure
Sigils have been, and are still, kept alive across the centuries is likely their powerful combination of meaning and mystery. They allow us to hide something precious in plain sight like a word, a wish, a truth and turn it into something beautiful and uniquely ours. Perhaps you can bring a sigil into your art practice. Let me know how you get on.
Save this pin to read later.
Author Bio: Alison Hazel
Alison Hazel is a hobby artist and she shares her ongoing journey about becoming an artist later in life. She creates simple art that anyone can make. She hopes to inspire you to reach your creative potential in the area that suits you. Read more about Alison’s story. Get her newsletter.
Weird Gourds – Colored Ink Art
Join me as I sketch, draw and paint a weird autumn themed knobby gourd using colored ink as a hobby artist.
Artzlife Newsletter
Author: Alison Hazel - Published: December 2024 Artzlife Newsletter Creative art journal inspiration for hobby artists Welcome to a Place for Passionate Hobby Artists Are you a hobby artist seeking inspiration, connection and gentle guidance on your creative...