Seasons of Art: Spring

Seasons of Art: Spring

Seasons of Art: Spring 2023

Group Meeting

Learn more about the recent Seasons of Art group meeting.

See more about the Seasons of Art group here.


Satvvir’s Artwork

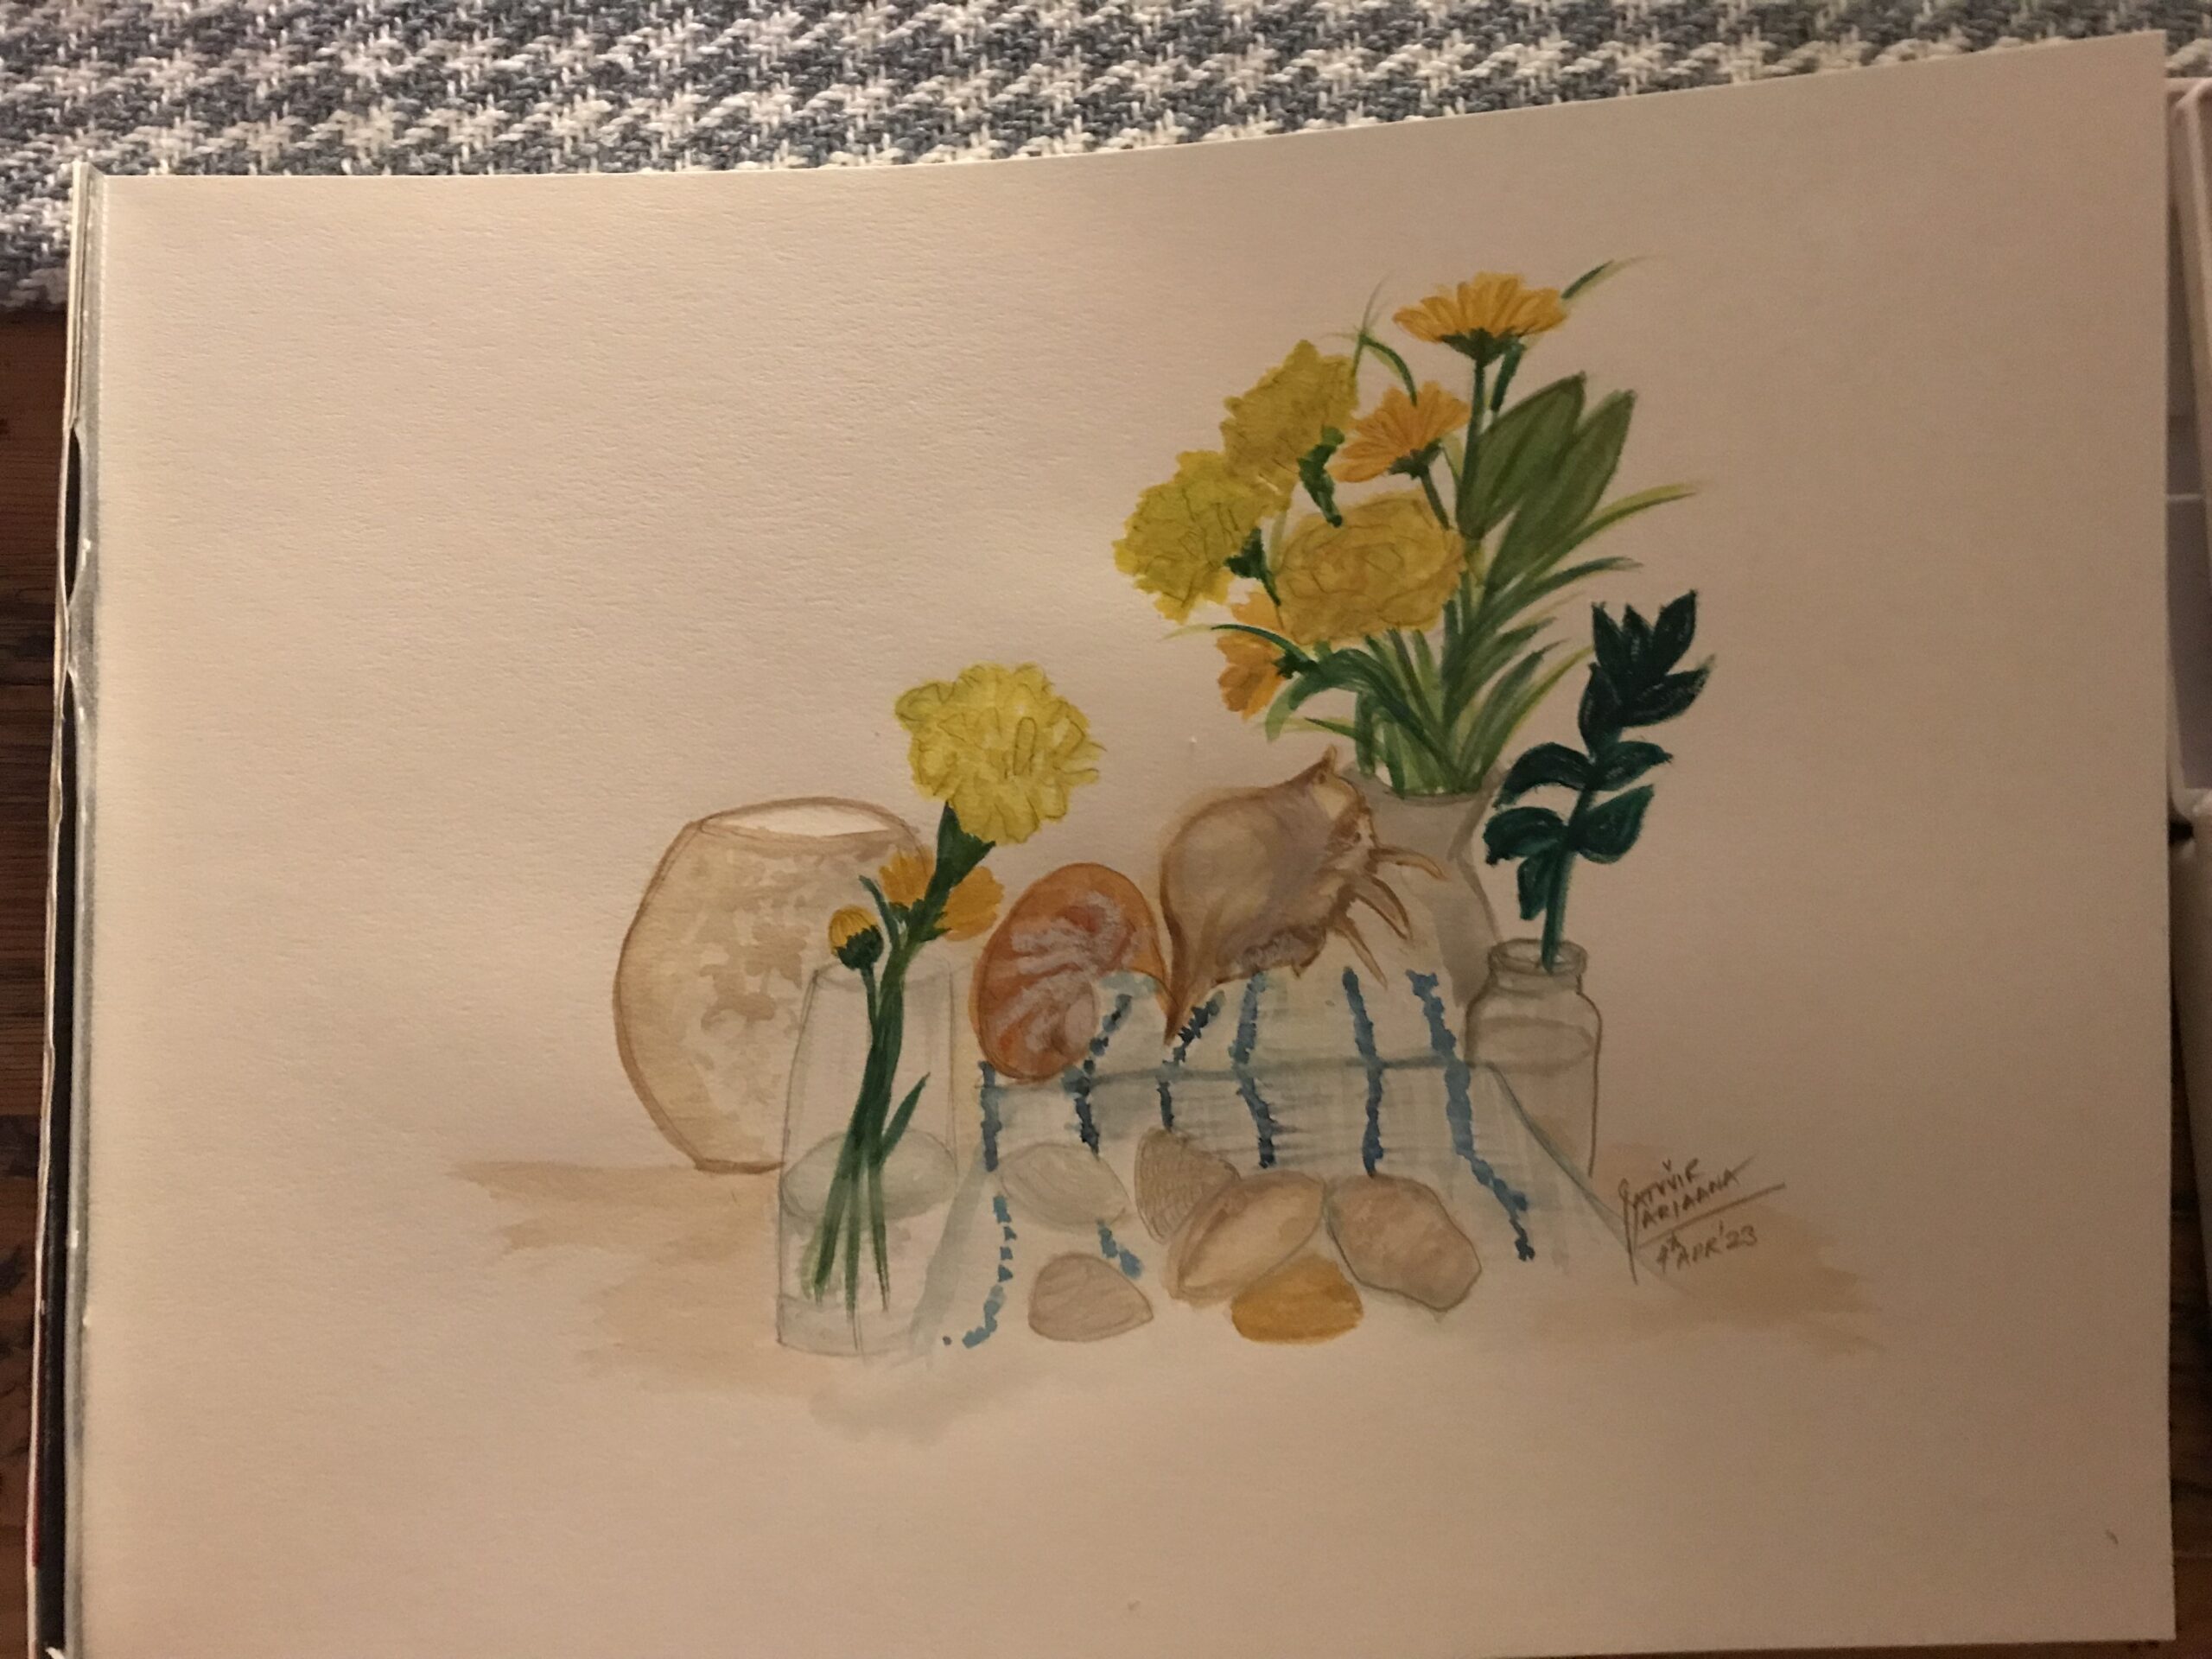
Below is Satvvir’s artwork (Instagram @theambivertsbb). She used watercolor and combined orabges and yellows with a lot of texture in this piece.
Arwynne’s Artwork

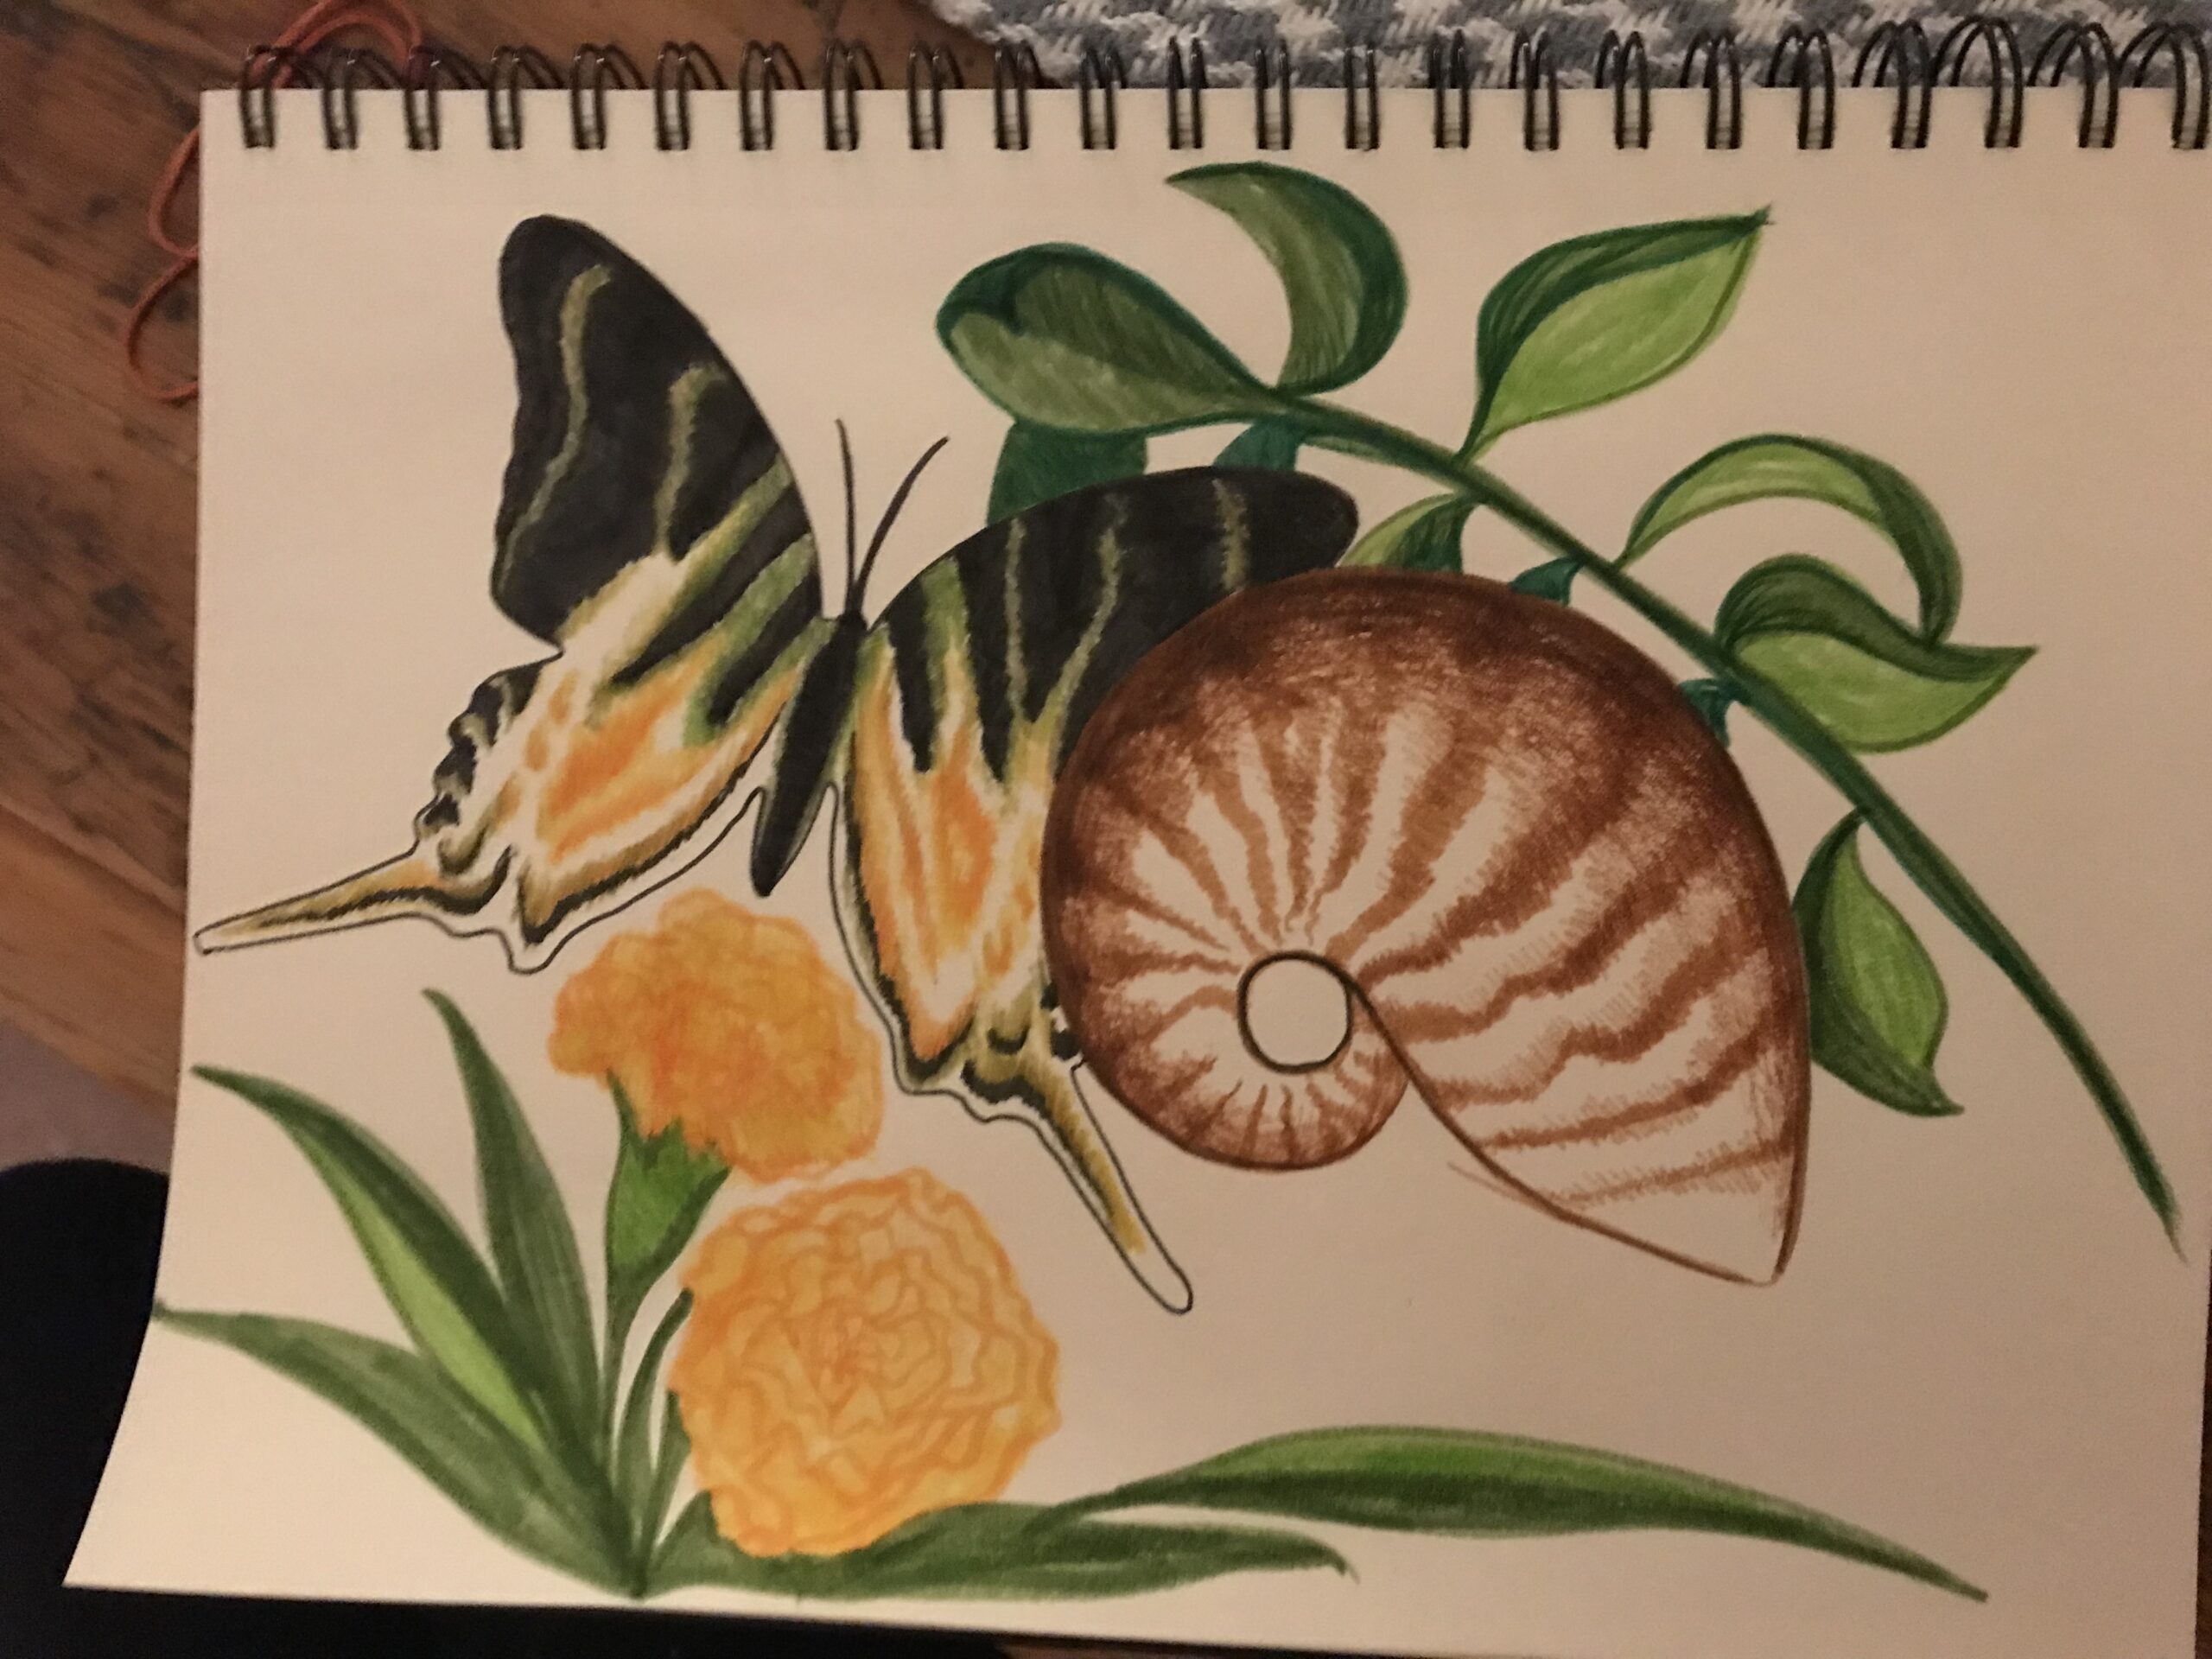
 Here is Arwynne’s finished artwork. You can see more of her work at IG @mspinkdotcom.
Gillian’s Artwork

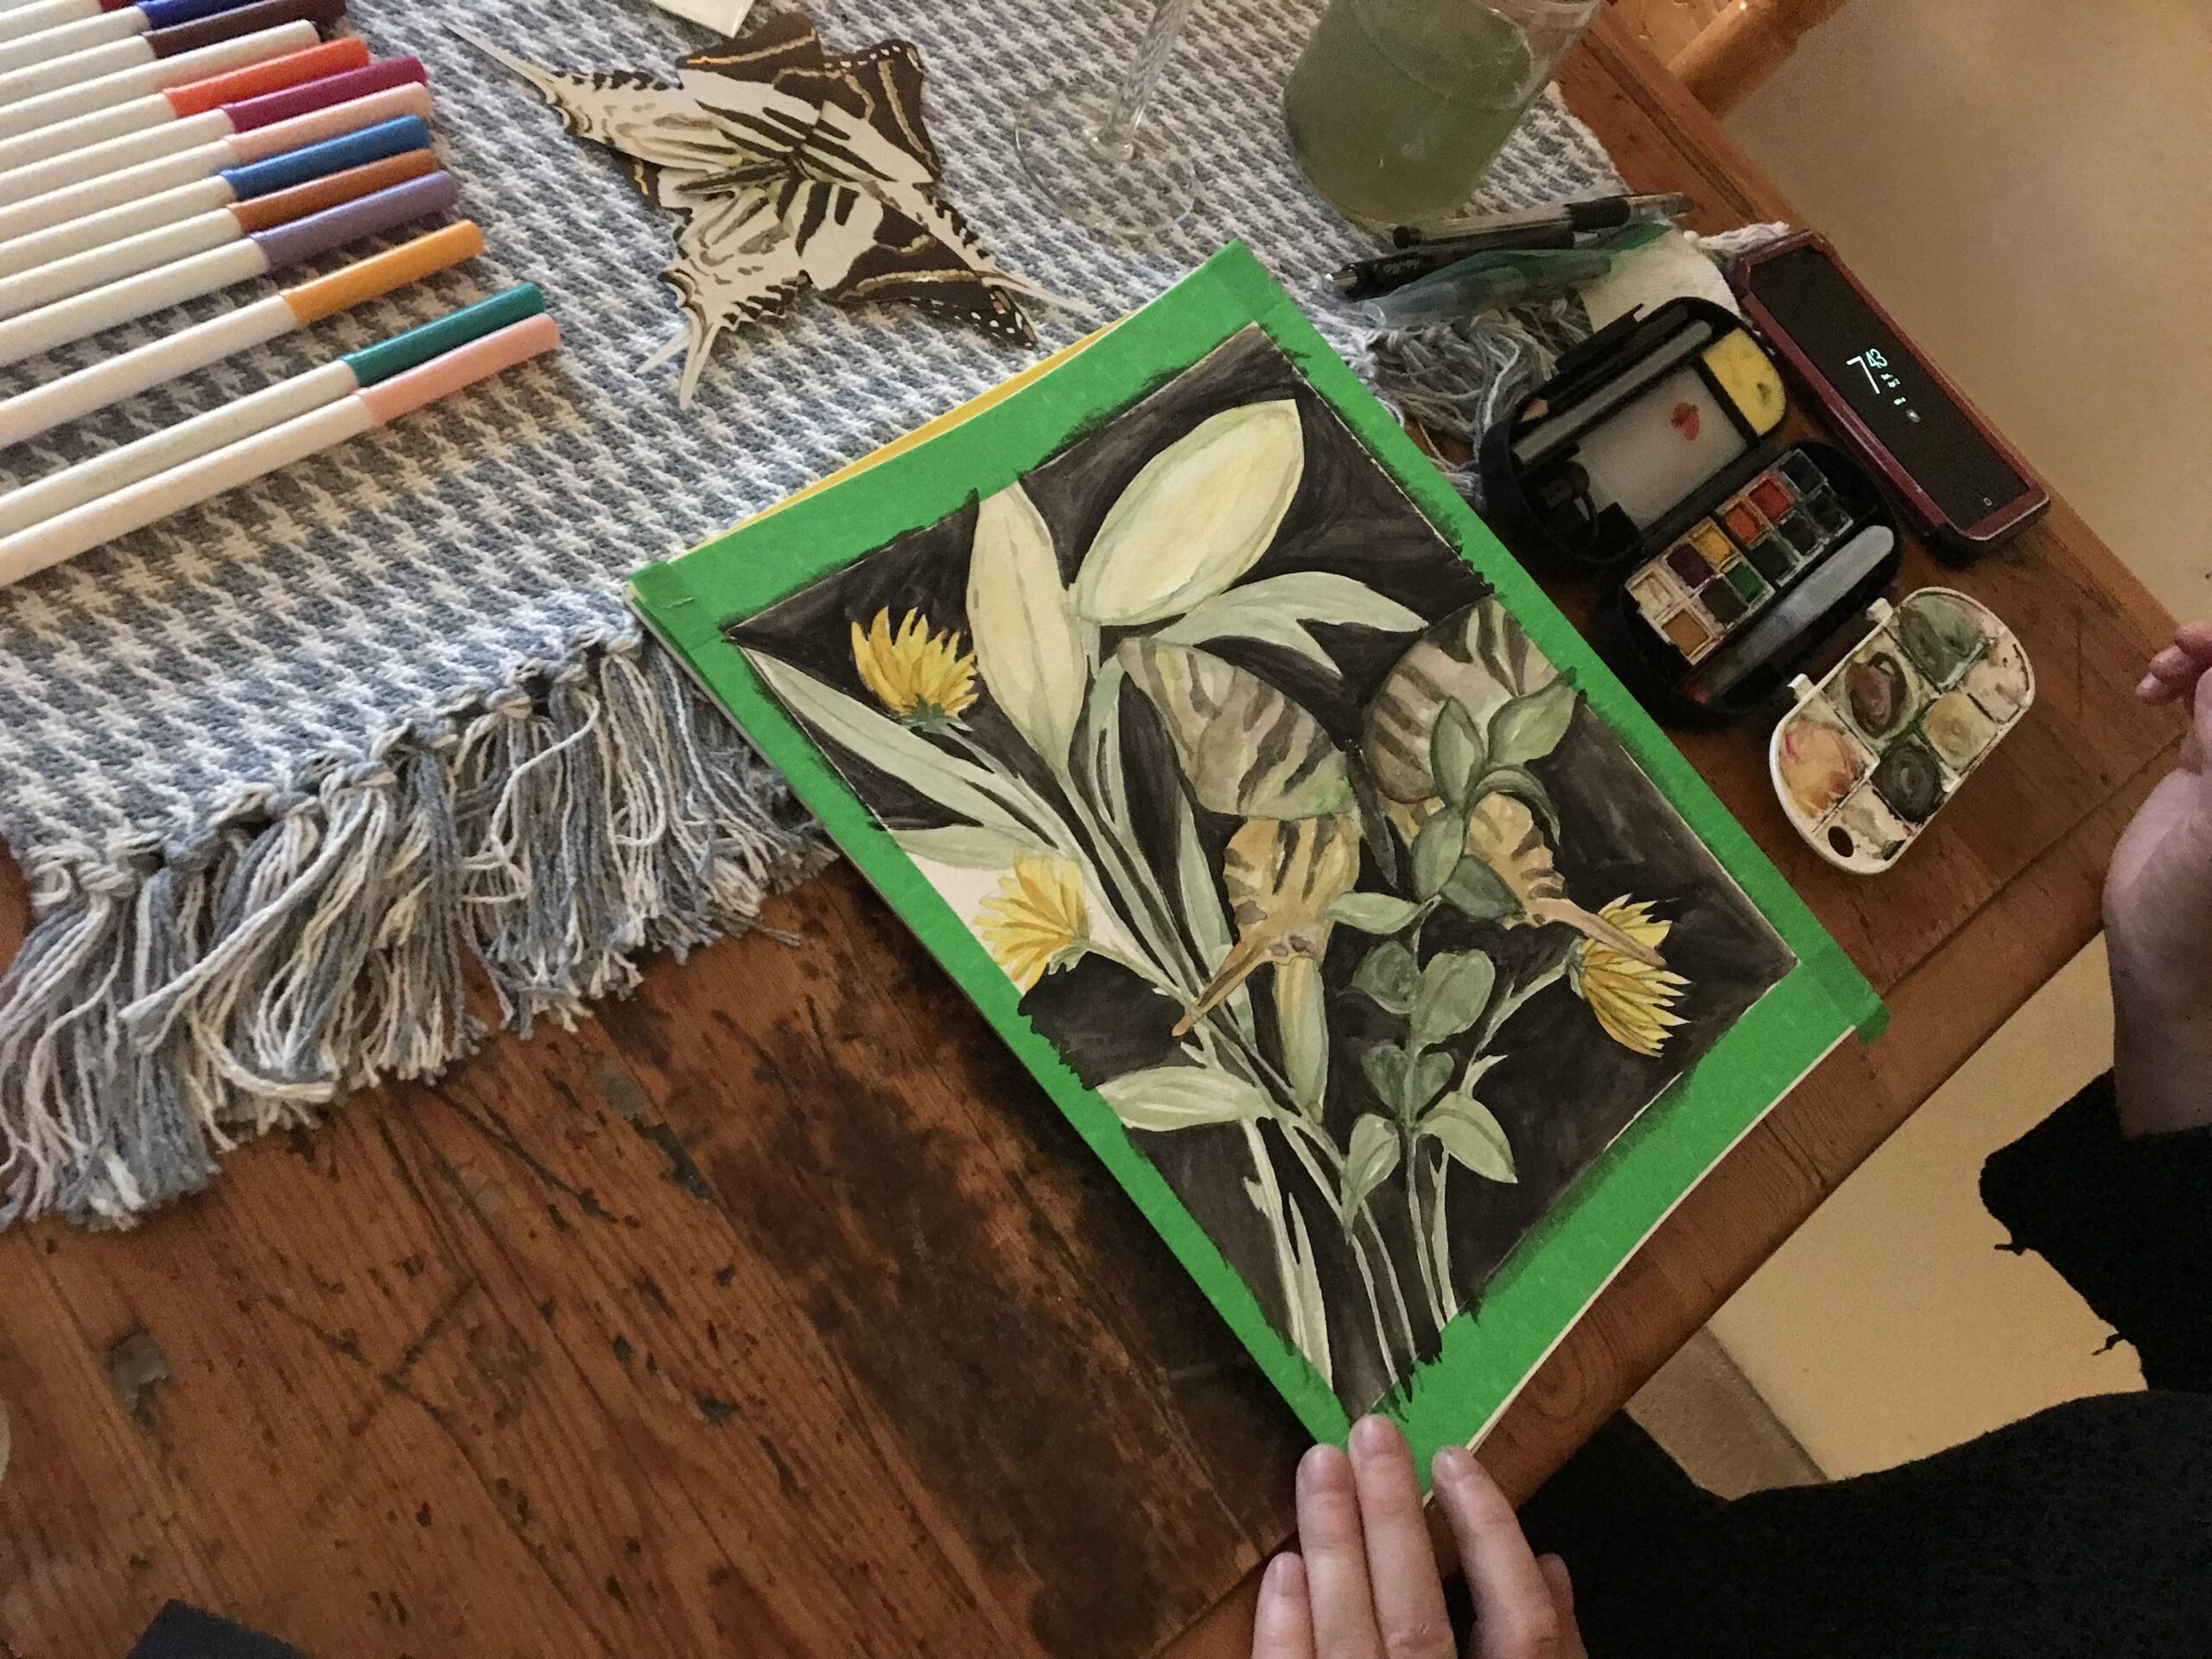
Below is Gillian’s finished artwork. I first meyt Gillian when she led a watercolor class at the Elephant Studio in Vancouver. Follow Gillian at IG @gillianpearsonart.
 

Alison’s Artwork

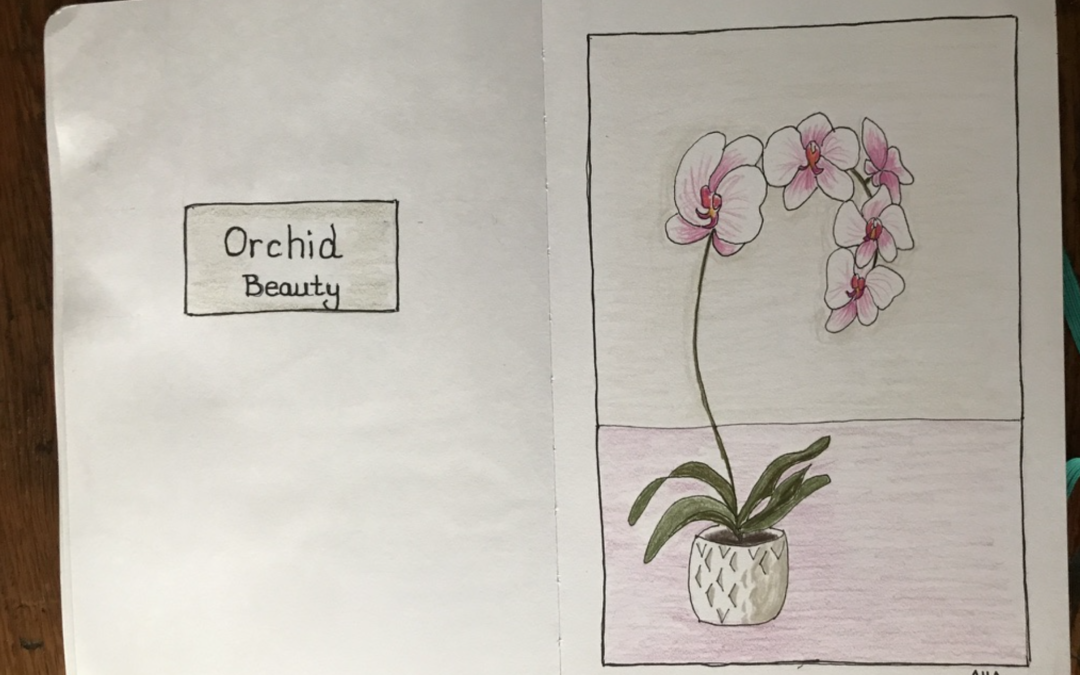
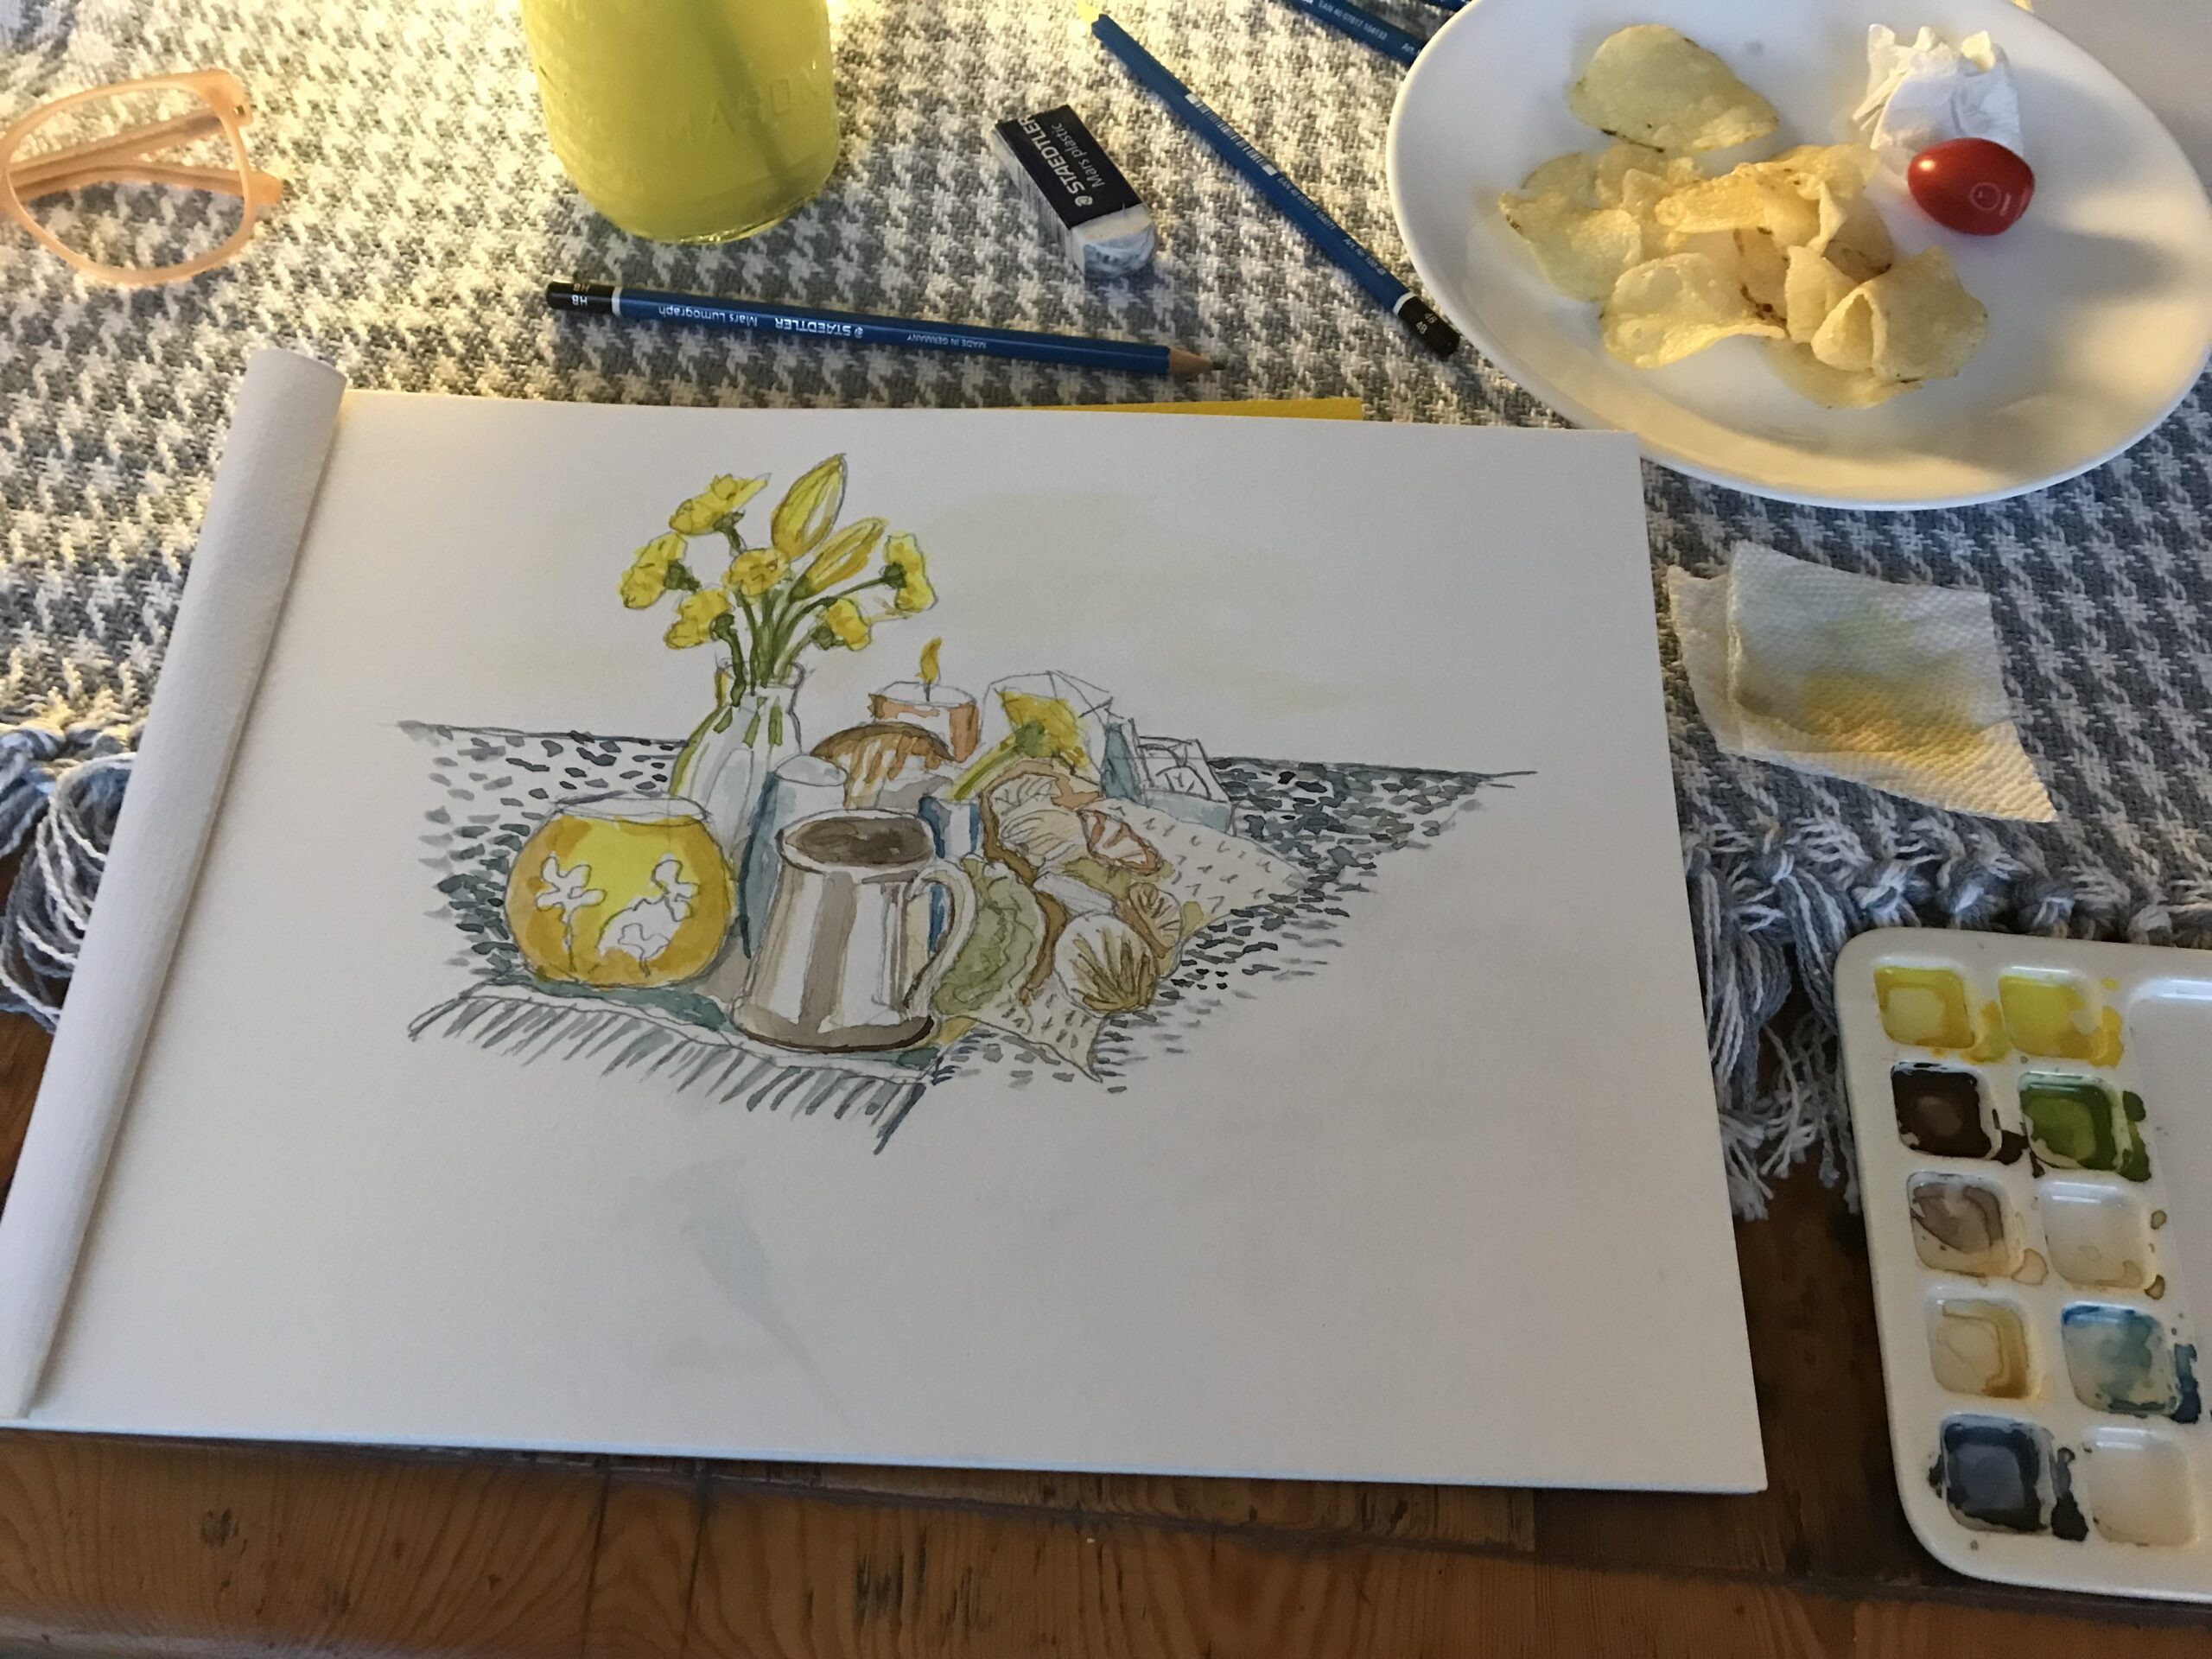
Below is my artwork of the still life done in watercolor. I tried to create something in the center which I couls later frame and hang on my wall. The main horizontal is slightly out which I adjusted when placing it in teh frame.
 

Seasons of Art Group YouTube Video

I complied a YouTube video of the evening’s activities and you can check it all out by clicking on teh video below. 

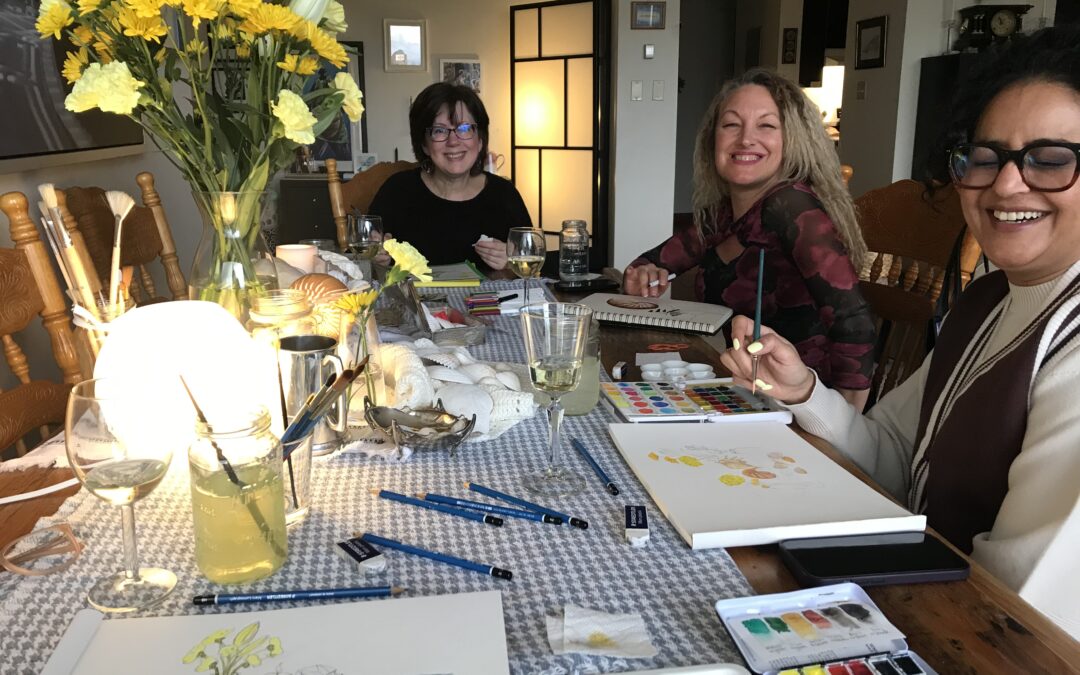
Seasons of Art Group: The Gals

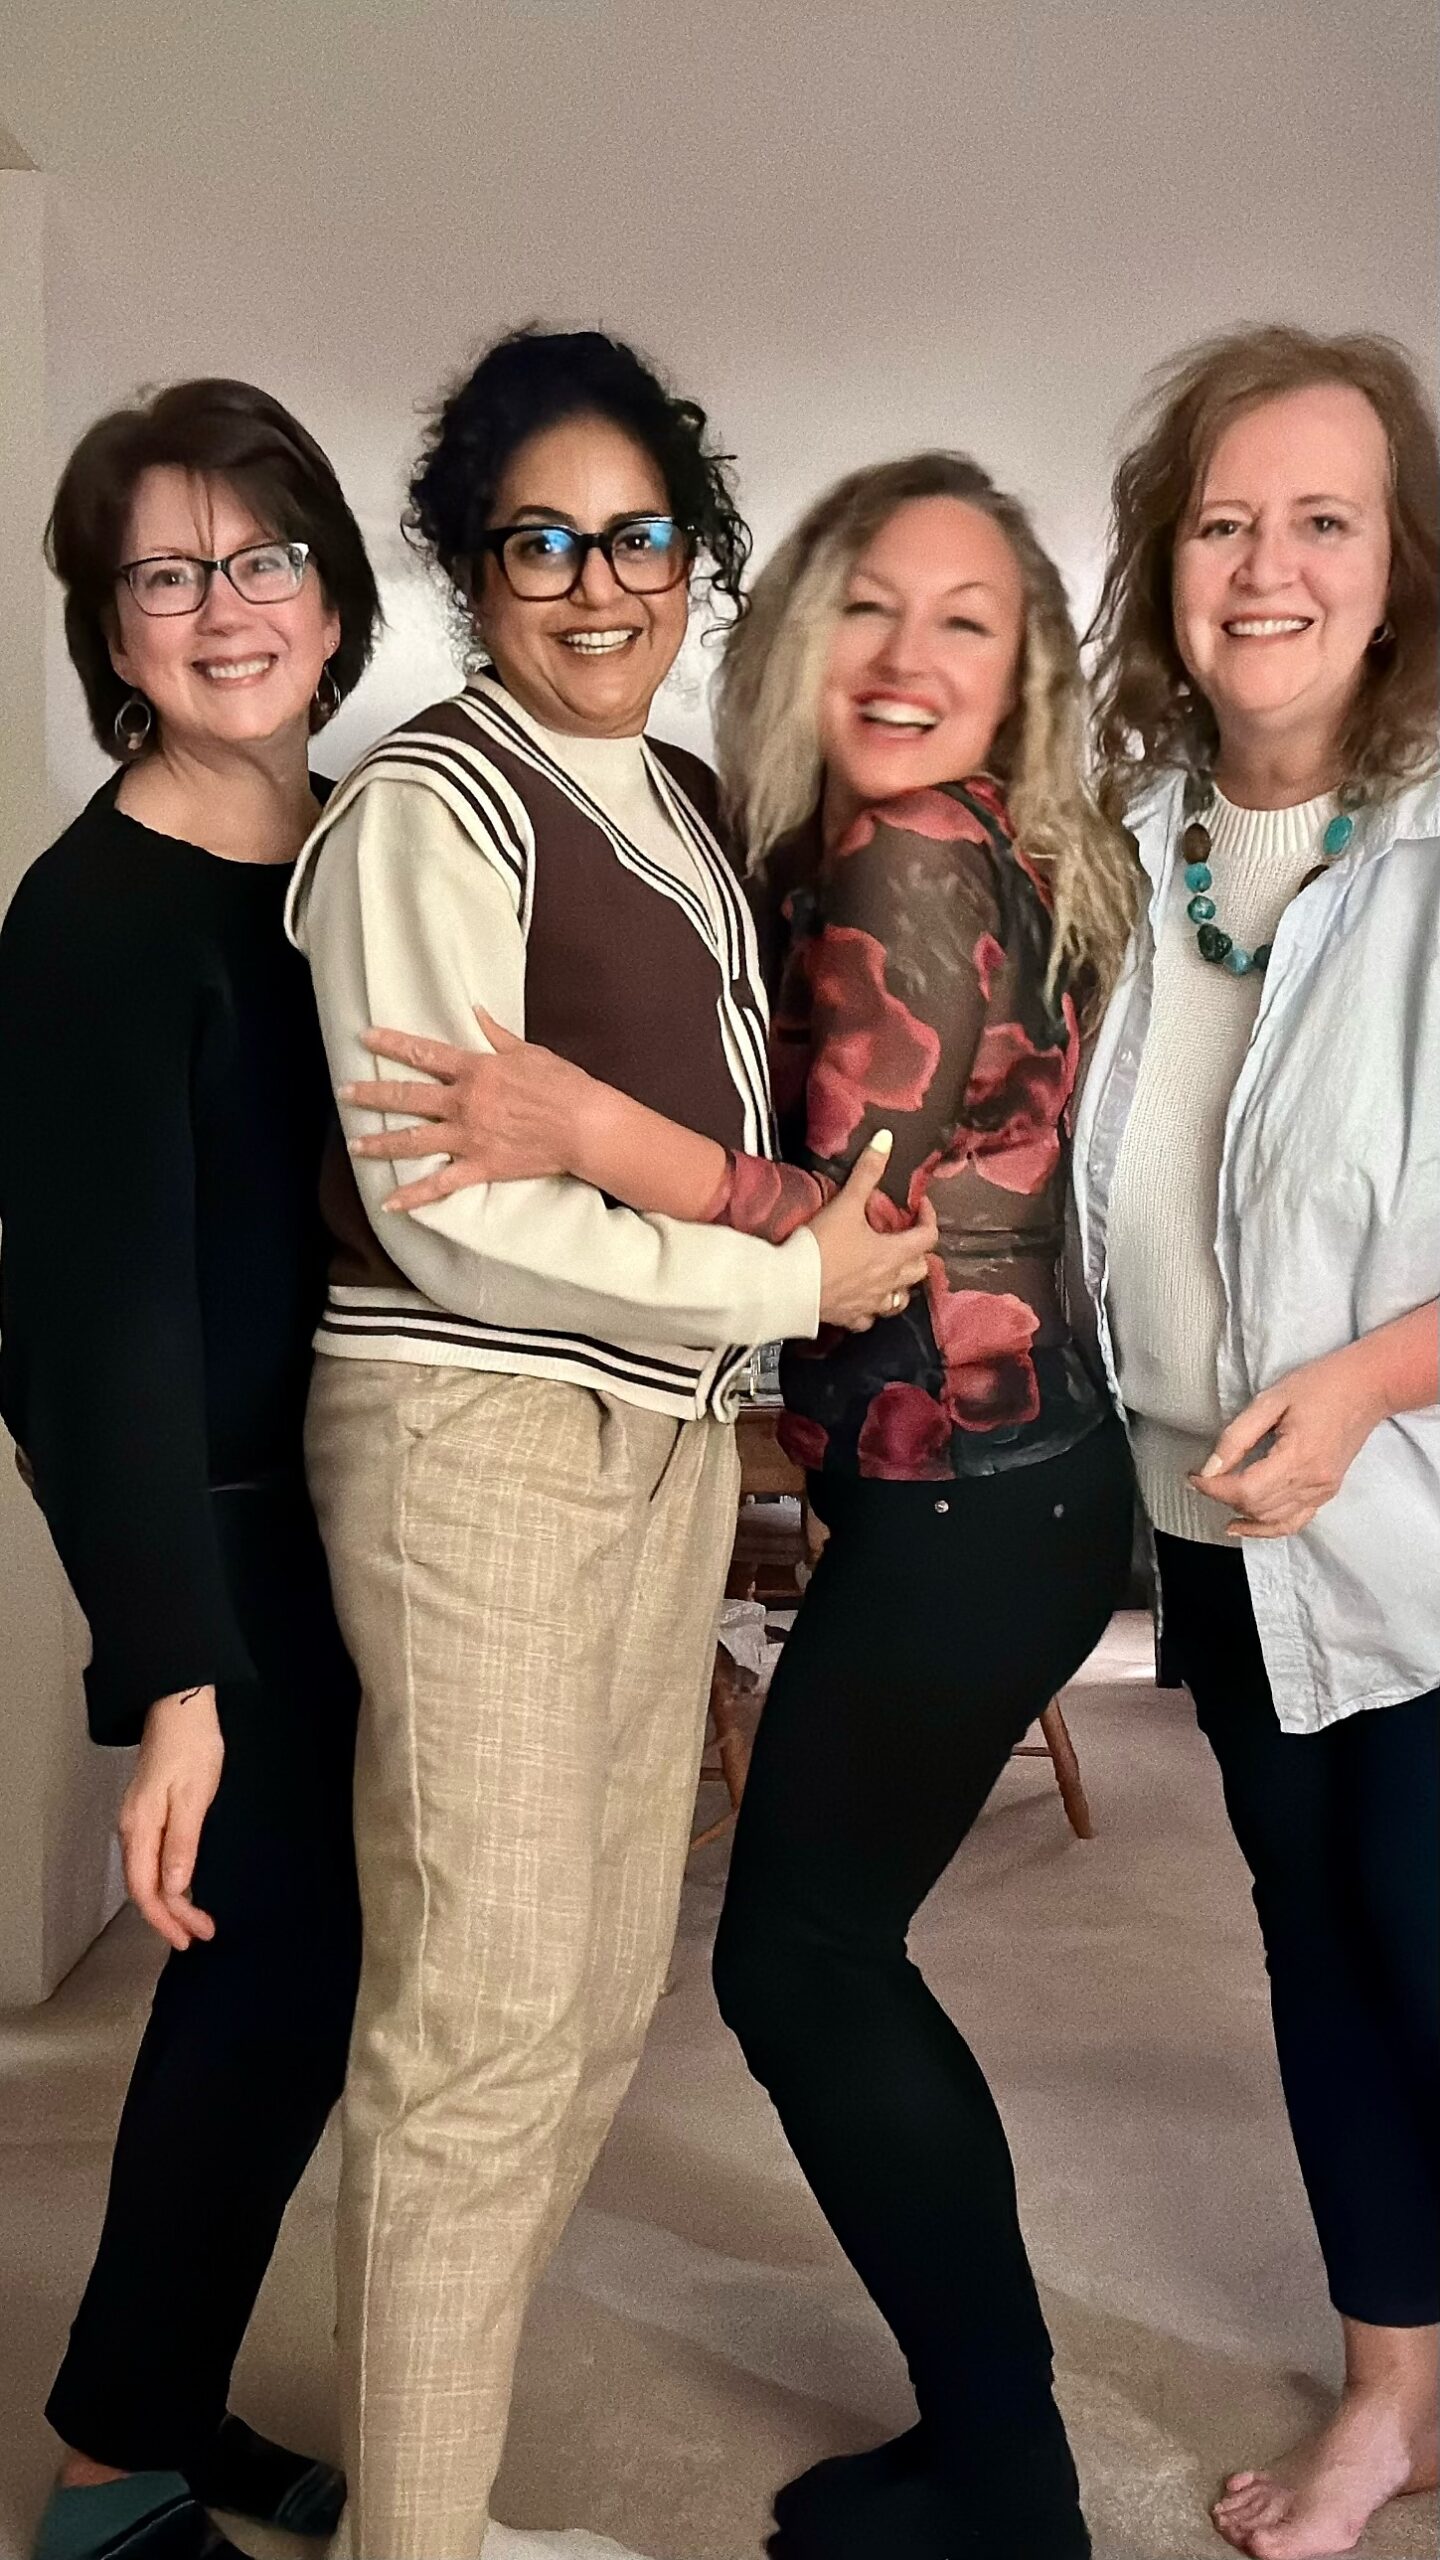
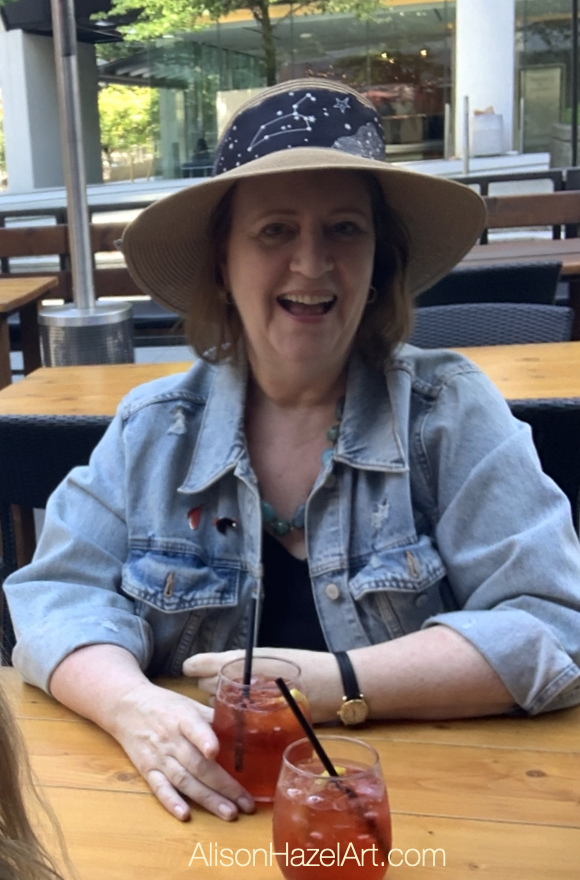
Our group photo taken at the end. frome left to right Gillian, Satvvir, Arwynne and Alison. We had a really nice evenign and I look forward to doing it again soon.
gillian-satvvir-arwynne-alison
Alison Hazel

Author Bio: Alison Hazel

Alison Hazel is a hobby artist and she shares her ongoing journey about becoming an artist later in life. She creates simple art that anyone can make. She hopes to inspire you to reach your creative potential in the area that suits you.
Read more about Alison’s story.

Send Alison a quick message.

No Results Found

The page you requested could not be found. Try refining your search, or use the navigation above to locate the post.
Art for Self-care

Art for Self-care

Art as Self-care

The use of art as self-care is well documented. Art can be therapeutic and many people say this is true. In a busy digital world, there is an urge to disengage from text-based connections with others. Drawing and sketching may help bring balance to the input your brain gets every day.

Healing

Personally, I turned to art at a time in my life when I could not deal with another conversation as I seemed to be going around in circles with the issue at the time. I’d wake up and immediately start ruminating about what happened yesterday and replay conversations and situations in my head.

I would think, “I should have said this or that” or “I should have done things differently.” There was no let up. I became weary and tired.

Art Journaling

I turned to my art journal and began again. 

I now write my thoughts on the right-hand page and draw a corresponding picture on the left-hand page. I am right-handed so it’s easier to write on the right-hand page and usually there is more paper underneath to support the pen. We used to do this type of work in grade school way back where it is still used as a learning aid.

Memory

You remember things better if you hear them, write notes about then and draw an image about them. Clearly you can go further and make a model out of cardboard or macaroni, dance it out, pen a poem, write song lyrics, sing about it or do a play.

Write and Draw

Let’s keep to the writing and the drawing. Words and image. Make notes and draw a picture about it. This technique is a basis of art journaling.

1. Aspiring Artist Activity

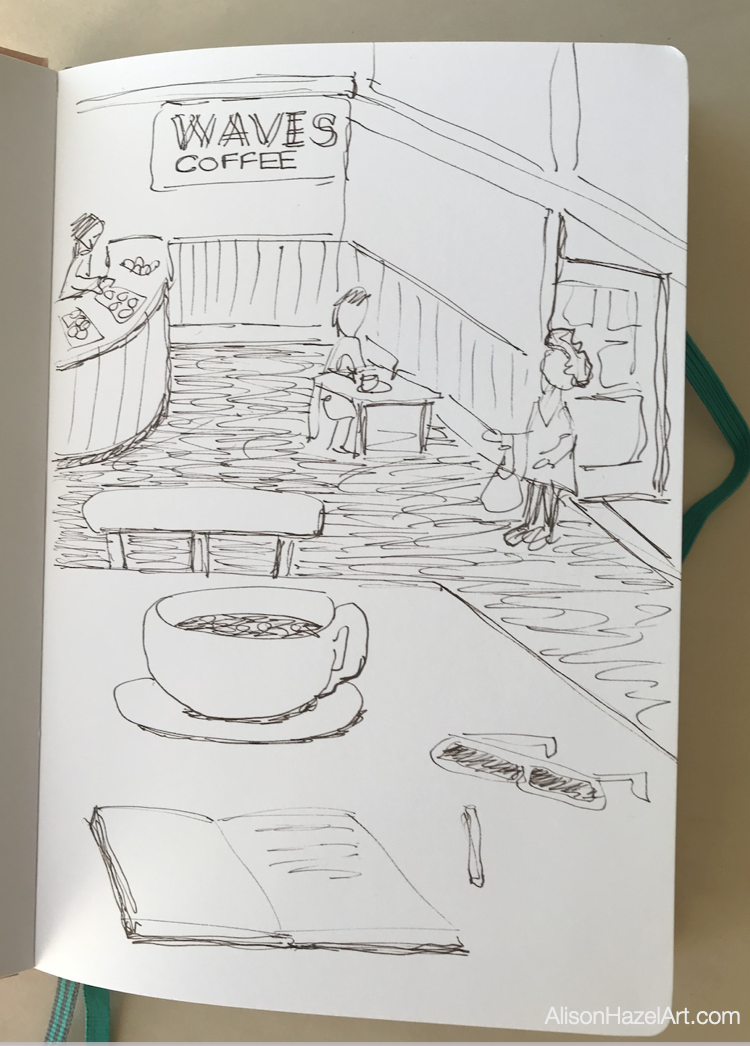
Art Journaling: Coffee Shop

Take your art journal, a pen and go to a coffee shop. Get a cup of coffee and settle down at a table. In your art journal please do the following:

Sketch

  • Sketch the cup and maybe the people at the other tables.
  • Add the coffee shop name and logo to the sketch.
  • If you have a croissant or other pastry, draw that in too.
  • You can add as much, or as few, details to your journal spread as you like.

Words

  • Write the time, date where you are enjoying the delicious coffee.
  • Note the coffee shop name.

You have now completed your first art journaling sketchbook entry.

Doodling

Doodling is the act of drawing squiggles and mini shapes and characters on the corner of a page. It is what you do when they put you on hold on a phone call with your pen in hand. Doodling can be lines, curves, faces or whatever. But it is an outpouring of what’s on your mind and in this way it can be helpful.

Daily Art Practice

If you look carefully, you can eke out a quarter of an hour each day for your daily art practice. Fifteen minutes of drawing daily can soothe your mind.

Draw Your Day

For my daily art practice, I have a special small A5 sketchbook just for my quick daily art drawings. These sketches are unlikely to ever see the light of day, but they can often be the basis for later more complex drawings that I create.

I like the idea of letting sketches incubate until they turn into something else. Simple objects around you are great subjects to draw.

Benefits of Daily Art Practice

To establish a daily art practice is of huge benefit for several reasons:

  • You get to improve your art.
  • You express your innermost feelings
  • You can express yourself through words and images
  • You can begin to create a body of work
  • You may realise what your favorite art medium is
  • You initiate the foundation of your art style

Daily Art Practice Examples

Here are some examples I did of daily art practice with pencil sketches of flowers:

Breath Drawing

Breathing, we all do it, in and out, in and out, in and out… Regular breathing tends to be shallow and has the same count for in and out.

You breathe in for a count of three and out for a count of three. Inhale one, two, three and exhale one, two, three. This is natural breathing.

2. Aspiring Artist Activity: Controlled Breath

A controlled breath helps to calm the mind and reduces blood pressure.

Breathe

Try this activity and the trick is to control your exhale.

  • Breathe in fully for a count of three, and out fully for a count of five.
  • In one, two, three and out one, two, three, four, five.
  • Fully empty your lungs in a slow controlled exhale.


Draw

On your paper and with a black pen please do the following:

  • Start at the left-hand edge and draw a line up when you breathe in.
  • Draw a line down as you breathe out.
  • Continue across the page.
  • Turn the page one quarter turn and repeat the line.
  • Continue filing up the page with your breath movement lines.
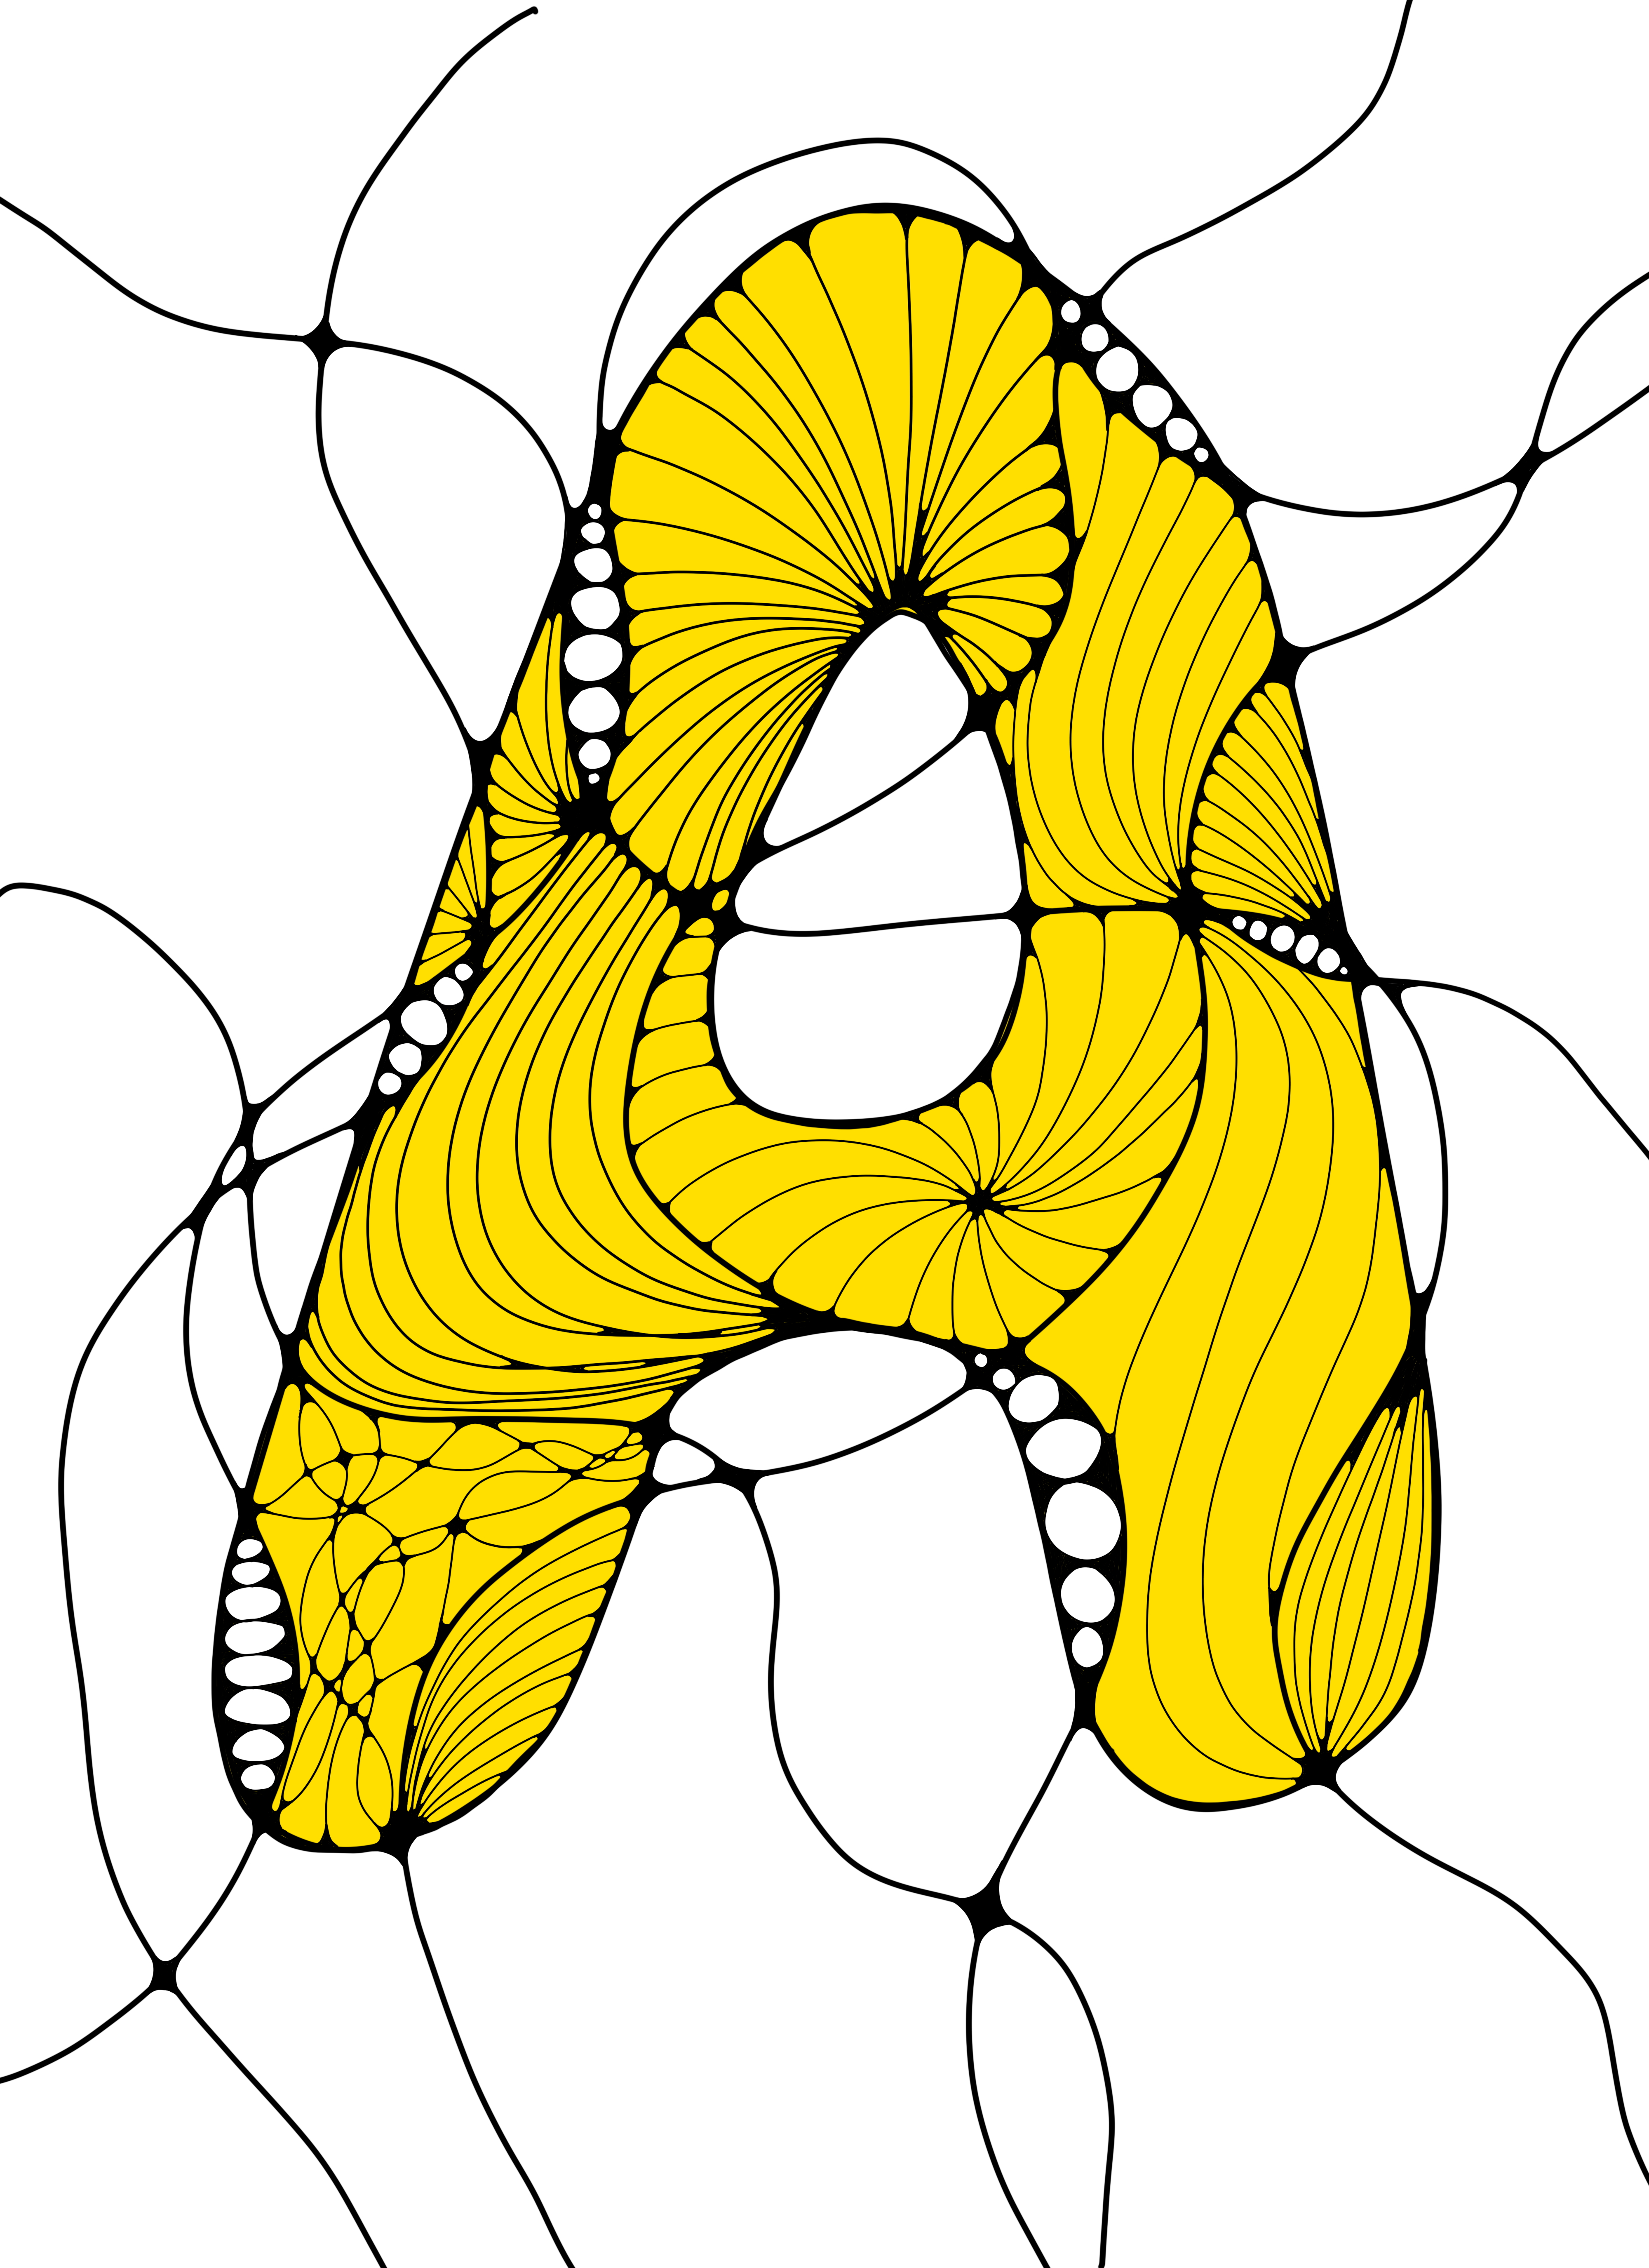
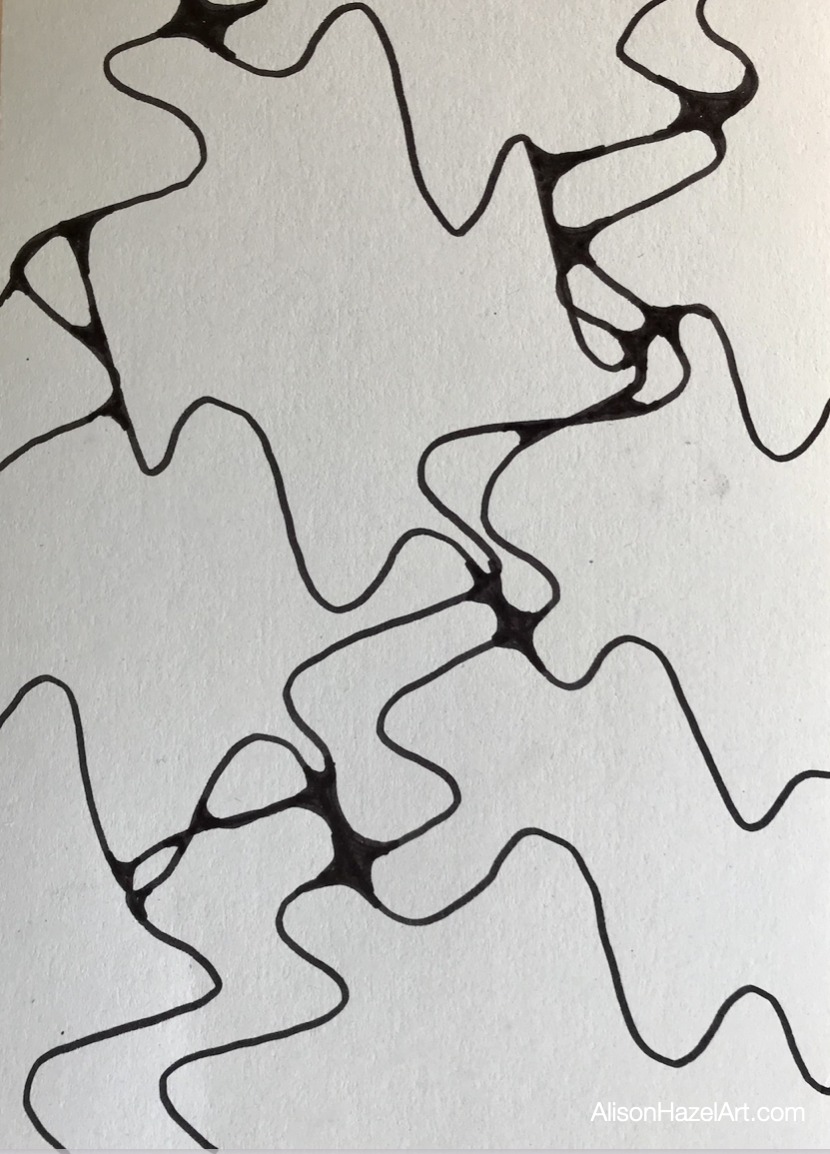
  • You will end up with an artwork that looks like neurographic art and now you can curve the intersections and color in.

Neurographic Art

Neurographic art is an art movement that I recently discovered as I was searching for art and mindfulness. I began with some basics and now enjoy making neurographic art.

Neurographic Art Examples

Some examples of my beginner attempts at neurographic art are here:

Journaling

Journaling comes in several flavors:

  • Bullet journaling – to do lists and calendars
  • Art journaling
  • Sketch journaling
  • Morning pages journaling – Follow the guide of Julia Cameron and write three pages longhand every morning to dump your cluttered mind
  • Nature Journaling
  • Perpetual Journaling

Art Journaling

Art practice sketches and thoughts. Some of my examples of art journaling are here:

Sketch Journaling

To my mind, sketch journaling is drawing what you did and where you went.

Nature Journaling

Nature journaling is drawing the natural world. You would typically start with plants and insects in your own garden. This is a great activity to do with the kids or grandkids.

Perpetual Nature Journal

A perpetual journal is divided into twelve months and you capturing some images each month.

Example pages:

Pin this image to your Pinterest board.

Perpetual Anything Journaling

A perpetual journal could be for anything that interests you. The benefit of a perpetual journal is that it is evergreen and grows every month. 

Perpetual journals can easily become records of your life and can be handed down to the family like an heirloom. Think back to Edwardian women embroidering stitch samplers which show what they could do. These cloths are most desirable today as family records. Perpetual journals can be your legacy.

Perpetual Legacy Journaling

A legacy journal is one you leave behind for those that follow. Typically, it was a family history book containing the family tree, but it can be focused on what and who you are. Examples of a perpetual legacy journal that you could make are:

  • Family recipes
  • Our family Christmas book
  • Family tree
  • Family homes
  • Your gardening tips
  • Family anecdotes
  • A home book about the property and renovations you did

I’m sure you can think of many more perpetual legacy journals. 

Alison Hazel

Author Bio

Alison Hazel is a woman who shares her ongoing journey about becoming an artist later in life. She creates simple art that anyone can make. She hopes to inspire you to reach your creative potential in the area that suits you.

Read more about Alison’s story.

Send Alison a quick message.

More Articles

If you enjoyed this article on Art for Self-care you may like some other posts from our blog.

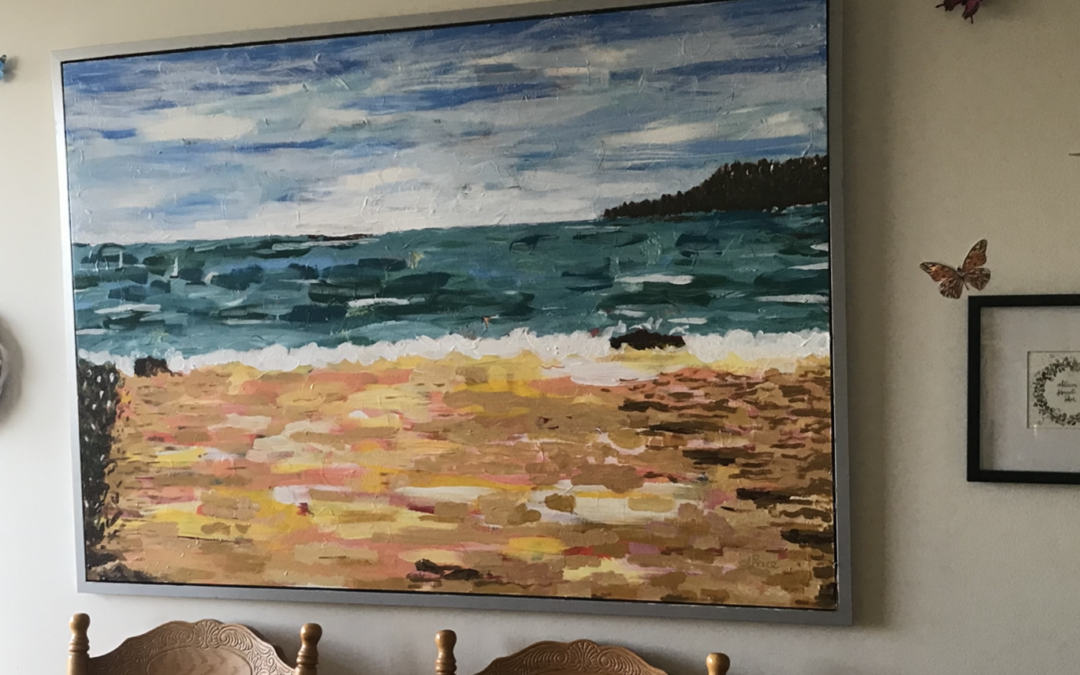
Acrylic Overpainting: Ikea Artwork

Acrylic Overpainting: Ikea Artwork

Author: Alison Hazel   -   Published: January 2024 Overpainting Last month I decided to paint over, or overpaint, a large Ikea artwork I had in my living room. Over painting is a technique used by many of the great artists when supplies were short and canvasses hard...

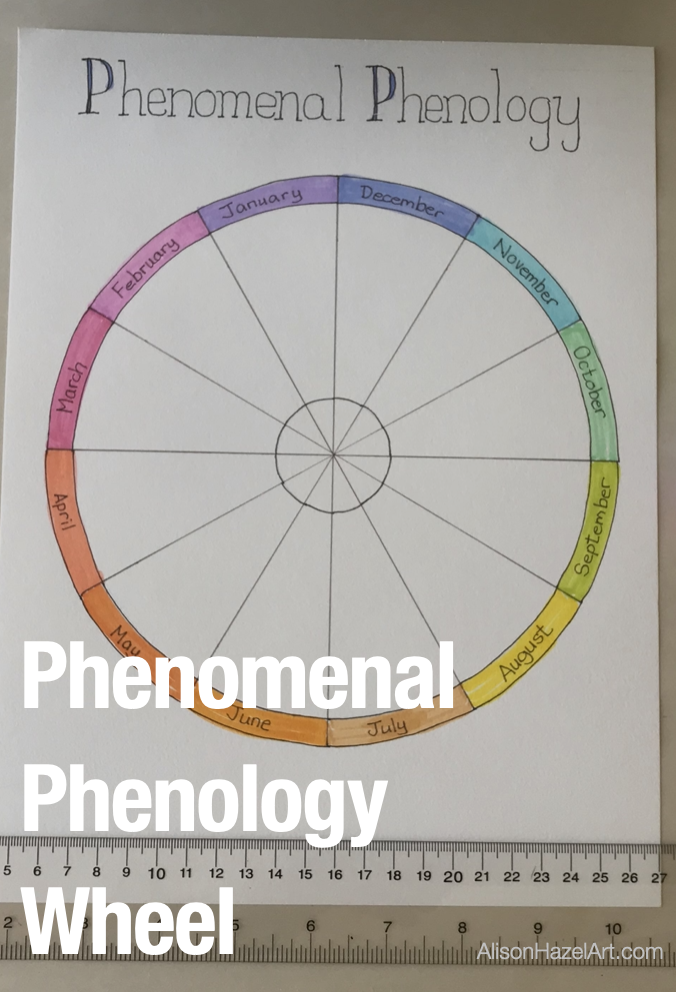
Phenomenal Phenology Wheel

Phenomenal Phenology Wheel

Phenology

The science of phenology is the study of the natural world around us and more specifically, it is the study of cyclic and seasonal natural phenomena, especially in relation to climate, plant and animal life.

Phenology is particularly used for environmental studies, nature study and is easy to do with children in your own back garden.

Observations

Phenologists make observations about the natural world, and you can too.

Typical things that would be a good observation would be:


  • Temperature
  • Weather
  • Rainfall
  • Snowfall
  • First blossoms on trees
  • Flowers that are blooming
  • Vegetables ripe for picking
  • When the leaves start to fall
  • How high the rivers are
  • Which insects, birds or mammals have been seen
style="display:block; text-align:center;" data-ad-layout="in-article" data-ad-format="fluid" data-ad-client="ca-pub-4471307604888511" data-ad-slot="7787961343">

Phenology Wheels

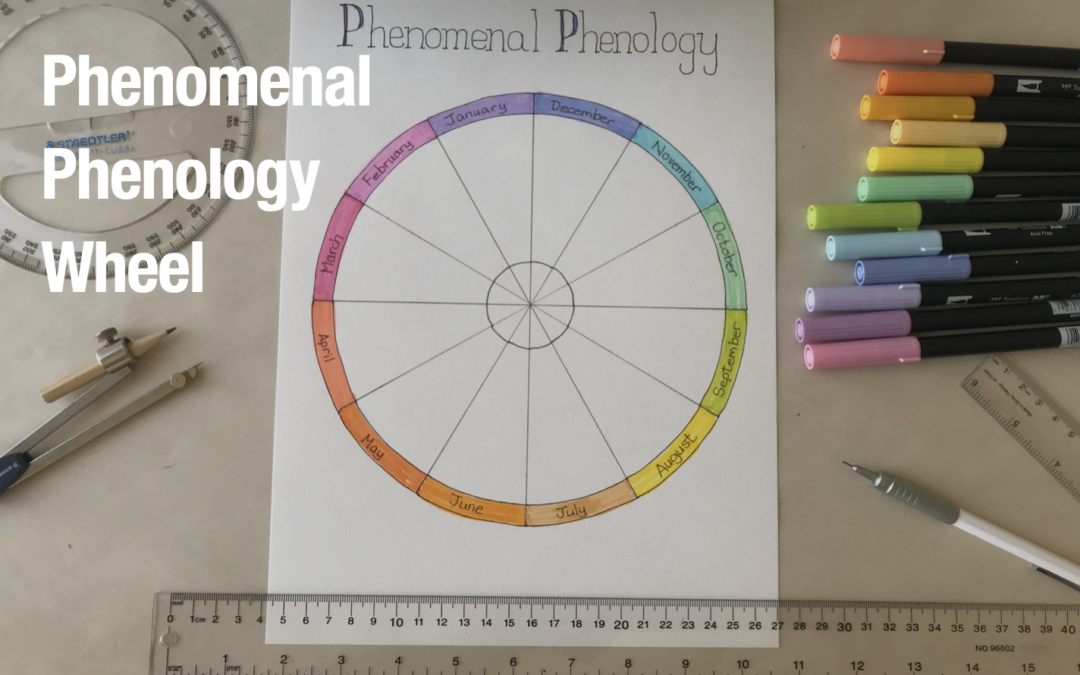
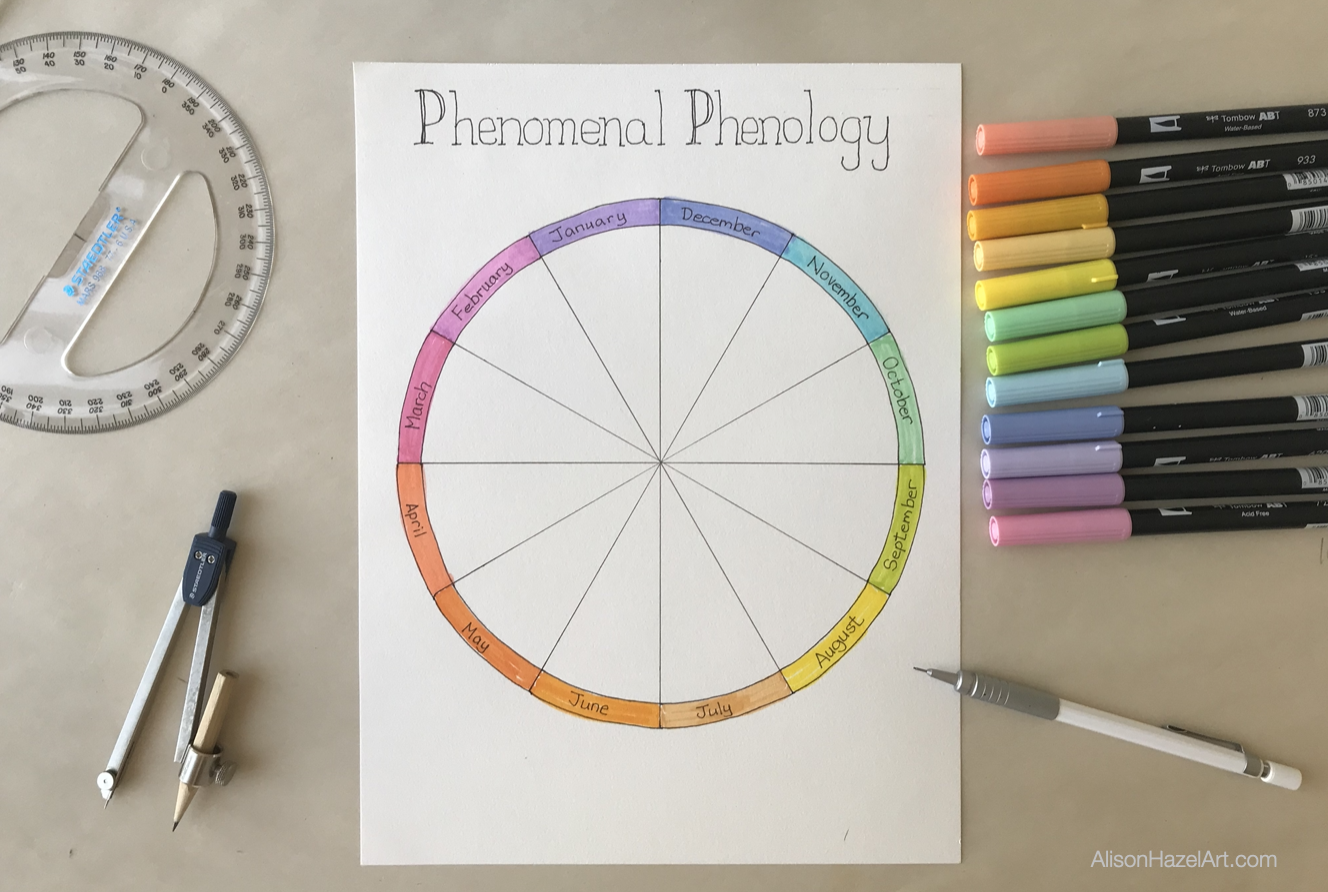
A phenology wheel is a circular diagram portraying all the observations for the time periods chosen.

For example, you could have a phenology wheel with different divisions such as:


  • Yearly – 12 monthly divisions
  • Monthly – 31-day divisions
  • Weekly – 7 daily divisions
  • Seasons – four divisions

Time Periods

As can be seen, there are many different time periods which can be used for a phenology wheel.

This year I decided to do a monthly phenology wheel as I have started taking an interest in my Perpetual Nature Journal which has twelve months.

It seemed a logical step to have a monthly phenology wheel as well.

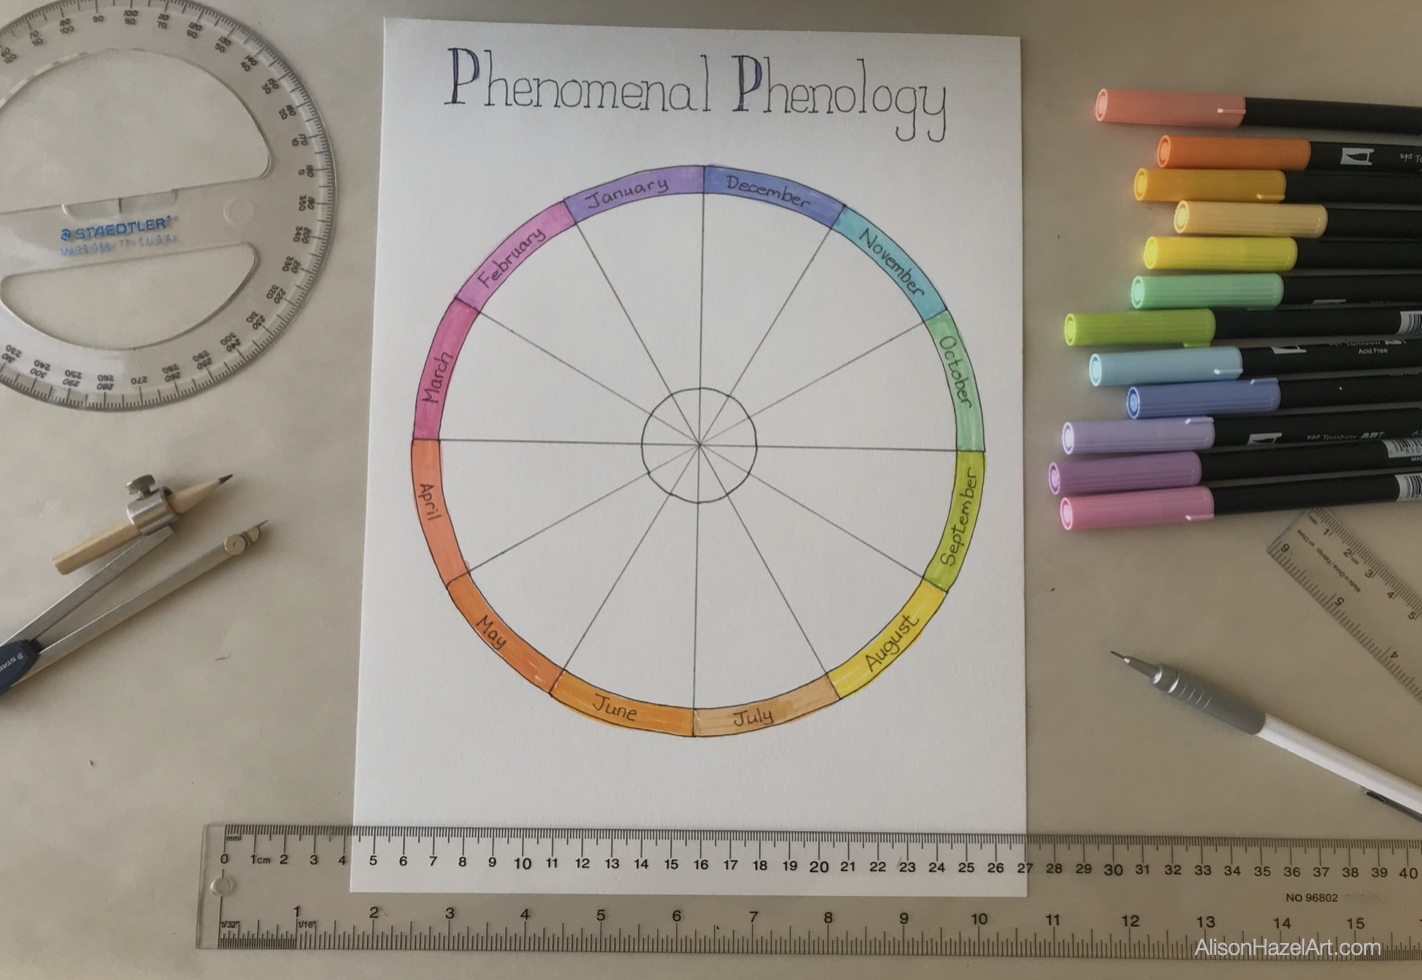
How to Create a Phenology Wheel Diagram

My piece of paper is about 23cm by 30cm (9 by 12 inches).

It doesn’t matter what size page you have.

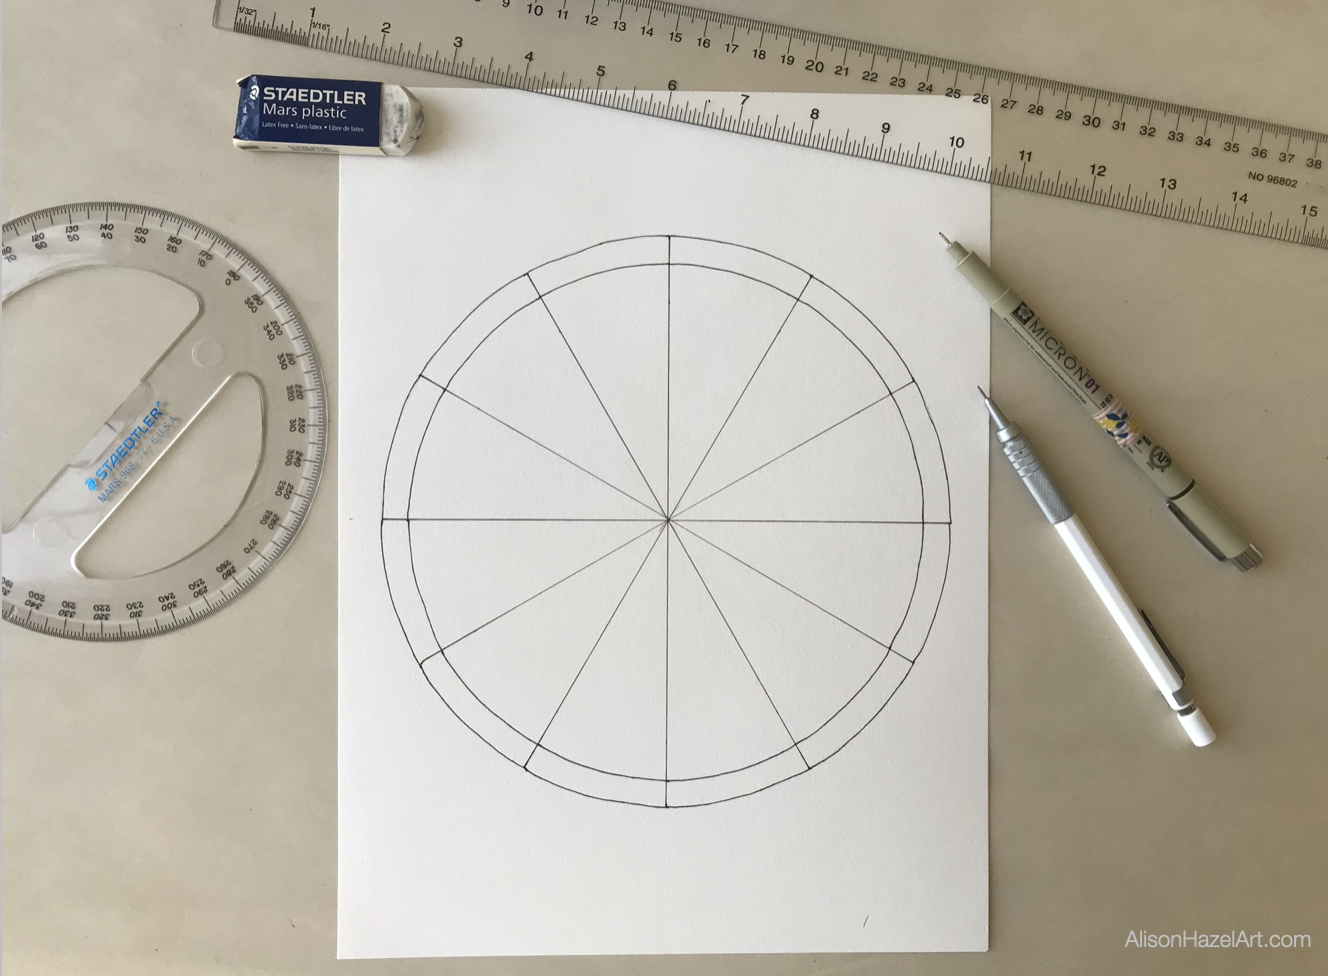
First with a pencil draw a light diagonal line from corner to corner to find the centre of the page.

Next you will take your compass and put the point in at the middle cross hairs.

Draw a circle as large as you can giving yourself about 1cm (1/2 inch) gap from the edge of the paper.

For my page, my outer circle is 10cm (4 inches) radius that is the first circle.

My second circle is 9cm (3 ½ inches) radius.

My small inner circle has a 2cm (3/4 inch) radius.

Dividing into 12

Line up your ruler with the centre point of the page and draw horizontal line from the outer circle all the way across.

Next take your circular protractor and line it up with the central dot of the protractor where you put in the point of the compass.

Mark out with a pencil and draw a vertical line.

You now have four quarters.

Next divide the four quadrants into three 30-degree segments each and connect each of the angled lines across the circles.

It now looks like a pizza cut into twelve slices.

Months

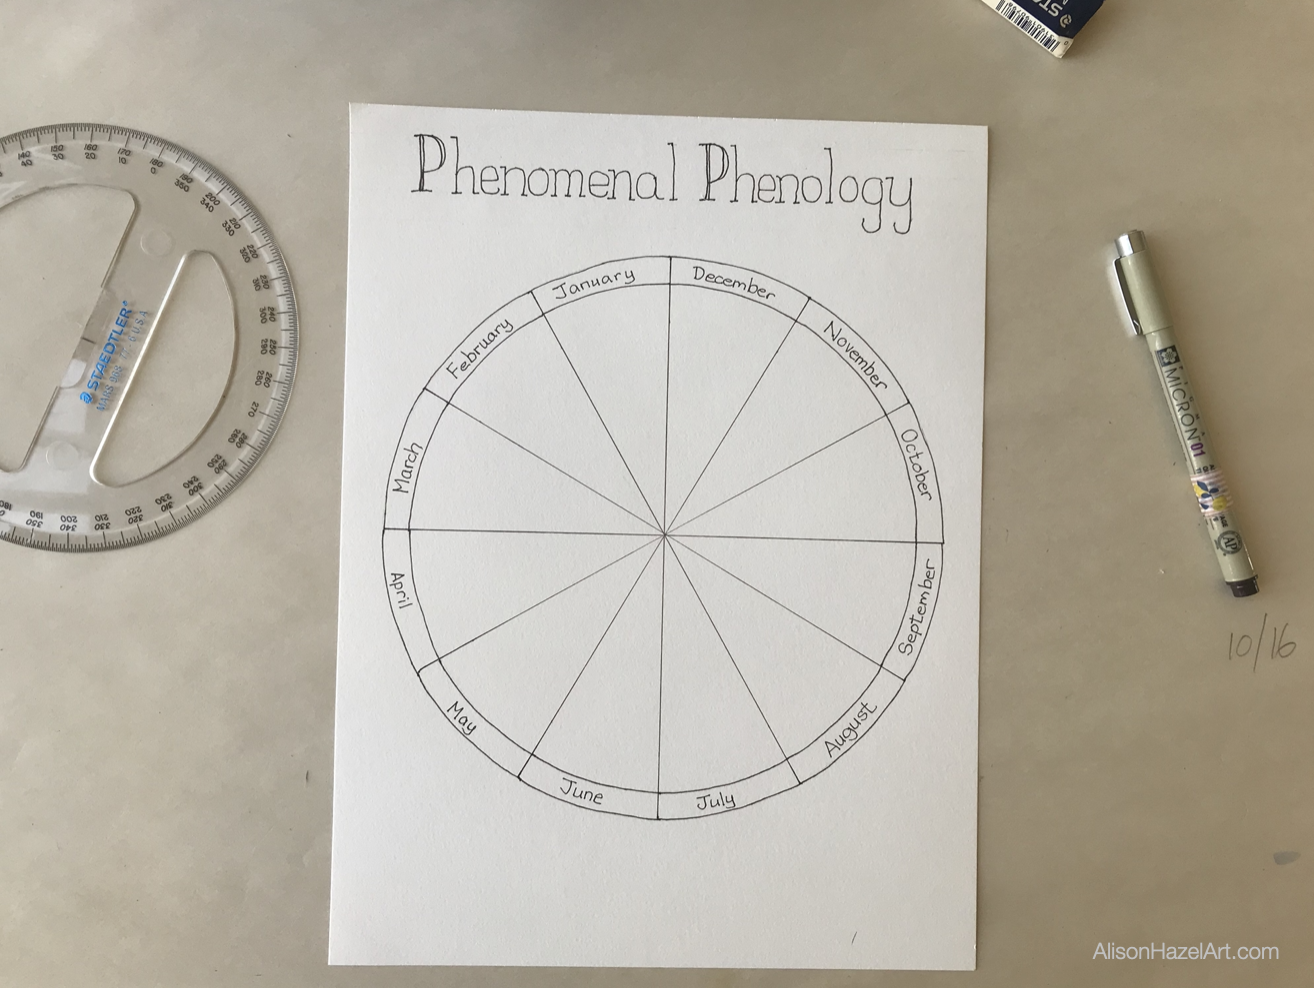
At this point you have the option of either doing your months clockwise or anticlockwise and consideration needs to be given to where to put January.

In my phenology wheel I placed January on the top left, and I laid out my months anticlockwise all the way around.

The reason I did it this way is because I am aligning it to the Pagan Wheel of the Year where the very top point is December 22nd, the beginning of Yule, which would be mainly be in January.

It doesn’t really matter which way you do it, but have some reason about why you’re doing it the way you are.

You can either have the months going clockwise or anticlockwise.

You can start your year at any point that makes sense to you.

Coloring the Months

As I am a keen follower of new age practices, I wanted to align my months not only with the Wheel of the Year, but also with the zodiac signs.

I used assorted Tombow markers for this part.

In this case April will be red (Aries), August will be yellow (Leo), and December will be blue (Sagittarius).

These are the three primary colours from which you can hang the colour wheel.

The secondary colors will be June as orange, October as green and February as violet.

My full month colours in order are as follows:


  • January is purple
  • February is violet
  • March is magenta
  • April is red
  • May is tangerine
  • June is orange
  • July is apricot
  • August is yellow
  • September is chartreuse (lime green)
  • October is green
  • November is turquoise
  • December is blue

Inner Circle

The small inner 2cm radius circle is where I plan to note the high and low temperatures I experienced in my city each month.

Phenomenal Phenology Wheel Monthly Progress

We are more than halfway through August as I start my phenology wheel.

I may or may not be able to get the August diagram in there, but I’m hoping that I shall and when I do, I’ll post the image below here.

My phenology wheel is an ongoing project that I can add to each month.

As I complete the months I will take a photo and post it below so you can see how much I got finished is my phenology wheel.

Phenomenal Phenology

I’m calling it Phenomenal Phenology because I can and I think it’s a great title for my phenology wheel.

I plan to frame my phenology wheel when it is completed and hang it up in my art studio.

As I’ve said often before, I do believe that every artwork you do should be good enough to frame and it ought be hanging on your wall.

style="display:block; text-align:center;" data-ad-layout="in-article" data-ad-format="fluid" data-ad-client="ca-pub-4471307604888511" data-ad-slot="7787961343">

Why I’m Doing Phenology

I want to explain to you why I’ve started looking at phenology.

This year I have really tried to work on art as self-care.

This is sometimes through neurographic art or other pen and ink work that I’ve been doing.

But the main idea is to slow down life a little.

I’m trying to uncouple from such a digital world where social media dominates.

I’m trying to bring daily art practice into my life with small art projects which I can work on and that make me happy.

Activities like working on my Perpetual Nature Journal, sketching nature around me at the beaches and so on here in my city, I am really starting to enjoy.

The reason I wanted to try and do a phenology wheel was to add another facet to the type of art that I’m working on now.

Meditative Art

I’m starting my phenology wheel in August, so it’s not at the beginning of the year.

As was not my Perpetual Nature Journal which I only began in May.

But I believe that by having these other options to my art journaling, sketch journaling and other artwork, it gives me options on a day when I really don’t want to do too much.

Daily Art Practice

If I have enough small creative projects on the go, I will be able to reach out for one of them and do some art in the day.

I’ve spoken before about having different types of creative projects as an artist and how I believe it benefits you as an aspiring artist to have multiple art projects in progress at once.

I’m not the type of artist that starts one great big painting and keeps going for six weeks until it’s finished.

That will never be the type of art I do.

Starting out in art journaling, sketch journaling and working with Artist Trading Cards, which are small art pages that can be done in one day, is what appeals to me.

Therefore, I’m adding the small Phenomenal Phenology wheel to my arsenal of art-on-the-go.

It is a yearly project much like my Perpetual Nature Journal.

Because, honestly, when I wake up in the morning, I never know what I’m going to want to do art wise.

I believe you can’t force creative expression.

If this sounds like something that will resonate with you explore out site further.

Thank you for sharing part of your day with me.

Love,

Alison

style="display:block; text-align:center;" data-ad-layout="in-article" data-ad-format="fluid" data-ad-client="ca-pub-4471307604888511" data-ad-slot="7787961343">

Pin this image to your Pinterest board.

Aspiring Artist Activity

Create your own yearly phenology wheel and bring self-care into your life through meditative art.

On a sheet of paper or in your nature or art journal, please do the following:

Draw the Circles

  • Find the center of the page.
  • Draw 3 circles with 10cm, 9cm and 2cm radii respectively.

Divide the Wheel

  • Draw a horizontal line through the center point to the outer circle.
  • Draw a vertical line through the center point to the outer circle.
  • With a protractor, divide the circle into 12 30 degree segments.

Months

  • Write the month names from January to December around the outer edge as shown.
  • Color in each month.

You are now ready to start making observations and drawing what you see in each month.

Alison Hazel

Author Bio

Alison Hazel is a mature woman who shares her ongoing journey about becoming an artist later in life. She creates simple art that anyone can make. She hopes to inspire you to reach your creative potential in the area that suits you.

Go here to read more about Alison’s story.

If you want to send Alison a quick message go here.

More Articles

If you enjoyed this article you may find more interesting blog posts on our site. See below.

How to Draw the Face of Jesus

How to Draw the Face of Jesus

Author: Alison Hazel   -   Published: February 2024 Reference and Acknowledgement Today I'm going to show you how I draw the face of Jesus as an icon. This is not my original idea as I am following along and referencing the work of Mikhail Fadi at UK Coptic Icons and...

Sketching English Bay Beach, Vancouver

Sketching English Bay Beach, Vancouver

Introduction

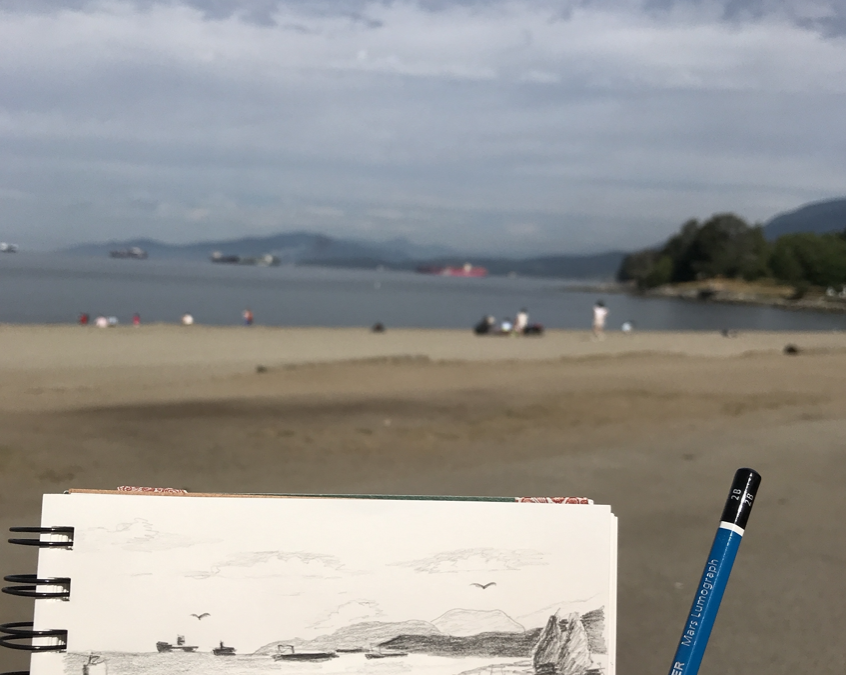
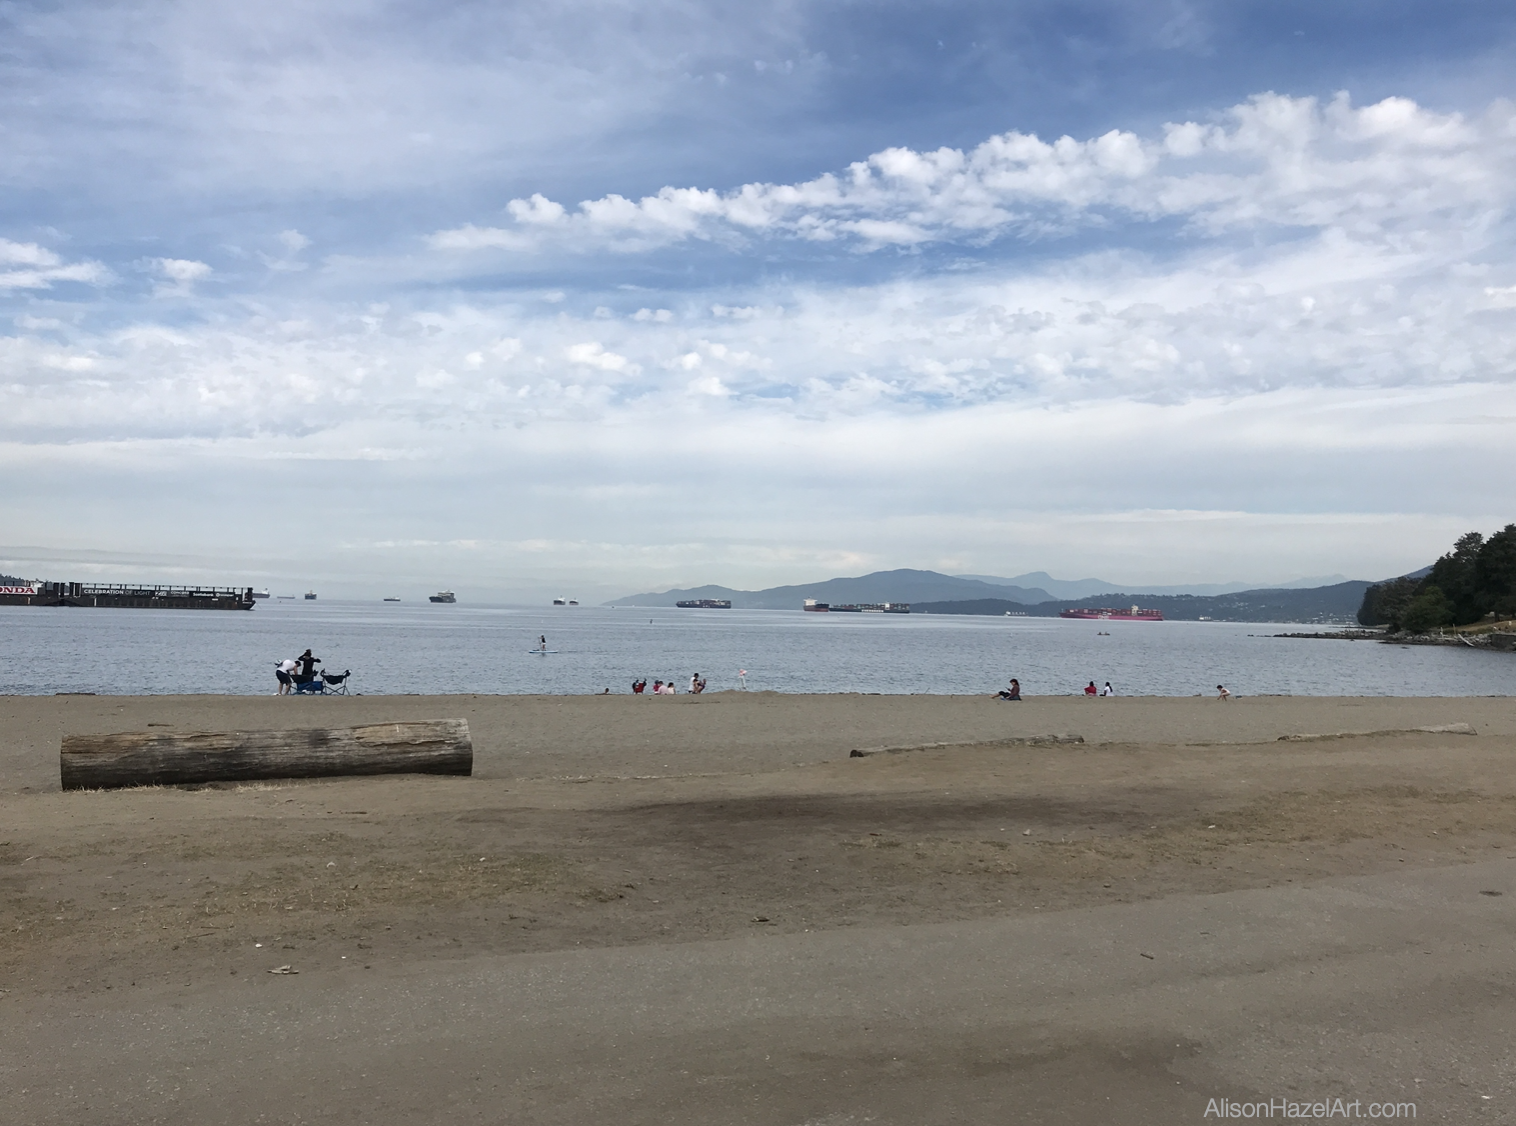
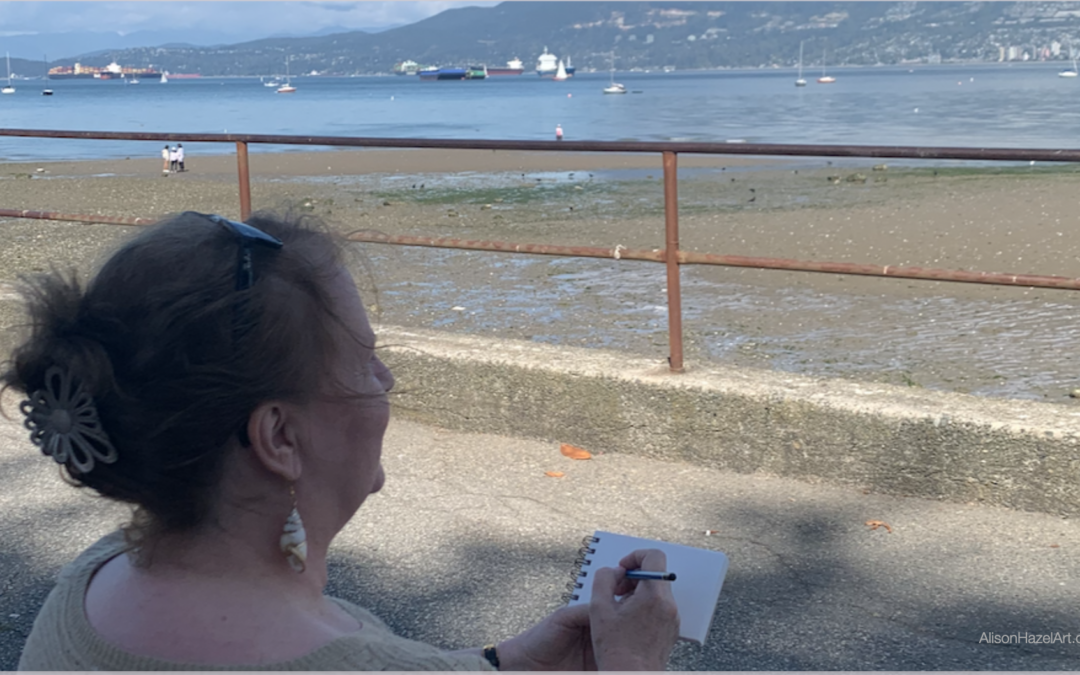
This week I went down to English Bay in Vancouver to do some sketching.

I was down there rather early around 9:00am because it promised to be a scorching day and I knew that the beach would fill up soon with people enjoying the good weather.

With coffee and a sandwich and sat on one of the benches on the promenade.

The seagulls were cawing and kids were playing and screaming in the surf.

There were six to eight large vessels lining up to enter the harbor to the right. The ships to be just hanging on the distance horizon.

I particularly wanted to get the background mountains as they had very interesting shades of greys and purples through the haze.

English Bay Vancouver

Field Art Supplies

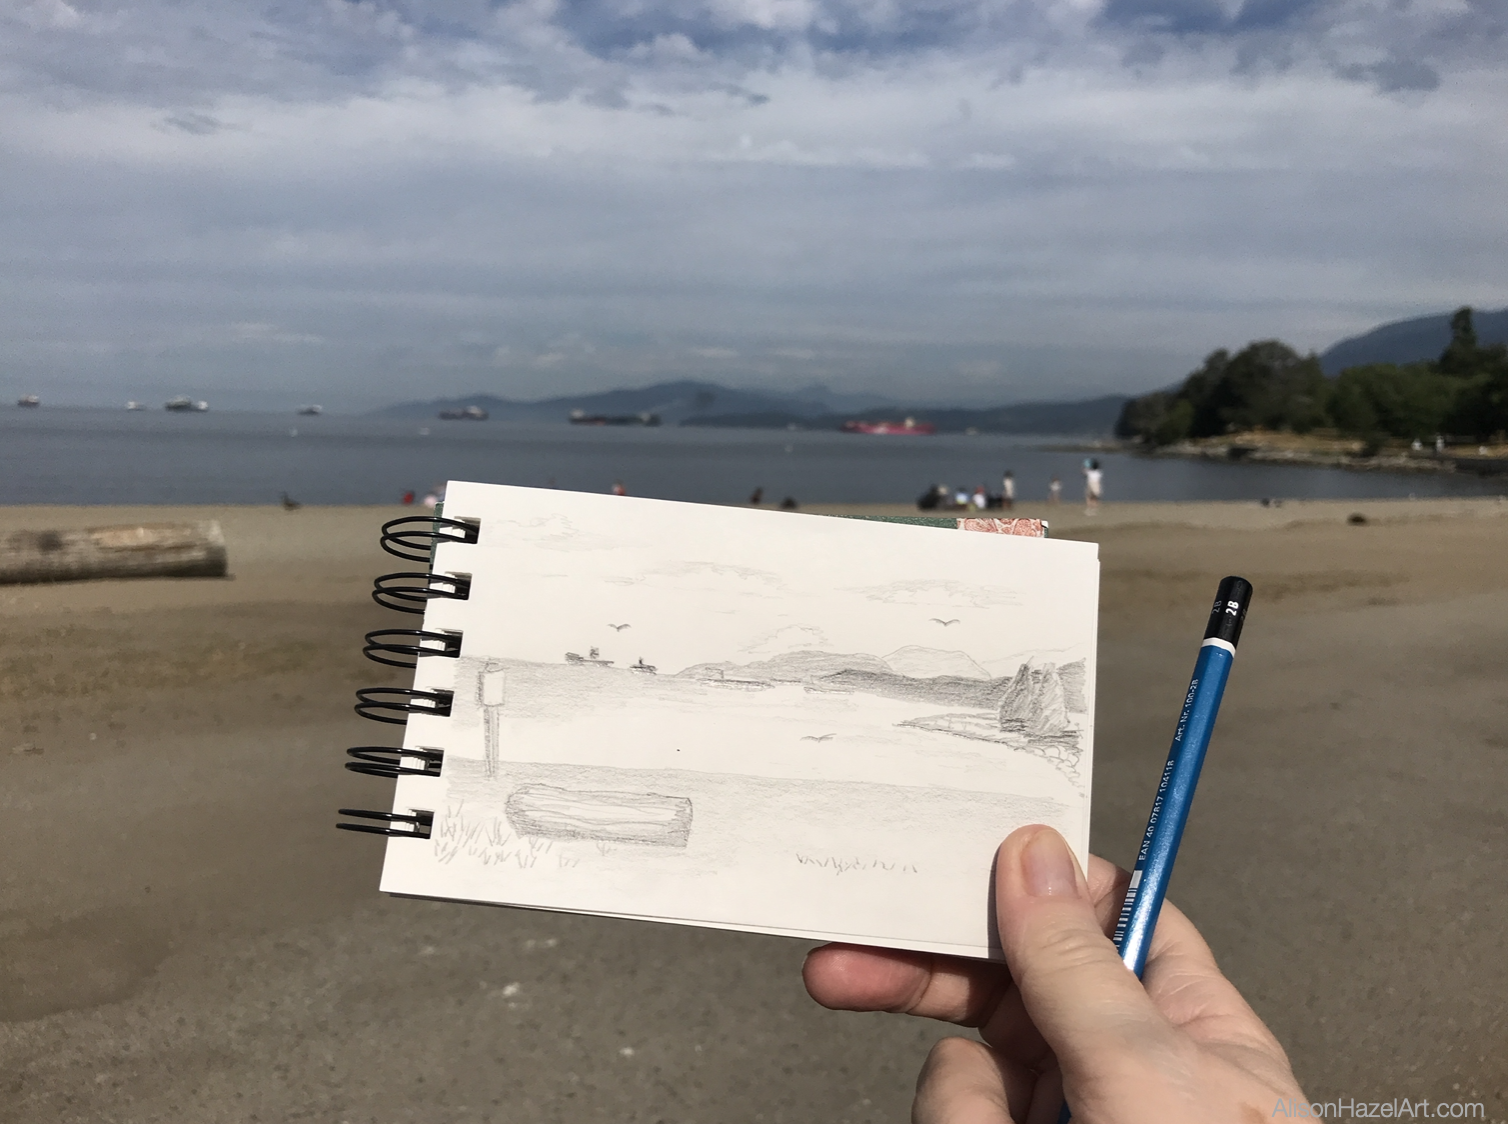
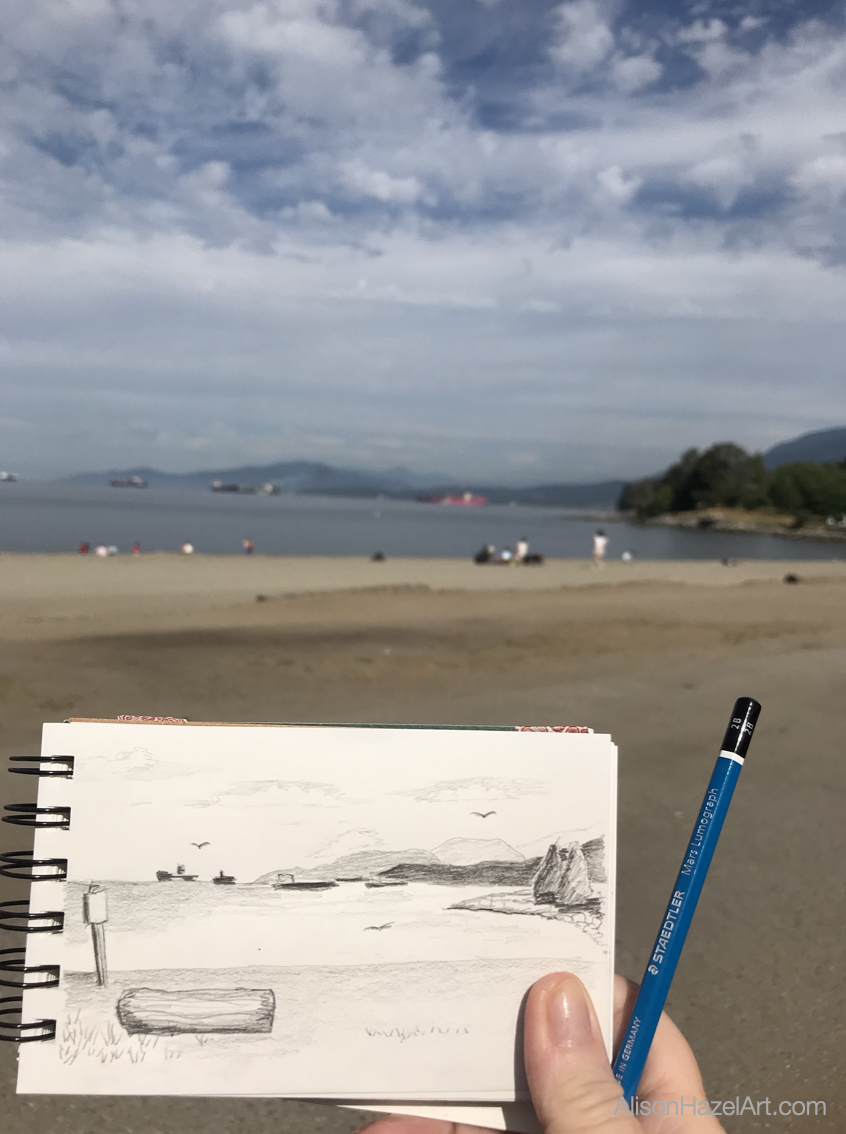
I took my A6 field sketchbook with me a 2B and a 2H pencil.

These fitted conveniently in my little belt bag and I had my phone with me as well, so I could take some photos.

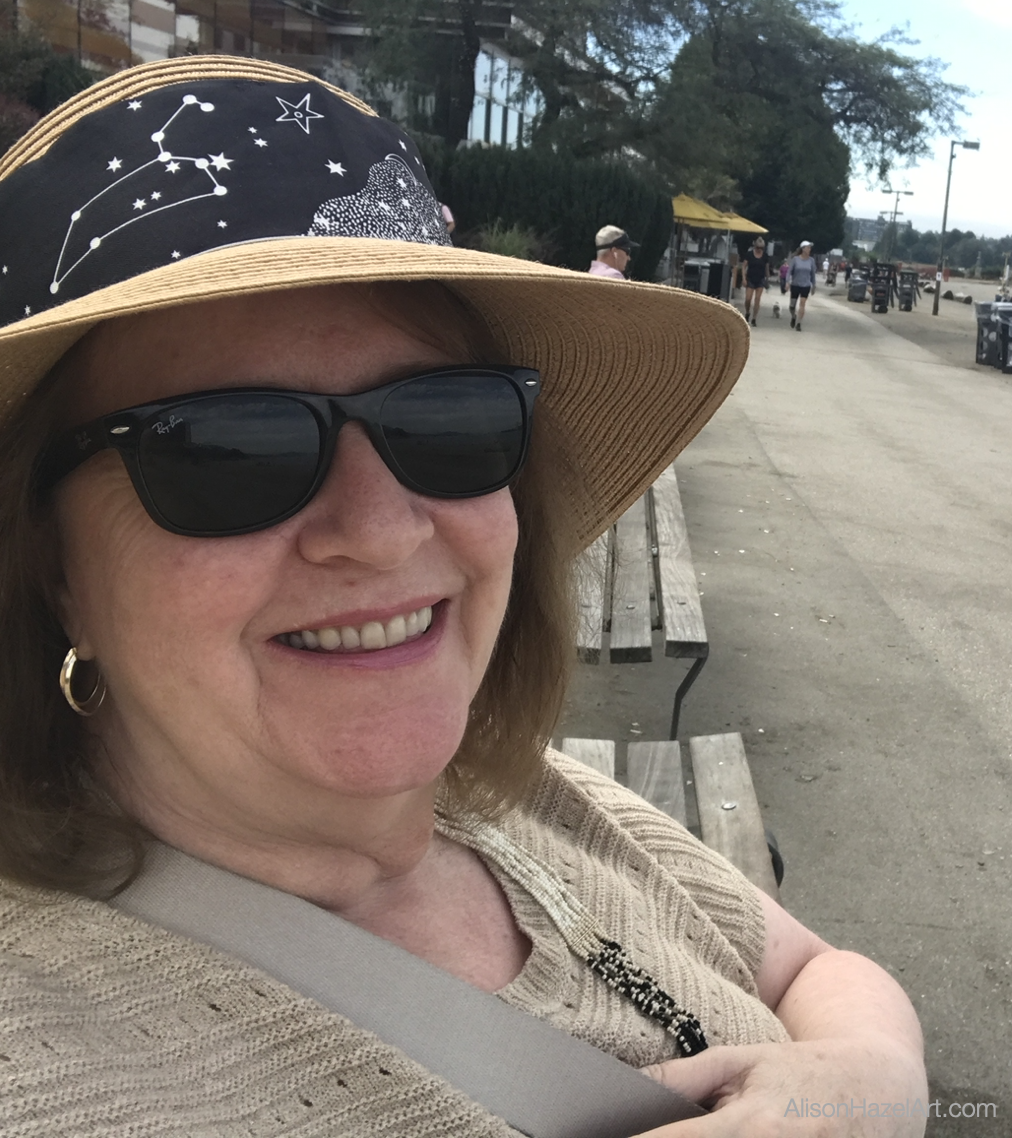
I had my hat and sunglasses because it promised to be a really hot day this is now the middle of summer in Vancouver and the beach is a popular destination.

Loads of people were jogging along the promenade riding their bikes and pushing their kids in their buggies.

There were still the remains of the Pride parade ribbons which was the previous night.

This was Sunday morning.

Composition

I started to sketch out with my horizon line and then the edge of the surf. The sea here is very common at English Bay in Vancouver and the waves just lap at your ankles.

In fact, I’ve never seen a storm on this coast at all, but maybe that’s just because I haven’t been down there when it’s been raining.

Three Sections

Anyhow I did my sketch.

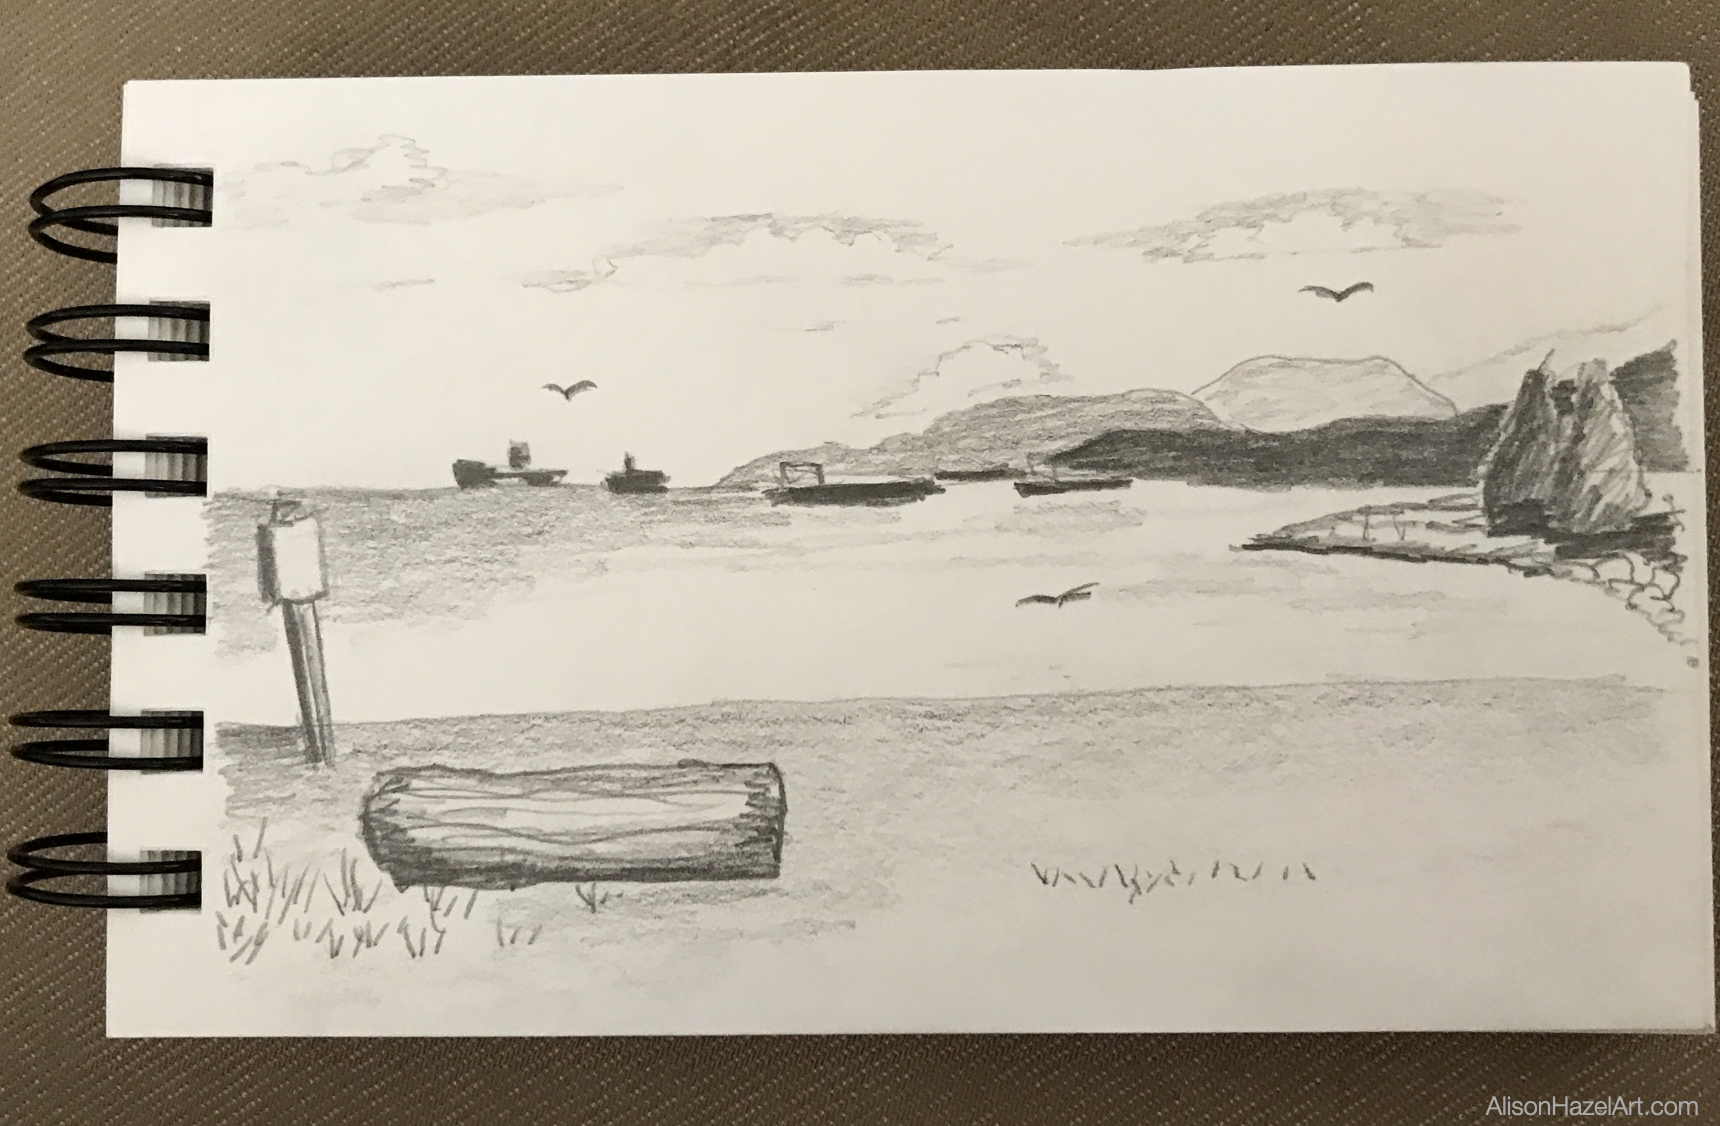
I divided the page into three horizontal bands with the sky, the sea and the sand.

I wanted to make sure to pick up the three distant mountains in the background.

On the far right there was the small curve of a cove which was slightly raised with boulders and had a few fir trees at the edge of the drawing.

There was a huge log of a Redwood tree that the city plonks on the beach for people to sit on and there happened to be one right in front of me, so I just drew it.

There was plenty of people on the beach, but I didn’t add them into my sketch.

Sky

I did attempt to show the clouds in the sky.

It was very difficult with just my pencil.

Clouds are subjects that I find challenging to draw.

Sea

The sea was mainly low flappy wave and I added plenty of little horizontal lines going across the page indicating the motion of the sea.

Beach

For the beach sand, I really drew many dots (and I think it is called pointillism) just to show the texture of the sand.

Although it was very smooth sand, it still had a grainy texture that’s why I tried to express it with dots.

Composition

The three areas on my page, the top, middle and bottom the top being the sky with the clouds, the middle being the ocean with the waves little horizontal dashes and then in the foreground the beach with the dots.

There probably are other ways of depicting these textures, but this is where I am in my art journey.

I added a signpost which I couldn’t read that was stuck in the sand.

Timing

I did enjoy the hour I sat at the beach. It was glorious fresh air, lovely sunshine and it wasn’t too hot although it was promising to be 28C degrees today.

I didn’t want to be there much longer.

Studio Sketch

When I got home, I made a cup of tea and took a bit of a rest.

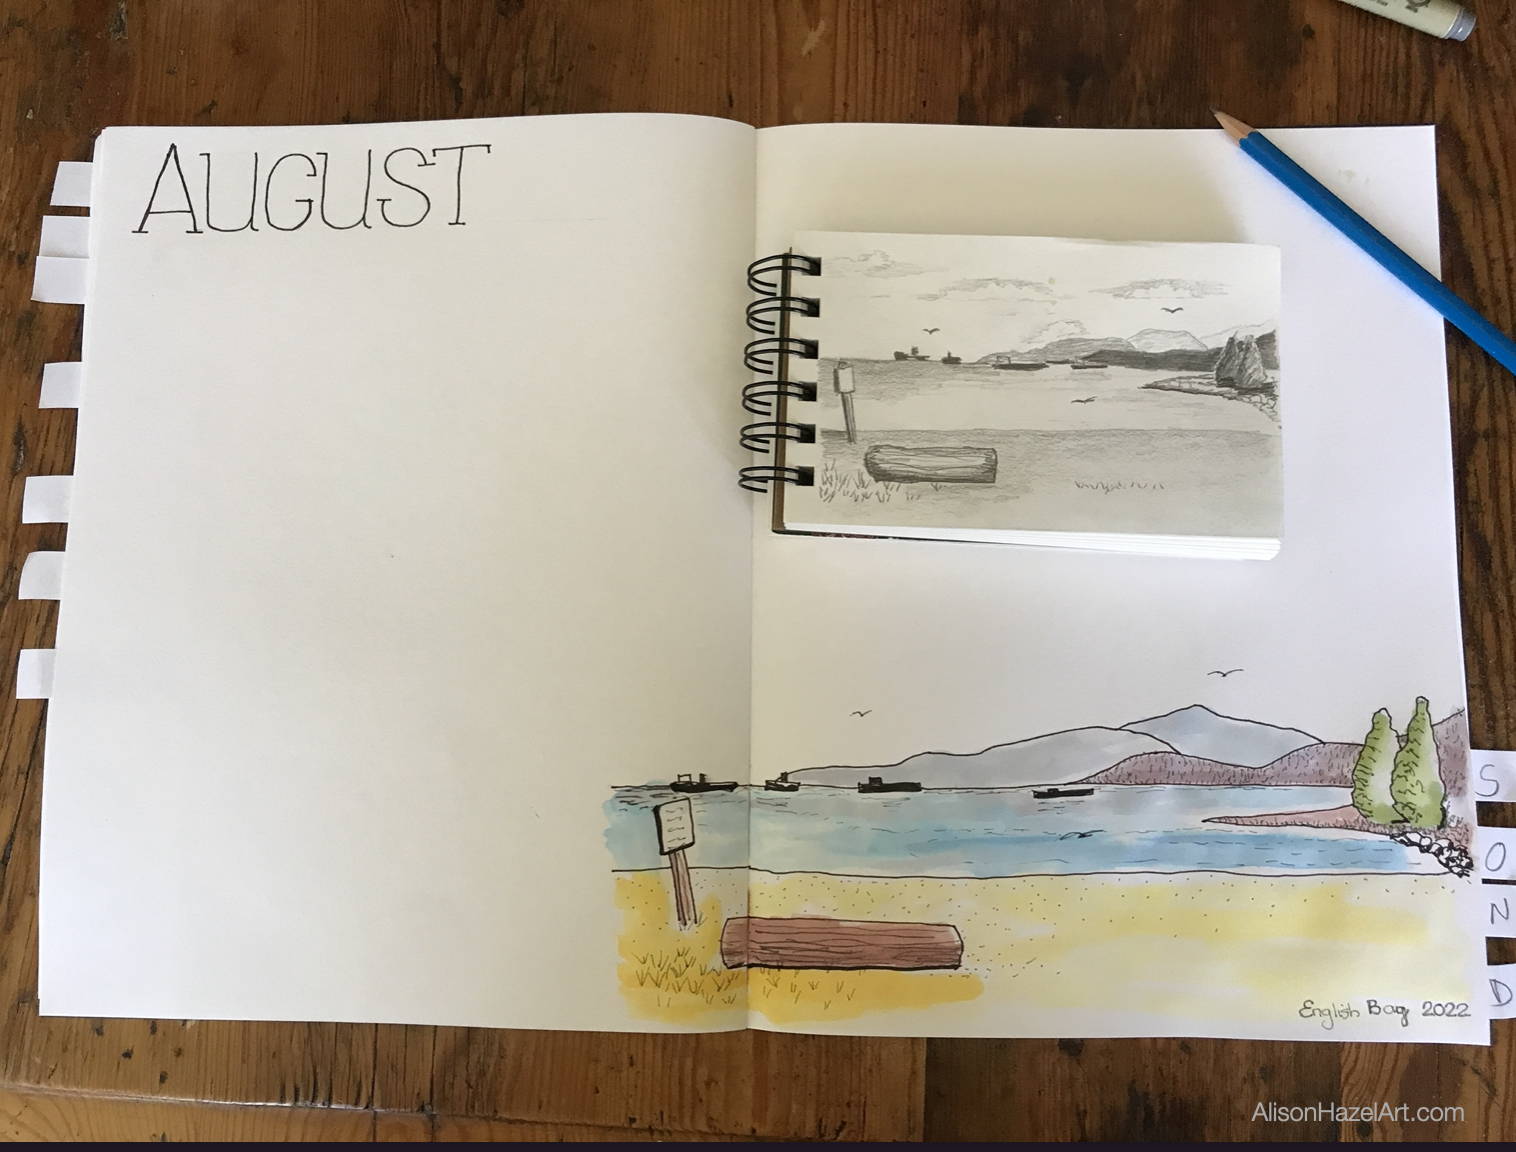
Then I got out my perpetual nature journal because this is where I wanted to add this drawing.

To me nature is all the outdoors on the Earth where we live. It is the environment we live in and our relationship within it.

I don’t believe that nature journaling is required zoom in on one little ladybug or a leaf, it can certainly be the landscape around us as well.

With my 2H pencil I just sketched out in the bottom right hand of my August page in my perpetual nature journal.

I sketched out the main structures in this drawing.

I then went over it with a 0.5mm black pen just to give the shapes some form.

Colored Ink

As I am continuing to work with my Windsor and Newton drawing inks as my current favorite medium, I wanted to once more practice working with them.

I used my inks to colour in the sea, the trees, the mountains and the beach.

I was very aware of watering these inks down.

Inks are unforgiving and once you’ve laid them on the page you really can’t move the color.

In this way inks are not at all like watercolors.

I used a very small brush, I think it was a number 4 and slowly added the impression of the landscape that I was drawing.

Black and Grey Pen

After leaving it to dry I went back in with my black pen.

I also had a grey pen just to add some textures to the log to the sand to the water and to the trees in the distance.

Improvement as an Artist

I would like to be a better artist.

Style

I know that if I keep practicing, I probably will be better, but the art I can do today is the best I can do.

I would love to be able to do a pond of waterlilies like Monet, just for the hint of the image in the painting and I do admire his work.

I’m also a huge fan of Van Gogh’s work with all his many brushstrokes.

Hobby Artists and Colored Inks

At the moment I’m still learning art as a hobby artist.

I’m getting better with my pen work and I’m getting a little better with my colored ink work although that still is going to require a lot of effort.

This is probably the fifth painting I’ve done with colored inks, so I’m still learning this medium so very much.

Perpetual Nature Journal

The third thing I’m really starting to enjoy is working with my perpetual nature journal .

Where it becomes an ongoing journal.

This Year

It is divided into twelve months and each month I can do the drawing of that month within the page and date it for the year.

Next Year

Then next year in August I can come back and do another drawing and add it to the August page.

I do believe there is further potential for other types of perpetual journals and I’m looking into that as well.

I do enjoy doing these artworks.

I find it greatly meditative and relaxing.

I believe creating simple art brings mental clarity and this is what I’m enjoying as well.

Vancouver Art Map

Creating an Art Map

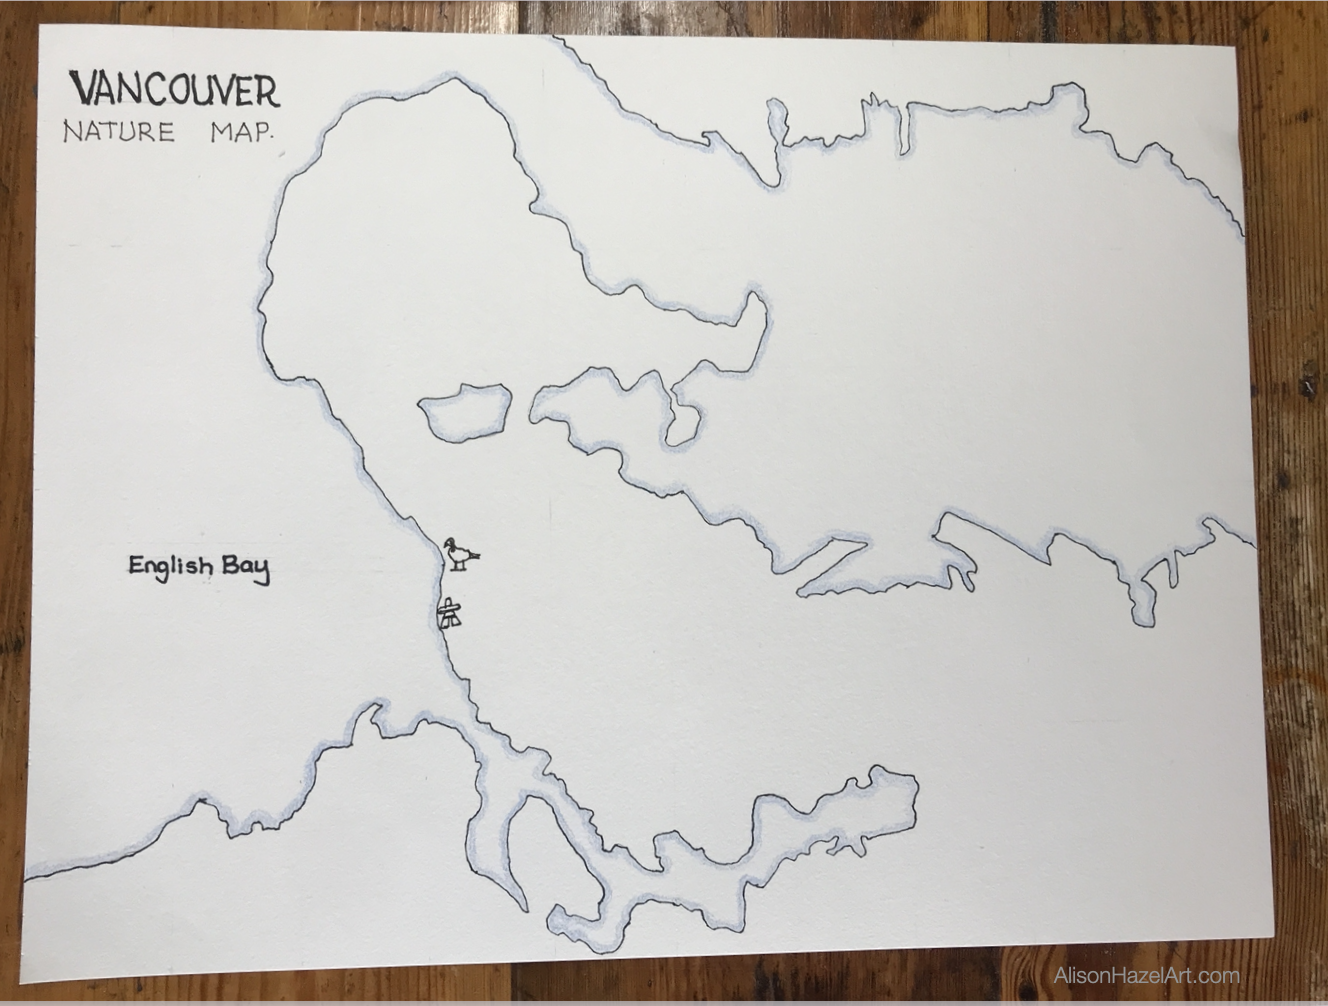
I have an art map for all the field sketching I do in and around my local area.

I created it by copying the map from Google and drew the outline of the coast on to a large piece of paper.

I plan to frame my Vancouver Art Map and hang it in my studio one day.

Sketch

I added this week’s art outing to my Vancouver Art Map.

The position was very close to where I drew the Canada Geese and the Inukshuk pen and ink before.

Clearly, I need to venture farther afield in my sketching life soon.

Aspiring Artist Activity

Take your field sketchbook, some pencils and an eraser and go out to a local beauty spot in your area.

Field Sketch

  • Choose a composition that appeals to you.
  • Sketch it out keeping it simple spend at least 30 minutes on this sketch.

Studio Sketch

  • When you get home crack open your perpetual nature journal and start working either in pen and ink, colored inks or whatever art medium is your favorite now. For example, last year I really thought I was going to become a watercolor painter, but I did struggle with it as it was hard. This year I’ve moved onto colored inks and I’m trying to work with this medium as much as possible.
  • Make sure to enjoy what you are doing.
  • Spend at least one hour on your studio sketch and finish it off the way you like.

Thank you for sharing your day with me,

Alison

Alison Hazel

Author Bio: Alison Hazel

Alison Hazel is a hobby artist and she shares her ongoing journey about becoming an artist later in life. She creates simple art that anyone can make. She hopes to inspire you to reach your creative potential in the area that suits you.

Read more about Alison’s story.

Send Alison a quick message.

Seasons of Art: Spring

Seasons of Art: Spring

Seasons of Art: Spring 2023 Group Meeting Learn more about the recent Seasons of Art group meeting. See more about the Seasons of Art group here.  Satvvir's Artwork Below is Satvvir's artwork (Instagram @theambivertsbb). She used watercolor and combined orabges...

How to Draw the Face of Jesus

How to Draw the Face of Jesus

Author: Alison Hazel   -   Published: February 2024 Reference and Acknowledgement Today I'm going to show you how I draw the face of Jesus as an icon. This is not my original idea as I am following along and referencing the work of Mikhail Fadi at UK Coptic Icons and...

Painting My Flower Press Cover – Ink Art

Painting My Flower Press Cover – Ink Art

Author: Alison Hazel   –   Published: June 2022

Inspiration

In the first week of May I discovered the YouTube channel Daily Nature Journal and I was inspired to start a nature journal. Alex showed some pressed flowers that he was using in his nature journal and I was so interested, I decided to order a flower press for myself from Amazon. I plan to keep my flower press for years and eventually hand it down to my daughters as a family heirloom.

Unboxing Flower Press

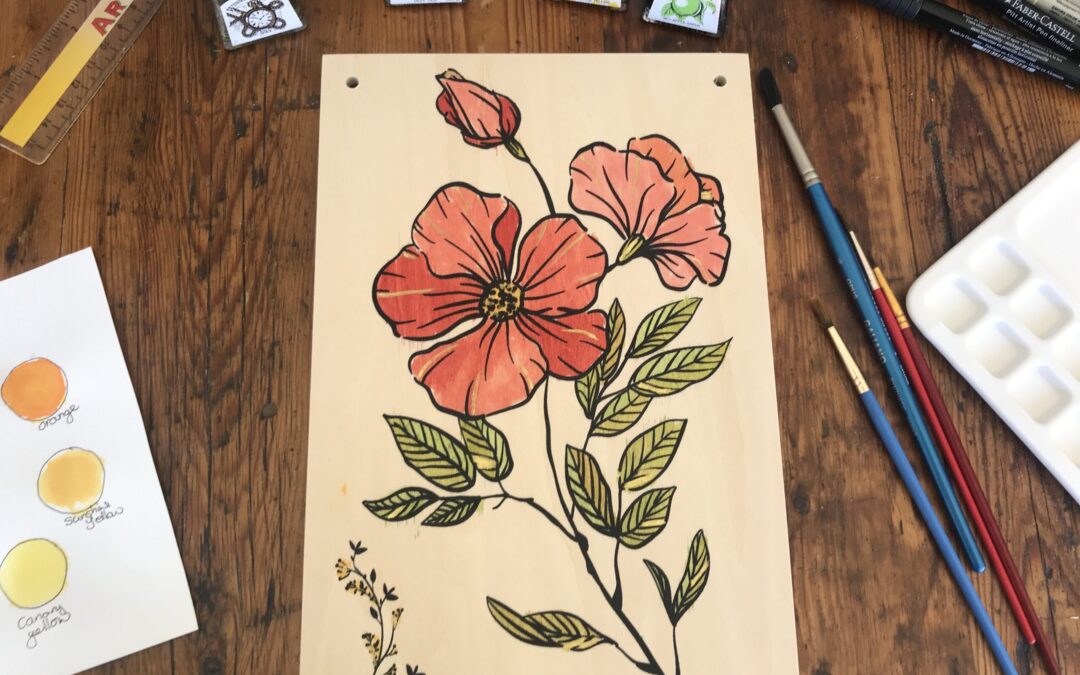
I chose a flower press from Berstuk.co.uk. This flower press is made with plywood, not compressed chip board, and brass bolts not mild steel (which will eventually rust) brass does not rust. You can get the same flower press which I purchased on this LINK.

The flower press came in a box, with instructions and included all the bolts, wing nuts and washers you need. There is a front wooden panel with a flower outline painted on and a plain back panel. You also get cardboard and blotting paper cut to size with chamfered corners.

How to Use a Flower Press

This flower press comes with cardboard and blotting paper. You make a sandwich of cardboard, blotting paper, flowers, blotting paper, cardboard and repeat. You can have multiple sandwiches in the press. I hope to start pressing flowers soon.

Ink Colors

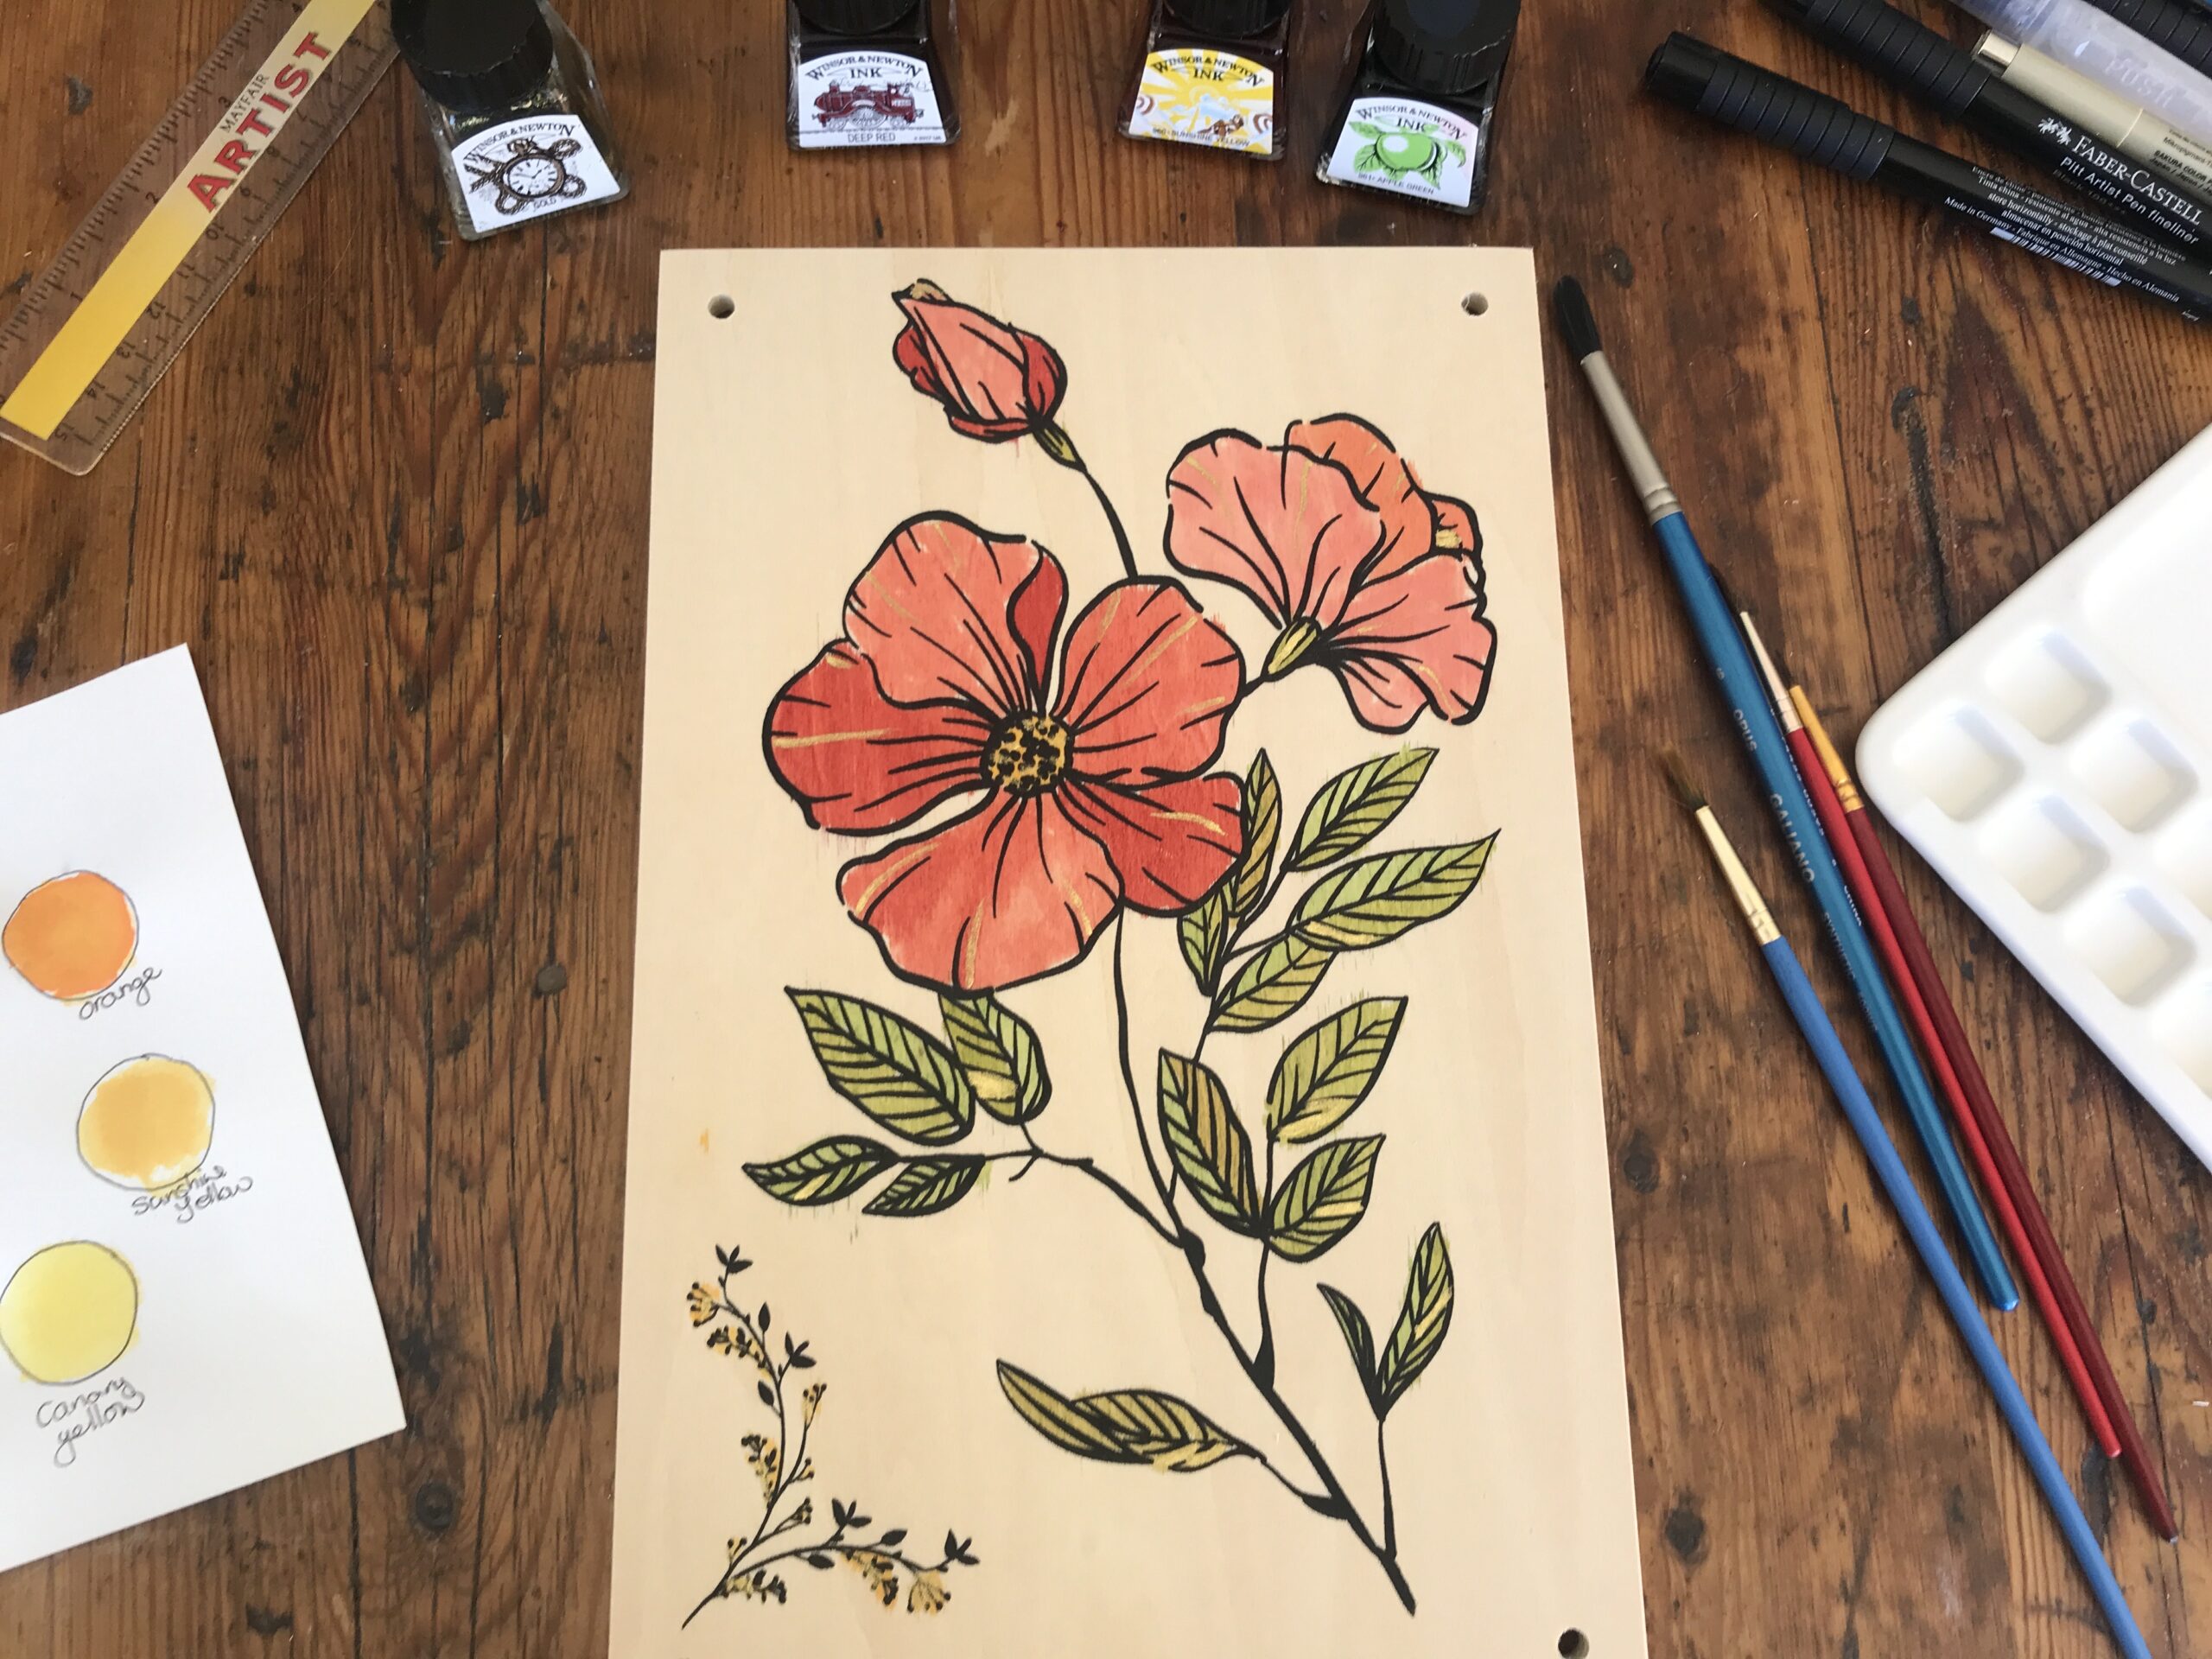
The colored inks I’m using are from Windsor and Newton. I recently got these inks and I’m enjoying learning to work with them.

Green

The apple green is quite bright and needs to be toned down with a little yellow.

Yellow

I chose canary yellow and this is used to mellow the green for the leaves. I also used the yellow for the centre of the flowers.

Red

The red is called deep red. I thin the red down to make it more pink.

Gold

I so often use gold in my artworks that it seemed quite natural to do so here as well. Although I had not thought of doing so until the end.

Process

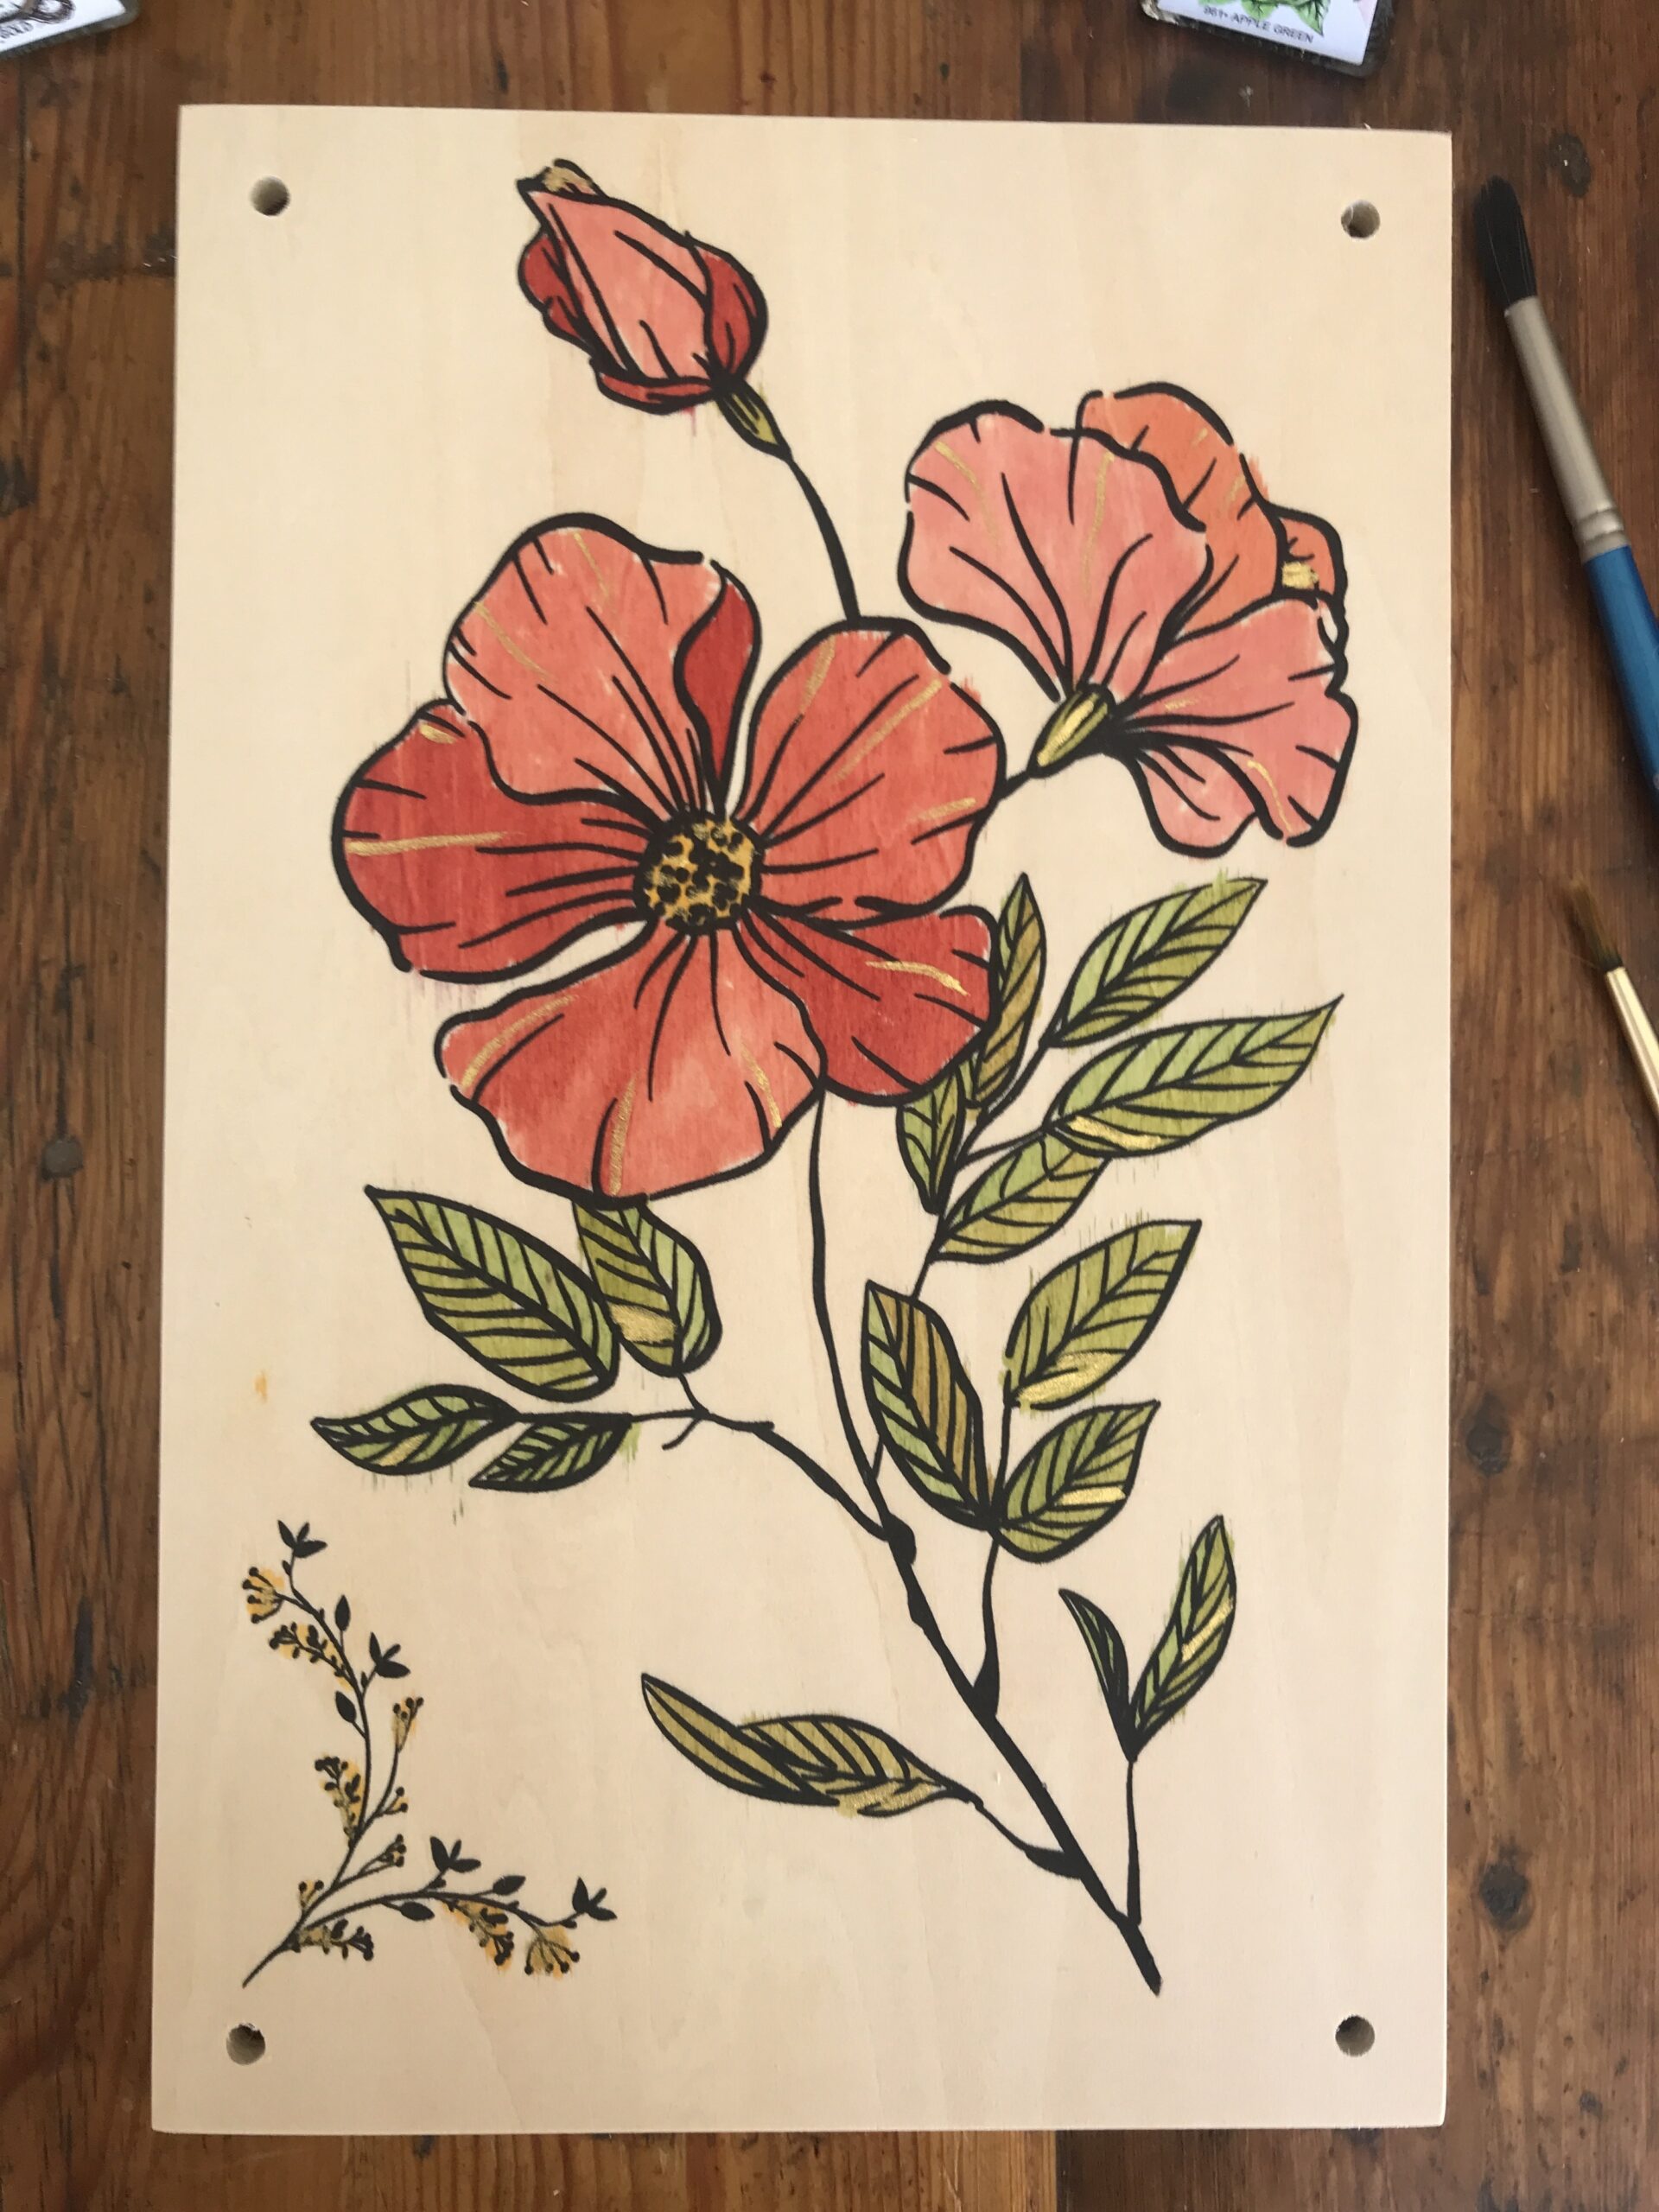
First, I wiped the front panel with a damp kitchen towel to remove and dust or sawdust. Starting with the green I thinned it with water three to one and added a little yellow. This makes an olive green. I painted this on one side of a few leaves.

Next, I mixed more green and yellow and the second mix is slightly different to the first mix. I continue to paint the leaves with a few green and yellow mixes. I painted the center of the flower with yellow.

For the petals I took intense red and watered it down a little differently for each petal to give the flower some depth. Finally, I added a dash of gold ink here and there for highlights.

Heirloom

I let it dry overnight. I may varnish it later. I plan to keep it in the family like a family heirloom and pass it along to my daughters for their pleasure.

Aspiring Artist Activity

When you get your flower press paint the cover as follows:

  • Mix green and yellow ink for the leaves.
  • Mix yellow for the inside of the bloom.
  • Mix a tihn pink for the flower petals.
  • Add a touch of gold to bring your flower press to life.

Share

Share your completed flower press cover with the hashtag #AHAflowerpress so we can all see what you have created.


Alison Hazel

Author Bio: Alison Hazel

Alison Hazel is a hobby artist and she shares her ongoing journey about becoming an artist later in life. She creates simple art that anyone can make. She hopes to inspire you to reach your creative potential in the area that suits you.

Read more about Alison’s story.

Send Alison a quick message.

No Results Found

The page you requested could not be found. Try refining your search, or use the navigation above to locate the post.
error: Content is protected !!